Now that QuestDB Cloud is generally available, you can claim up to $200 of free credits to use towards a QuestDB instance for your own time-series workloads. This tutorial will show you how to get started with your first database instance in QuestDB Cloud!
Registration
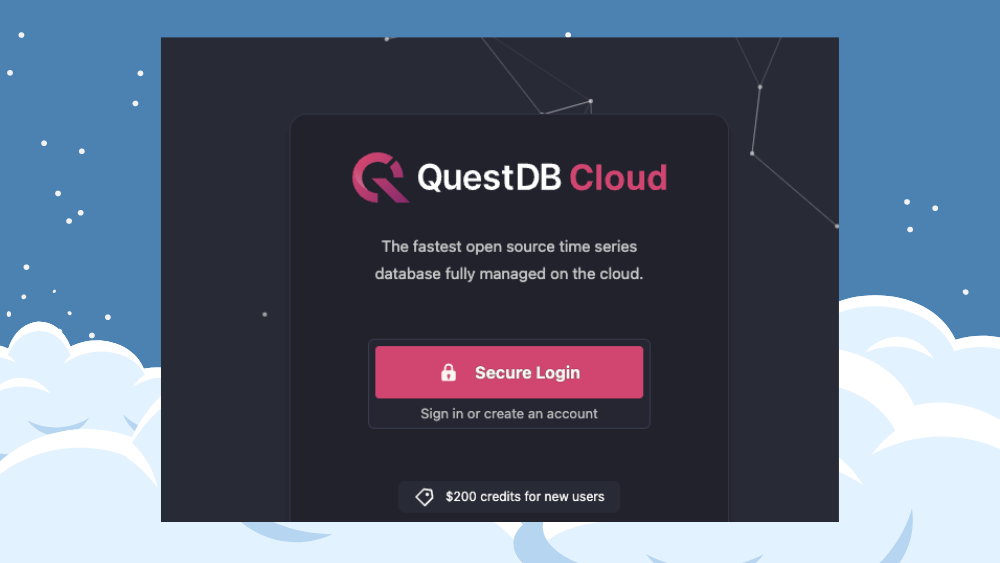
To access our Cloud, you can navigate to https://cloud.questdb.com, where you will be greeted by a welcome page. Click the "Secure Login" button to get started! From here, you can either choose to create an account using your email and password, or use a Google account to log into the Cloud.
Creating your first database
Once you've created an account, you'll be forwarded to the database listing page. This is where all of your active databases will be shown. However, since you need to explicitly create a database, and you just signed up in the previous step, this page should be empty.
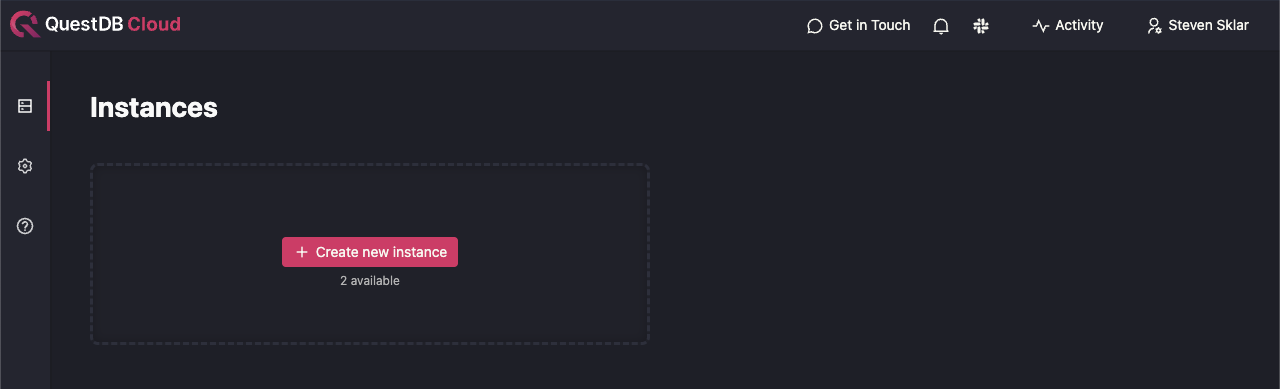
Note that by default, we allow users to create at most 2 databases. If you require additional instances, please reach out to us so we can increase your organization's limit. See the Help and Support section for the various ways to contact us.
Let's click the "Create new instance" button to get started!
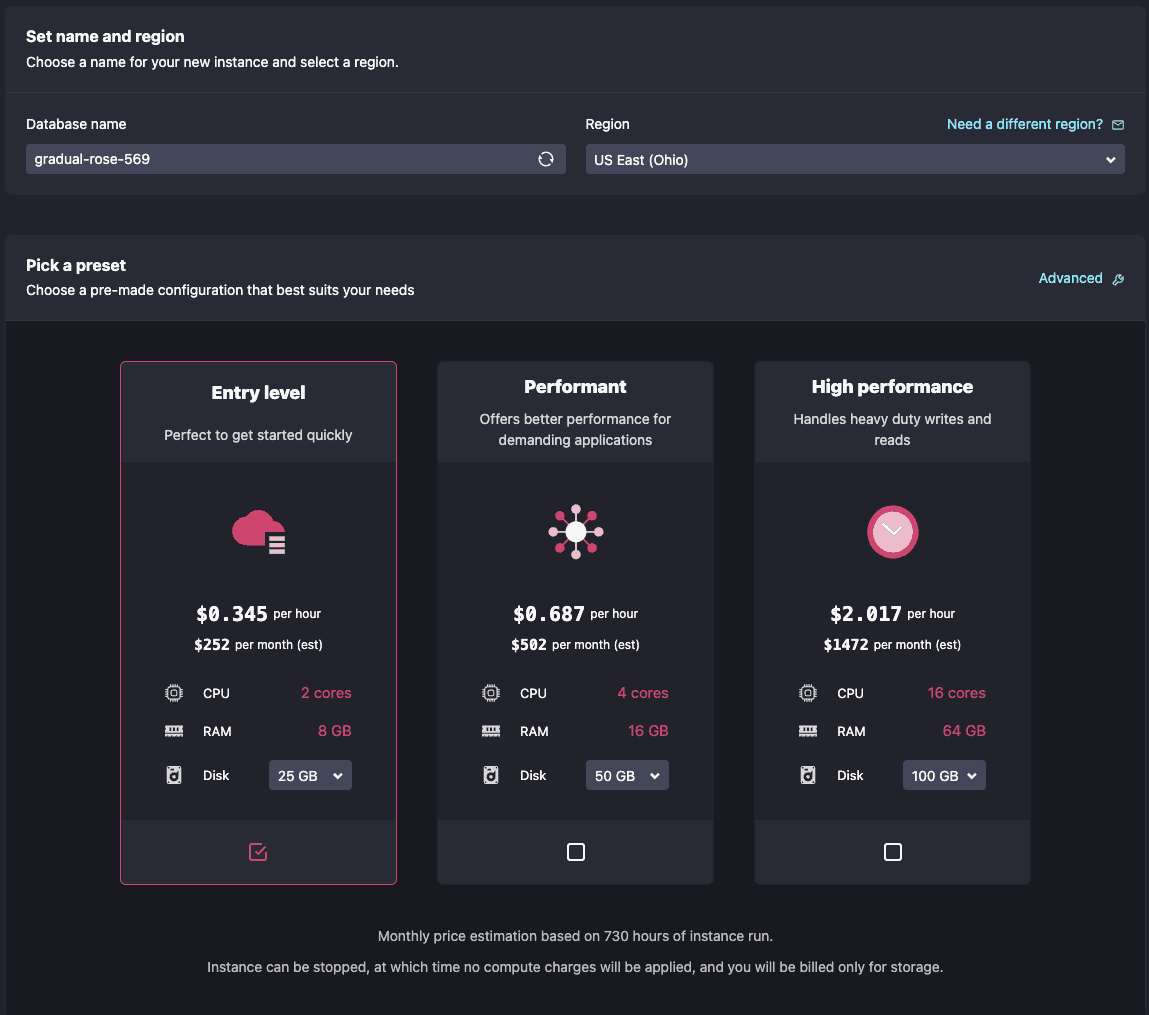
On this page, you can name your new database (or use the default
randomly-generated name like I did) and also choose the region in which you want
to deploy it. As of writing, we support the equivalents of AWS's us-east-2 and
eu-west-1, but please contact us if you need a different region and we'll do
our best to accommodate.
In case you're not sure how you want to spec your database instance, we provide 3 preset configurations for you to get started. These will all launch with the latest available QuestDB version.
Since this is only a tutorial, and we want to keep your costs low to get the most out of your free credits, we can just create an "Entry level" database for demonstration purposes. For more granular control over your database instance's specs, click the "Advanced" button on the top right to tweak parameters like the number of CPUs, amount of RAM, or QuestDB version that you want to run.
The "Entry level" option is already pre-selected for you, let's go ahead and click "Create Instance". You should now be forwarded to the database detail page.
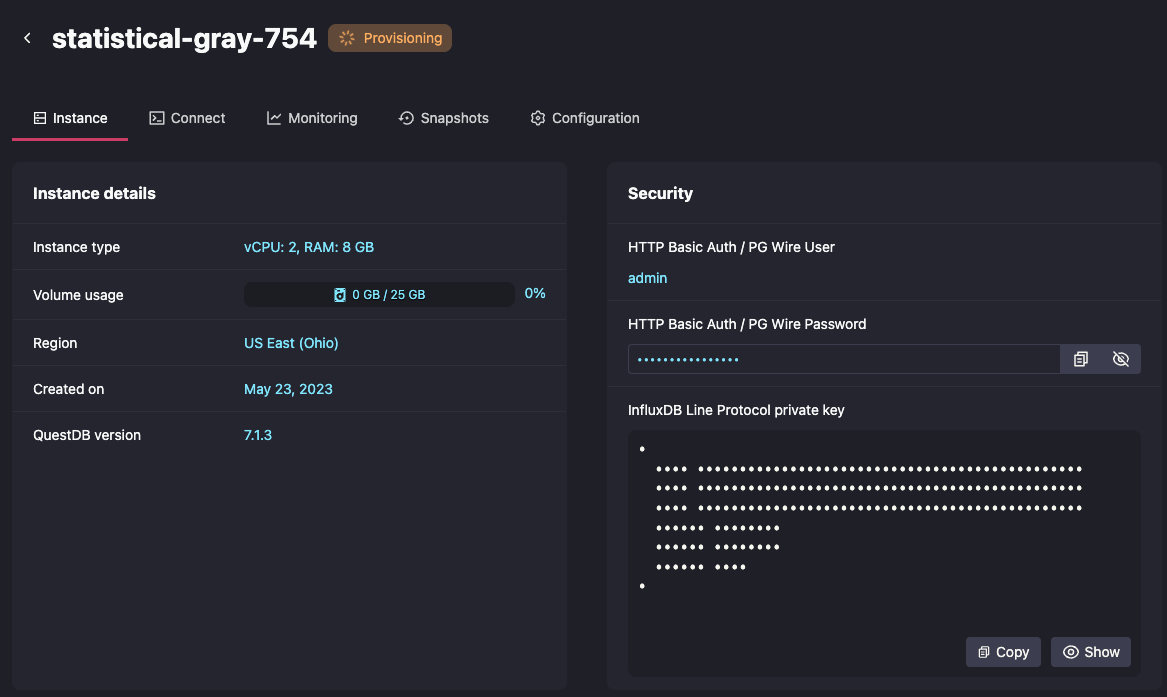
Notice that the database is in a "Provisioning" state. This means that your dedicated instance is being spun up in our infrastructure, and is not immediately available. Let's wait for the instance to be in a running state before continuing, which should take no more than 10 to 15 seconds. There's no need to refresh the page; our app polls the backend at regular intervals to update the database status and connection info.
Connecting to your database
Once your database is ready, you can click the "Connect" tab for instructions on how to connect to it. Since there are several different, and possibly unfamiliar, ways to connect to a QuestDB instance, I'll briefly review each one below (in order of appearance on the page).
Web Console
The Web Console is an integrated web-based frontend that is built into the database itself. It can act as a scratchpad for testing out queries, allow you to visualize table schemas, and even import data directly into the database from a CSV file.
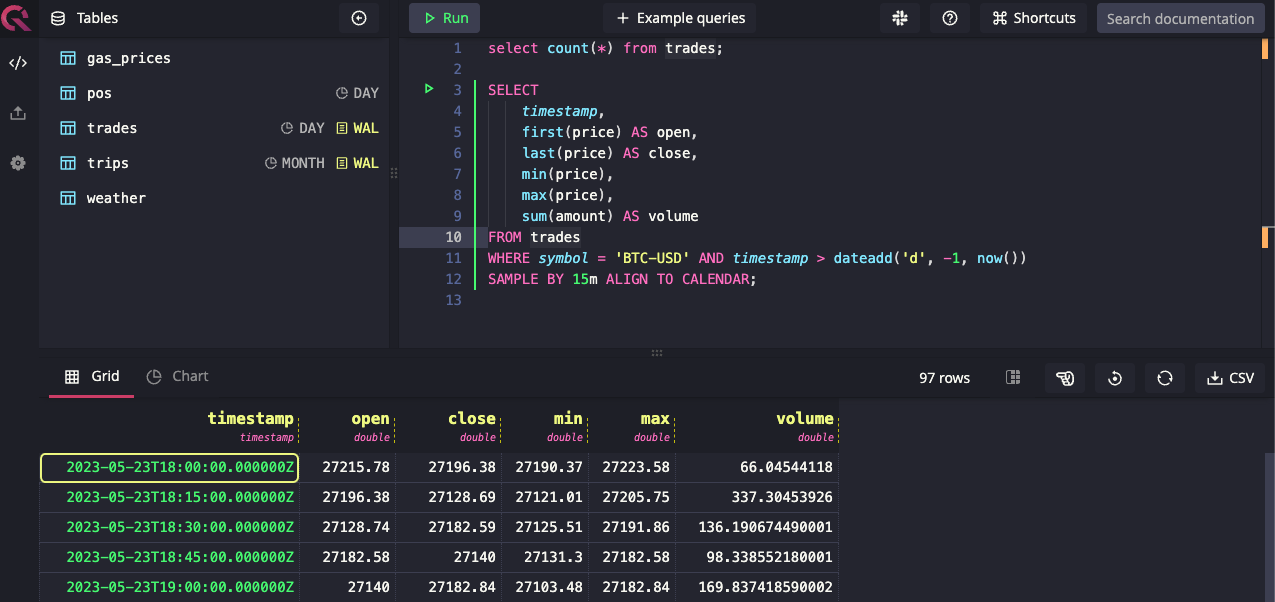
SQL is a first-class citizen here at QuestDB. The Web Console accepts ANSI SQL queries, augmented by our own set of custom SQL extensions that are optimized for time series analysis.
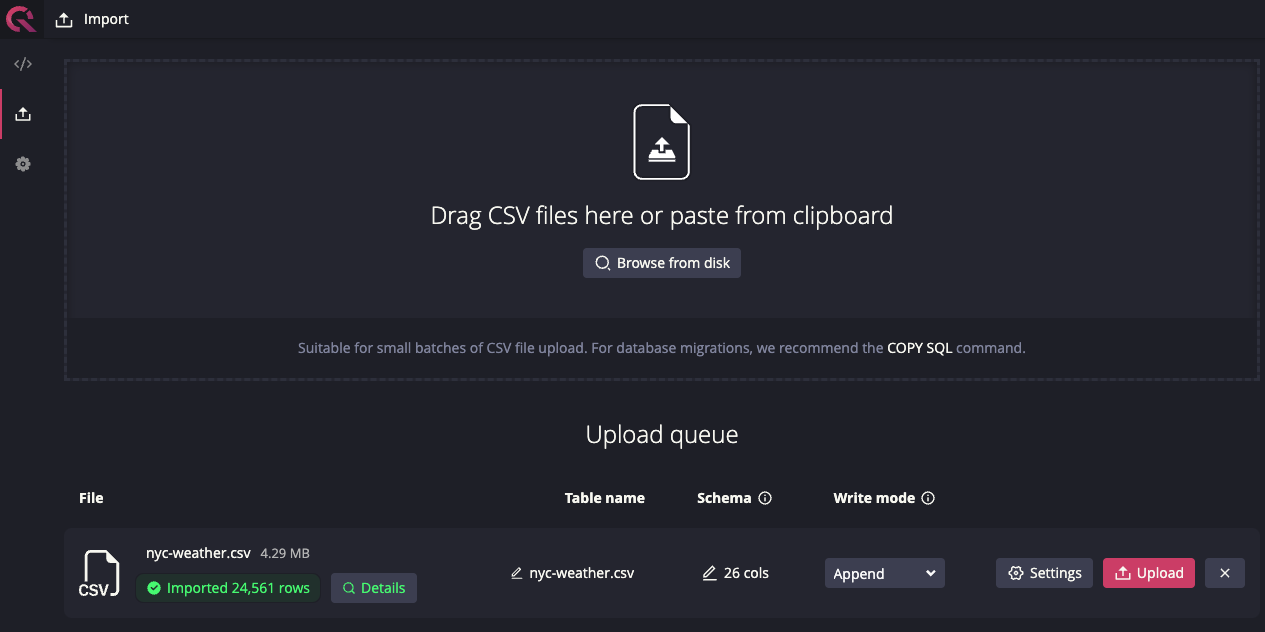
The Web Console also supports data ingestion from a CSV file, with a brand-new CSV import interface released in version 7.1.2. This interface provides several features for you to customize your import, including data overwrite vs append modes and the ability to set your new table's partitioning strategy.
Now that we've covered the web console, let's discuss the next connection type, which will allow you to programmatically ingest data into your database...
InfluxDB Line Protocol
If you're looking to take advantage of the many performance optimizations our team has been working on, then the InfluxDB Line Protocol (ILP) is for you! In fact, it's our most-recommended method for ingesting data into the database.
ILP is a text-based protocol used to write time-series data to a data store. It's a line-delimited protocol that represents data on a datapoint-per-line basis using a simple syntax specification.
But we haven't just implemented the existing protocol; we've also added features to the protocol itself!
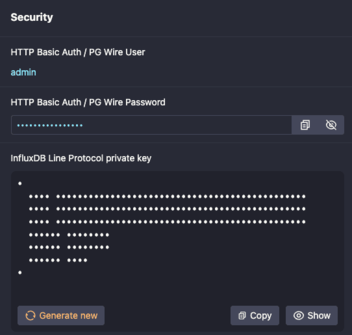
For instance, to secure connections to your database, we've added authentication over TCP using a JWK for ILP connections. This feature is enabled for every cloud database. You can find your instance's JWK private key on the database detail page in the "Security" section.
Now that you have the private key, how do you actually start using ILP? Moving back to the Connections tab, one of my favorite things about the platform is how we automatically generate working code examples, using our own performance-optimized libraries, that will open up a connection to your database and send some sample data points. Here is an example of connecting over ILP using our Golang client.
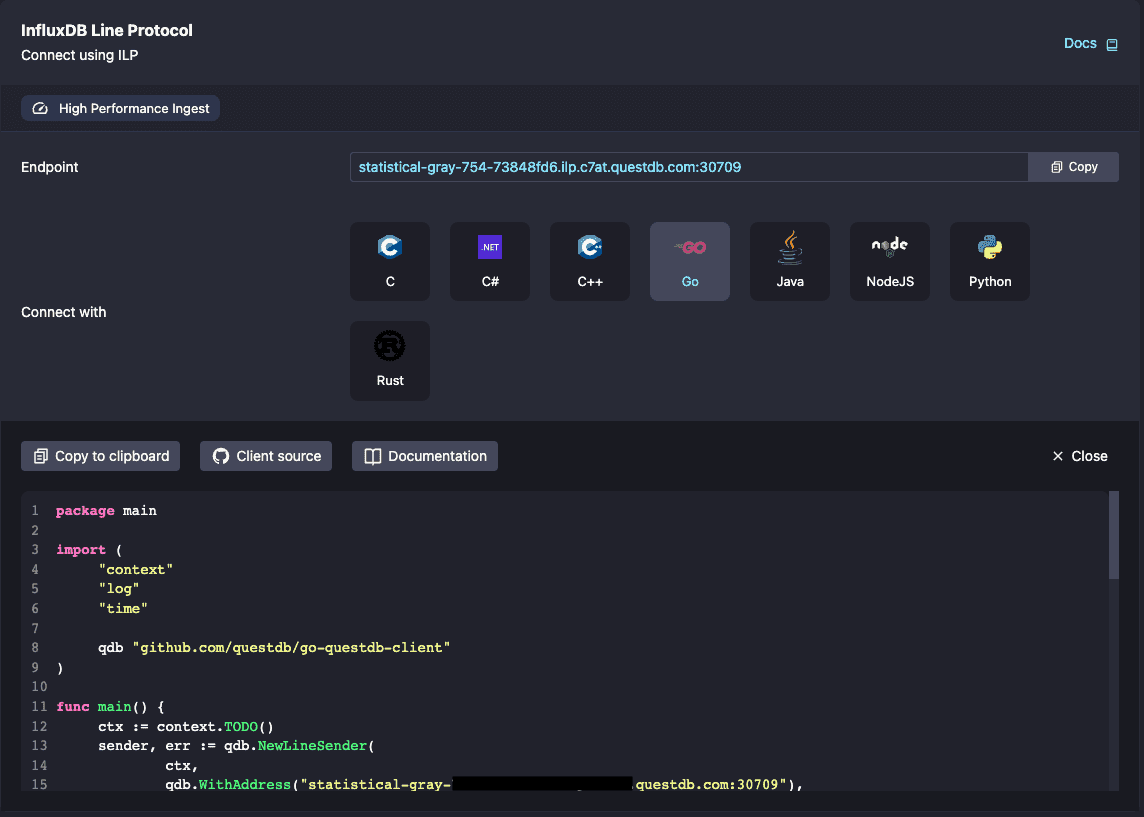
In this code sample (below where the screenshot cuts off), we fill in all of the authentication details for you, based on your connection method of choice. Our provided snippets should work as-is, with no modifications necessary!
Please keep in mind that you will eventually want to store these credentials as environment variables or secrets, instead of hardcoded in your codebase. It's important to keep your database's credentials safe! But this feature still makes it a breeze to connect to your new instance.
Finally, it's important to note that you don't have to create any tables in
QuestDB to start using ILP! Our ILP implementation dynamically generates table
schemas based on the data that QuestDB is receiving over the wire. If a table
does not exist, it is automatically created with a daily
partition strategy by default. If a subsequent line
does not include a field, a NULL is inserted into the table for that record.
And if the database encounters a column that it hasn't seen before in a given
table, the table is modified to add the new column. See the
ILP behavior section in our docs
for more information.
PostgreSQL Wire Protocol
Not only can you run SQL queries in the web console, but you can also connect to the database using a standard PostgreSQL client over the Postgres Wire Protocol, which most PostgreSQL clients and code libraries implement. Using the same connection semantics as you would for a normal PostgreSQL database (host, port, username, password, etc), you can point your client (or library) to your QuestDB's PostgreSQL endpoint and execute DML and DDL queries against the database. Just make sure that your client supports SSL, since it is used for all endpoints in our platform.
Just as we do for ILP, we also have a set of working code examples using common programming languages and their standard PostgreSQL libraries. These code examples use your database's actual endpoint and credentials, so they should require absolutely no modification to work. Your PostgreSQL username and password can also be found in the "Security" section on the database detail page.
I suggest using the PostgreSQL Wire Protocol if data ingestion speed is not your primary concern, or you require transactional support, which is not included in ILP. On the client side, ILP can be trickier than PostgreSQL to implement, which could also increase your application development time. So if you want to get started quickly by ingesting data into your database, PostgreSQL might be the right protocol for you. Finally, since ILP is a write-only interface, PostgreSQL is the only way to get data out of QuestDB.
HTTP REST API
If you don't have access to a SQL client, you can also execute SQL commands against the database's REST API. This is the same API that powers the Web Console, so any query that you run there will also be valid using the API.
The REST API uses HTTP basic authentication, and the credentials are the same as they are for PostgreSQL connections above. Here's a sample query to demonstrate how easy it is to get started:
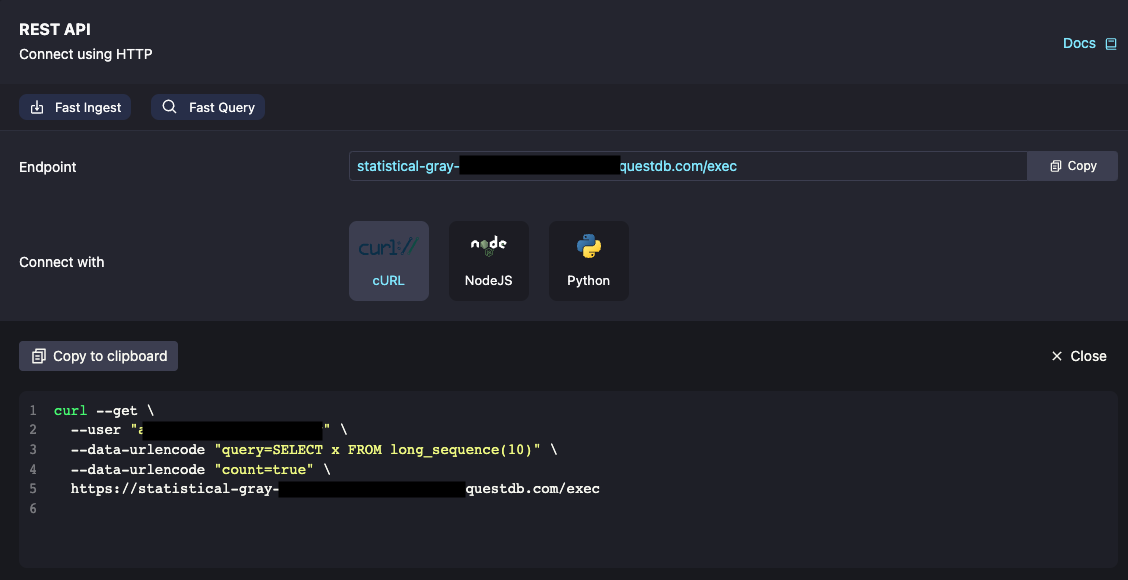
If you're working in a controlled environment that doesn't have access to a PostgreSQL driver or client, but need to programmatically query data from your database, our REST API endpoints are perfect for you.
Additional Features
In addition to the connectivity information, we also provide other features for our customers to use! I'll talk about each one briefly, leaving the in-depth details for further tutorials.
Monitoring
If you click the "Monitoring" tab, you will see time-series data for a few key metrics: CPU usage, disk usage, and memory usage for your instance.

Here's a fun fact: these metrics are actually served by a QuestDB instance running in our cluster! Check out our article on how we accomplished this in our Kubernetes-based infrastructure.
We also stream database logs to the monitoring page. These can be filtered by date and hour, as well as copied to the clipboard for your convenience.
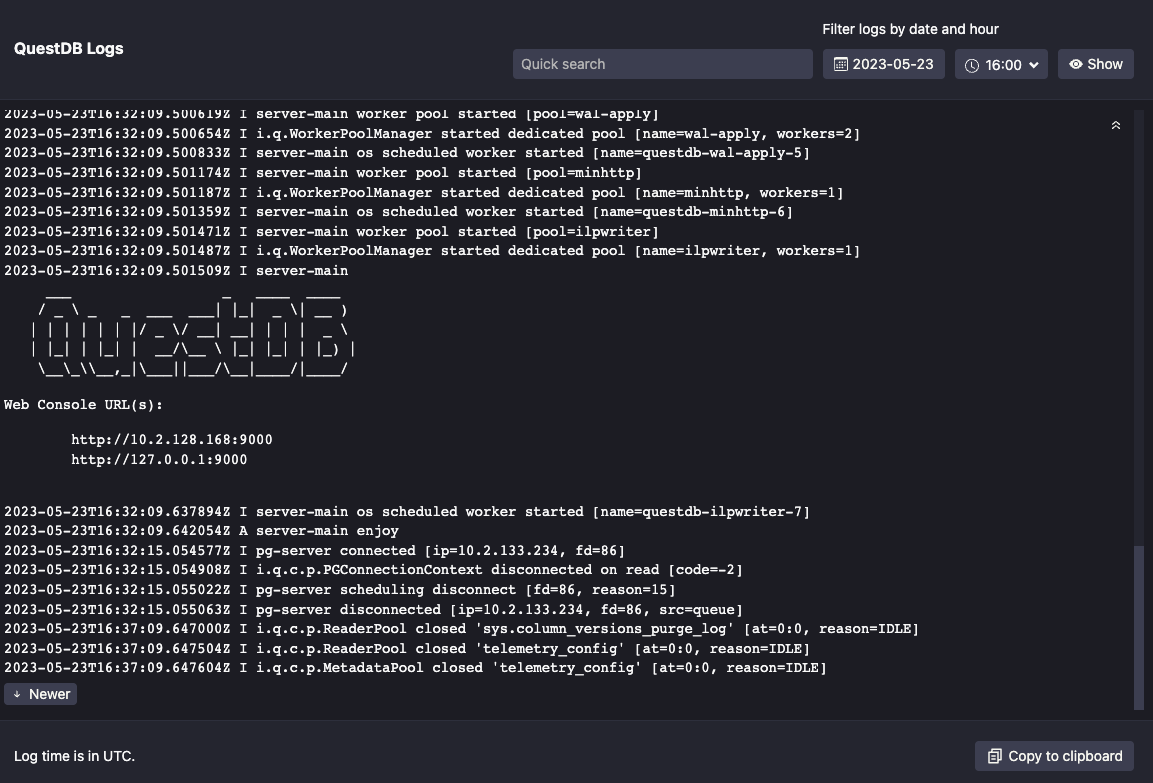
Note: All times for metrics and logs are in UTC.
Snapshots
On the "Snapshots" tab, you have the option to create a new daily snapshot schedule or a one-off snapshot of your database.
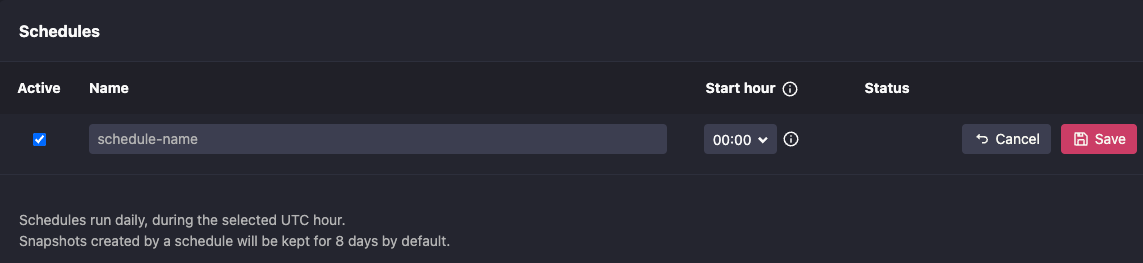
Snapshots can be restored either into a new database (if you have the spare capacity for another one), or restored into the existing instance from which it was taken, assuming that it is still running. It's also important to note that when restoring a snapshot into the same instance, all data starting from after the point at which the snapshot was taken will be destroyed.
Project ideas
Now that you can connect to your database, and are familiar with some of the basic QuestDB Cloud features, you're all set to go on your next time-series data adventure! Here are some neat project ideas that we've previously featured on our website:
- Time-Series Data Visualization with Apache Superset and QuestDB
- Ingesting Financial Tick Data Using a Time-Series Database
- Crypto Data Visualization Dashboards with Grafana
- Time-Series Monitoring Dashboard with Grafana and QuestDB
Cleaning up
QuestDB Cloud bills based on usage, so we recommend spinning down databases to avoid paying for unused resources.
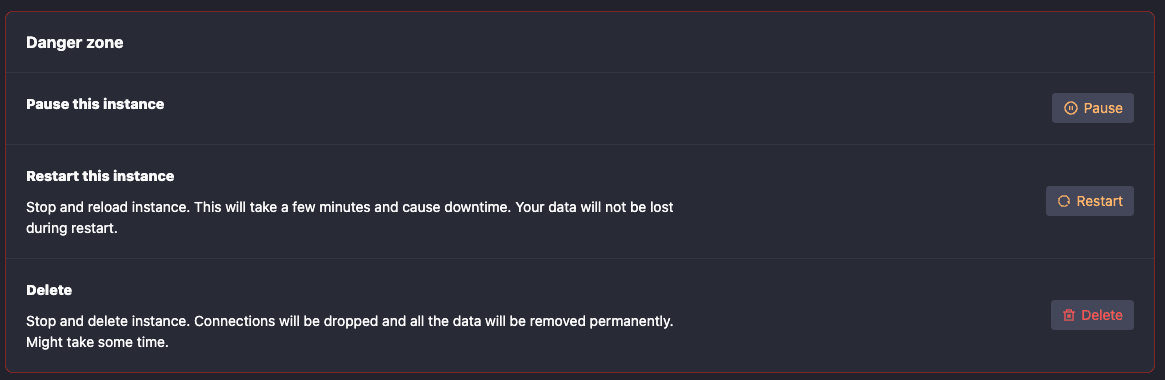
As you can see in the "Danger Zone" on our database detail page (cue the Top Gun music...), you have the option to either Pause or Delete your instance.
Pausing your instance
When you pause your instance, we spin down your database's computing and networking resources but leave your data's volume intact. The instance will no longer be running and you will not be able to connect to it, but your data will still be safely persisted on disk. You can always re-access your data by starting the database back up again.
Keep in mind, if you choose this option, you will still be paying for the cost of data storage.
Deleting your instance
If you delete your database, all resources (except for snapshots) are permanently deleted. This includes the volume that is housing your data. Once a database is deleted, there will be no additional cost to you.
Help and support
In the menu bar at the top of the page, we have two options for you to contact us.
Any messages sent through our "Get in Touch" popup go directly to a dedicated in-house Slack channel, where we are actively monitoring for any issues that you may encounter.

We also have a link to our public Slack in the menu bar. Here, you can get help from the community, as well as QuestDB employees who are usually hanging out there.
Take Advantage of our $200 Credit
If you'd like to spin up your own QuestDB Cloud instance, we are currently offering a $200 credit for new customers who want to try out the service! You can visit our Cloud page and sign up to receive your credit!
Here at QuestDB, we're proud of what we've built for you. If you have feedback, comments, suggestions, or just want to say hi, feel free to reach out to us! We love talking about all things QuestDB and time-series data.