Fast IoT Stack with QuestDB, MQTT, and Telegraf
This tutorial is written by one of our community contributors, Shan Desai. Shan is a Software Engineer at Emerson Discrete Automation. His work involves using IoT devices / IIoT Devices and Edge Computing Solutions. You can find more details on Shan's personal website.
Thanks a lot for your contribution, Shan!
Overview
QuestDB is the fastest open-source time-series database out there in terms of performance.
The QuestDB team was kind enough to welcome me into their community and I wanted to make things easier for people trying things out with QuestDB.
Lo! and behold Questitto an out-of-the-box repository for your initial IoT Applications. The repository is an altered version for my repository tiguitto which helps users deploy the highly used TIG+Mosquitto (Telegraf, InfluxDB, Grafana) + Mosquitto MQTT Broker stack in no time.
Motivation
I am really looking forward to use some SQL queries with
time-series database and QuestDB provides
such functionalities as well as some cool new features of
Dynamic Timestamping.
Not to mention, my staple InfluxDB's line Protocol is supported via sockets too!
Stack
questitto currently comes with basic user authentication support for Mosquitto
MQTT broker. The broker allows only specific users to publish / subscribe data
hence reducing misuse. Telegraf writes the incoming data via subscribing to the
MQTT Broker and pushes the data to QuestDB.
In order to make it easy to deploy, the stack is deployable via docker and
configuration is made simple via usage of text files (MQTT broker's users) and
an Environment File (for Telegraf)
Setup
Clone the repository:
git clone https://github.com/shantanoo-desai/questitto.git && cd questitto/
Your Directory structure should look like:
├── docker-compose.yml├── LICENSE├── mosquitto│ ├── config│ │ ├── mosquitto.conf│ │ └── passwd│ └── data├── questitto.env├── README.md└── telegraf└── telegraf.conf
Some brief information on the files:
mosquitto/config/passwd: file that has the usernames and passwords necessary for publishing/subscribing to the MQTT brokerquestitto.env: environment variable file used bytelegrafcontainer to subscribe to the MQTT Broker for data ingestiontelegraf/telegraf.conf: TOML Configuration file for lettingtelegrafdo the heavy lifting and inserting the data into QuestDB
User Management for Mosquitto MQTT Broker
In the repository there are two users added by default (see
mosquitto/config/passwd file):
pubclient:questitto
subclient:questitto
You can use the pubclient credential on your IoT Devices / MQTT Client to
publish information to the Broker. Similarly, subclient credential will be
used by telegraf or any other user of the stack in order to subscribe to the
incoming data. Feel free to change the passwords for the usernames or add more
credentials according to your needs. The format for the credential entries is as
follows (in plain text):
username1:password1
username2:password2
The mosquitto broker requires the the credentials to be encrypted and hence you bring the stack up with encrypting the passwords, the broker container will fail to start
Let's encrypt the passwords using the following command:
# assuming your current directory is questittodocker run -it --rm -v $(pwd)/mosquitto/config:/mosquitto/config eclipse-mosquitto mosquitto_passwd -U /mosquitto/config/passwd
The command does not return anything hence, after executing the command check
the mosquitto/config/passwd file using:
cat mosquitto/config/passwd
Input Data Format + MQTT Topic Design
For IoT Applications, let the higher components in the stack do the heavy-lifting i.e.
telegrafandmosquittoand keep the payload and topics very simple
As an example the MQTT Topics are selected as follows:
IOT/<SensorID>/<measurement_name>
if your IoT sensor publishes temperature data then you can publish it to a topic:
IOT/sensor1/temp
with the payload in InfluxDB line protocol string:
environment,type=BME280 temp=23.9
We then let telegraf translate the location of sensor1 for us using the
processors plugin and the MQTT topic itself.
Telegraf Configuration
telegraf subscribes to the MQTT Broker using the subclient credential
mentioned above.
Note: if you change the user credentials, make sure to encrypt the password
and change the questitto.env file with the actual credentials for telegraf.
Let's look at how telegraf can add our sensor's location for us.
We use the inputs.mqtt_consumer plugin to connect to our broker and subscribe
to it via the credentials in the .env file:
[[inputs.mqtt_consumer]]servers = [ "tcp://mosquitto:1883" ]# Topics to subscribe to:topics = ["IOT/+/acc","IOT/+/mag","IOT/+/gyro","IOT/+/temp"]# Telegraf will also store the topic as a tag with name `topic`# NOTE: necessary for the Processor REGEX to extract <Sensor_ID>topic_tag = "topic"username = "${TG_MOSQUITTO_USERNAME}"password = "${TG_MOSQUITTO_PASSWORD}"# Connection timeoutconnection_timeout = "30s"# Incoming MQTT Payload from Sensor nodes is in InfluxDB line protocol stringsdata_format = "influx"
we store the MQTT topic as a tag called topic and now leverage it for some
Regular Expression and Enumeration Magic as follows:
[[processors.regex]]order = 1[[processors.regex.tags]]# use the `topic` tag to extract information from the MQTT Topickey = "topic"# Topic: IOT/<SENSOR_ID>/<measurement># Extract <SENSOR_ID>pattern = ".*/(.*)/.*"# Replace the first occurrencereplacement = "${1}"# Store it in tag called:result_key = "sensorID"[[processors.enum]]order = 2[[processors.enum.mapping]]# create a mapping between extracted sensorID and some meta-datatag = "sensorID"dest = "location"[processors.enum.mapping.value_mappings]"sensor1" = "kitchen""sensor2" = "livingroom"
Based on our MQTT Topic design we know that the SensorID will be on the second
level i.e. IOT/(.*)/#.
We perform the Regular Expression to extract the sensor's ID and use enum to
map it to its dedicated location:
sensor1 --> kitchen
sensor2 --> livingroom
The location will be stored as a tag called location.
Data Insertion to QuestDB
[[outputs.socket_writer]]address = "tcp://questdb:9009"
will send the line protocol String to port 9009 of the questdb container and
you don't even need to define a schema beforehand!
Visualize It!
QuestDB comes with its own cool UI available on http://<IP_address>:9000
Example
Get the Stack up:
docker-compose up -d
As a simple Example I used MQTTX Desktop Client by emqx as a client to publish information in line Protocol to the following Topic:
{"topic": "IOT/sensor1/acc","payload": ["accleration,type=BNO055 x=2.3,y=3.2,z=0.01","accleration,type=BNO055 x=2.3,y=3.2,z=0.01","accleration,type=BNO055 x=2.3,y=3.2,z=0.02"]}
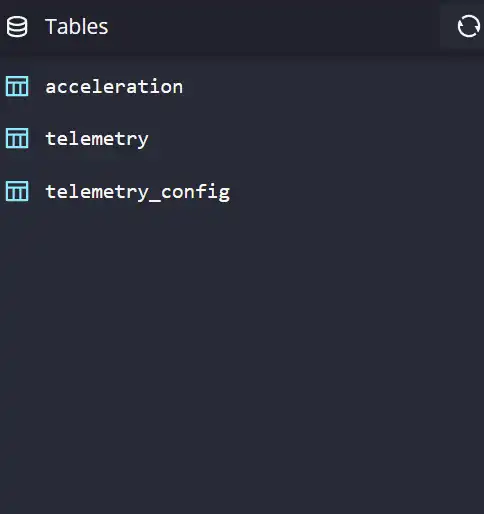
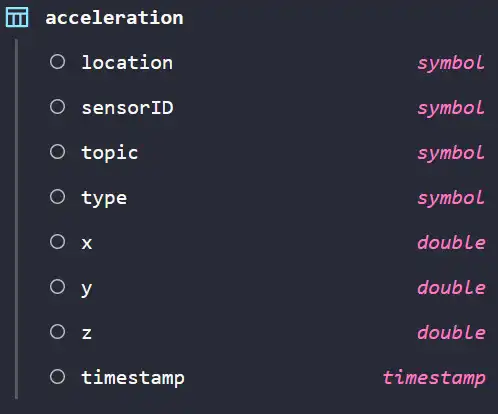
with the pubclient:questitto credentials and on the QuestDB UI you can see:

With the location and other tags from the line protocol inserted:

A simple query where I would like to know the acceleration value in the
kitchen for the X-axis is as simple as:
SELECT timestamp, x FROM accelerationWHERE location = 'kitchen';
Nuggets
If you need to add/remove or adapt the Users or the telegraf.conf without
bringing down the stack or the services within questitto simply use the
SIGHUP signal for the containers.
docker kill --signal=SIGHUP mosquitto# ORdocker kill --signal=SIGHUP telegraf
See my blog post for more details on this configuration.
Repository
You can find the repository on GitHub. Please feel free to open Issues/PRs and join our community forums, the developers are really helpful there!