Automating ETL jobs on time series data with QuestDB on Google Cloud Platform
This submission comes from one of our community contributors Gábor Boros who has put together another excellent tutorial showing how to use cloud functions together with QuestDB to build a custom ETL job that runs on time series data. The corresponding repository for this tutorial with code examples is available to browse on GitHub.
Thanks for another great contribution, Gábor!
Introduction
In the world of big data, software developers and data analysts often have to write scripts or complex software collections to process data before sending it to a data store for further analysis. This process is commonly called ETL, which stands for Extract, Transform and Load.
What are ETL jobs for?
Let's consider the following example: a medium-sized webshop with a few thousand orders per day exports order information hourly. After a while, we would like to visualize purchase trends, and we might want to share the results between departments or even publicly. Since the exported data contains personally identifiable information (PII), we should anonymize it before using or exposing it to the public.
For the example above, we can use an ETL job to extract the incoming data, remove any PII and load the transformed data into a database used as the data visualization backend later.
Prerequisites
During this tutorial, we will use Python to write the cloud functions, so basic python knowledge is essential. Aside from these skills, you will need the following resources:
- A Google Cloud Platform (GCP) account and a GCP Project.
- Enable the Cloud Build API - when enabling APIs ensure that the correct GCP project is selected.
Creating an ETL job
As an intermediate data store where the webshop exports the data, we will use Google Storage and use Google Cloud Functions to transform it before loading it into QuestDB.

We won't be building a webshop or a data exporter for an existing webshop, but we will use a script to simulate the export to Google Storage. In the following sections, we will set up the necessary components on GCP. Ensure the required APIs mentioned in the prerequisites are enabled, and that you have selected the GCP project in which you would like to create the tutorial resources.
Create a Compute Engine instance for QuestDB
First things first, we start with installing QuestDB on a virtual machine. To get started, navigate to the Compute Engine console. Visiting this page for the first time will take a few moments to initialize. After the loading indicator has gone, start a new virtual machine:
- Click on create and give the instance the name
questdb-vm - Select a region that's geographically close to you
- Select the first generation "N1" series
- Choose the
f1-micromachine type - in a production environment you would choose a more performant instance, but this is sufficient for example purposes - In the "Container" section, check "Deploy a container image to this VM
instance", and enter
questdb/questdb:latest - In the "Firewall" section, click on "Management, security, disks, networking, sole tenancy"
- In the new panel, select "Networking" and add
questdbas a "Network tag" - Leave all other settings with their defaults, and click on "create"
Make sure you note the "External IP" of the instance as we will need that later.
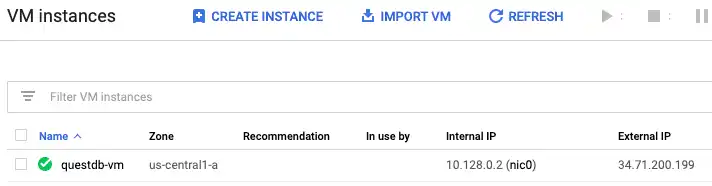
After a short time, the new instance will be up and running. As soon as the instance is provisioned, we can initiate a remote session to install QuestDB by clicking ssh in the VM panel.
Allow networking on the instance
If we try to open the Web Console by opening the
http://<EXTERNAL_IP>:9000 (where <EXTERNAL_IP> is the external IP of your
virtual machine) it won't load and we will face a timeout. The reason behind
this is that the firewall is not opened for port 9000 yet.
To allow port 9000 used by QuestDB, we must allow the port by adding a new
firewall rule on the
firewall console:
- Click on "create firewall rule" at the top of the page
- Give the rule the name "QuestDBPorts"
- In the "Target tags" field, write the same tag used for instance creation
(
questdb) - For the "Source IP ranges" field, set
0.0.0.0/0 - In the "Protocols and ports" section, select tcp and set port to
9000,8812 - Click on "create"
Some seconds later, the rule will be applied on every instance with the matching
questdb tag and port 9000 will be open. You may ask what port 8812 is for;
this port will be used by the Cloud Function later to connect to the database.
If you try to open the interactive console again, you should see the QuestDB Web Console and start writing queries. As our first query, create the table in which the Cloud Function will write the anonymized data. To create the table run the following SQL statement:
CREATE TABLEpurchases(buyer STRING,item_id INT,quantity INT,price INT,purchase_date TIMESTAMP)timestamp(purchase_date);
The query above uses timestamp(purchase_date) to set a designated timestamp on
the table so we can easily perform time series analysis in QuestDB. For more
information on designated timestamps, see the official
QuestDB documentation for timestamp.
Create a Storage bucket
Now, we create the bucket where we will store the simulated webshop data. Storage buckets are in a single global namespace in GCP, which means that the bucket's name must be unique across all GCP customers. You can read more about Storage and buckets on Google's documentation site.
To create a new bucket:
- Navigate to the cloud storage console
- Select your project if not selected yet
- Click on "create bucket" and choose a unique name
- Select the same region as the instance above
- Leave other settings on default and click on "continue" to create the bucket
If you successfully created the bucket, it should show up in the storage browser as you can see below.
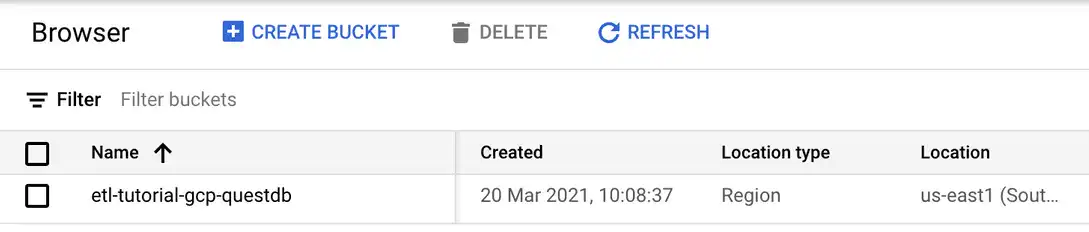
At this point, we don't set any permissions, ACLs, or visibility settings on the bucket, but we will come back to that later.
Create a Cloud Function
We have the bucket to upload the data, but we have nothing to process the data yet, and for this, we will use Cloud Functions to remove the PII.
Cloud Functions are functions as a service (FaaS) solution within GCP, similar to AWS Lambda. The functions are triggered by an event that can come from various sources. Our scenario Cloud Functions are convenient since we don't need to pay for a server to run all day, which is mostly idle; the function will be executed when the trigger event is fired, and we only pay for the execution time the number of function calls.
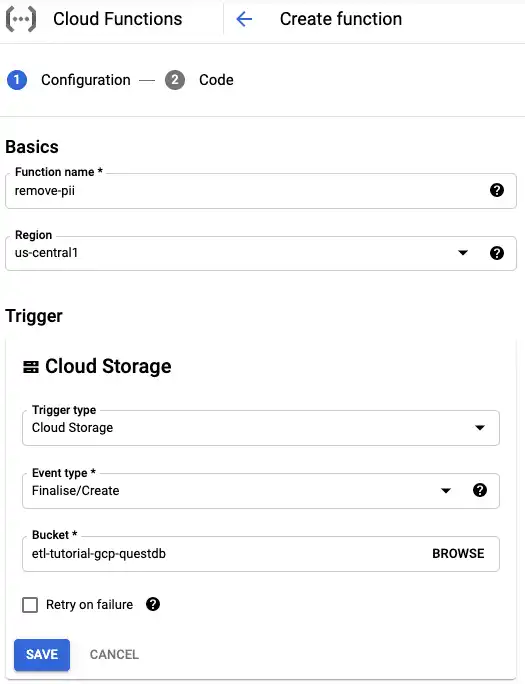
To create a Cloud Function:
- Navigate to cloud functions console
- Click on "create function" and give it the name
remove-pii - Select the region we are using for other resources
- For "Trigger" select "Cloud Storage" from the dropdown list
- Set the event type to "Finalise/Create"
- Choose the bucket created above and click "variables, networking, and advanced settings"
- Select "environment variables" on the tabbed panel
- Click on "add variable" right below the "Runtime environment variables" section
- Add a new variable called
DATABASE_URLwith the valuepostgresql://admin:quest@<EXTERNAL_IP>:8812/qdb, where<EXTERNAL_IP>is the external IP of your virtual machine - Click "save" then "next"
The next step is to select the runtime our function will use and provide the code. On this page, we can choose between numerous runtimes, including multiple versions of Python, Node.js, Go, Ruby, and even Java.
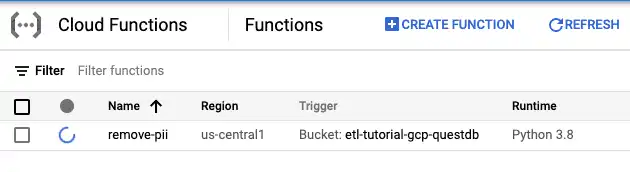
Since this tutorial uses Python, select Python 3.8 as it is the latest non-beta version at the time of writing. Leave the rest of the settings as default, and write the function in the next section. Click "deploy" at the bottom of the page. Some seconds later, you will see that the deployment of the function is in progress.
Generating and processing data
Before moving on, here's a quick recap on what we did so far:
- Set up a new Google Storage bucket
- Created the Cloud Function which will process the data later on
- Connected the bucket with the function to trigger on a new object is created on the bucket
Now for the fun part of the tutorial: writing the data processing script and loading the data in the database. Let's write the function to remove PII, but first, talk a bit about the data's structure.
Inspecting the data
ETL jobs, by their nature, heavily depend on the structure of incoming data. A job may process multiple data sources, and data structure can vary per source. The data structure we will use is simple, we have a CSV file with the following columns:
- customer email address
- purchase date
- item ID for the purchased item
- quantity
- the price per item
As you see, there is no currency column since we will assume every price is in one currency. To generate random data, you can use the provided script written for this tutorial.
Writing cloud functions
By now, we have everything to write the data transformer function and test how well the PII removal performs. We will work in the "inline editor" of the cloud function, so as a first step, open the edit the cloud function created above by navigating to the cloud functions console and clicking on the function's name. That will open the details of the function. At the top, click on "edit", then at the bottom, click on "next" to open the editor.
Let's start with the requirements. On the left-hand side, click on the
requirements.txt and paste the following:
google-cloud-storage==1.36.2psycopg2==2.8.6sqlalchemy==1.4.2
Here we add the required packages to connect to Google Storage and QuestDB.
Next, click on main.py, remove its whole content and start adding the
following:
import csvimport hashlibimport jsonimport loggingimport osfrom dataclasses import dataclassfrom datetime import datetimefrom typing import Listfrom google.cloud import storagefrom sqlalchemy.sql import textfrom sqlalchemy.engine import Connection, create_enginelogger = logging.getLogger(__name__)# Create a database engineengine = create_engine(os.getenv("DATABASE_URL"))
As you may expect, we start with the imports, but we added two extra lines: one for the logger and one for configuring the database engine. We will need the logger to log warnings and exceptions during the execution, while we will use the engine later to insert anonymized data into the database.
To make our job easier, we are going to add a data class, called Record. This
data class will be used to store the parsed and anonymized CSV data for a line
of the uploaded file.
# ...@dataclassclass Record:buyer: stritem_id: intquantity: intprice: intpurchase_date: datetime# ...
As we discussed, ETL jobs are validating the data that they receive as input. In our case, we will trigger the function if an object is created on the storage. This means any object, like a CSV, PDF, TXT, PNG file, or even a directory, is created, though we only want to execute CSV files' transformation. To validate the incoming data, we write two simple validator functions:
# ...def is_event_valid(event: dict) -> bool:"""Validate that the event has all the necessary attributes required for theexecution."""attributes = event.keys()required_parameters = ["bucket", "contentType", "name", "size"]return all(parameter in attributes for parameter in required_parameters)def is_object_valid(event: dict) -> bool:"""Validate that the finalized/created object is a CSV file and its size isgreater than zero."""has_content = int(event["size"]) > 0is_csv = event["contentType"] == "text/csv"return has_content and is_csv# ...
The first function will validate that event has all the necessary parameters, while the second function checks that the object created and triggered the event is a CSV and has any content. The next function we create is used to get an object from the storage which, in our case, the file triggered the event:
# ...def get_content(bucket: storage.Bucket, file_path: str) -> str:"""Get the blob from the bucket and return its content as a string."""blob = bucket.get_blob(file_path)return blob.download_as_string().decode("utf-8")# ...
Anonymizing the data, in this scenario, is relatively easy, though we need to ensure we can build statistics and visualizations later based on this data, so the anonymized parts should be consistent for a user. To achieve this, we will hash the buyer's email address, so nobody may track it back to the person owning the email, but we can use it for visualization:
# ...def anonymize_pii(row: List[str]) -> Record:"""Unpack and anonymize data."""email, item_id, quantity, price, purchase_date = row# Anonymize email addresshashed_email = hashlib.sha1(email.encode()).hexdigest()return Record(buyer=hashed_email,item_id=int(item_id),quantity=int(quantity),price=int(price),purchase_date=purchase_date,)# ...
So far, we have functions to validate the data, get the file's content which triggered the Cloud Function, and anonymize the data. The next thing we need to be able to do is to load the data into our database. Up to this point, every function we have wrote was simple, and this one is no exception:
# ...def write_to_db(conn: Connection, record: Record):"""Write the records into the database."""query = """INSERT INTO purchases(buyer, item_id, quantity, price, purchase_date)VALUES(:buyer, :item_id, :quantity, :price, to_timestamp(:purchase_date, 'yyyy-MM-ddTHH:mm:ss'));"""try:conn.execute(text(query), **record.__dict__)except Exception as exc:# If an error occures, log the exception and continuelogger.exception("cannot write record", exc_info=exc)# ...
As you see, writing to the database is easy. We get the connection and the record we need to write into the database, prepare the query and execute it. In case of an exception, we don't want to block the whole processing, so we catch the exception, log it and let the script go on. If an exception occurred, we can check it later and fix the script or load the data manually.
The last bit is the glue code, which brings together these functions. Let's have a look at that:
# ...def entrypoint(event: dict, context):"""Triggered by a creation on a Cloud Storage bucket."""# Check if the event has all the necessary parameters. In case any of the# required parameters are missing, return early not to waste execution time.if not is_event_valid(event):logger.error("invalid event: %s", json.dumps(event))returnfile_path = event["name"]# Check if the created object is valid or not. In case the object is invalid# return early not to waste execution time.if not is_object_valid(event):logger.warning("invalid object: %s", file_path)returnstorage_client = storage.Client()bucket = storage_client.get_bucket(event["bucket"])data = get_content(bucket, file_path)reader = csv.reader(data.splitlines())# Anonymize PII and filter out invalid recordsrecords: List[Record] = filter(lambda r: r, [anonymize_pii(row) for row in reader])# Write the anonymized data to databasewith engine.connect() as conn:for record in records:write_to_db(conn, record)
In the example above, we call the two validators to ensure it worth processing the data, and we get the file path from the event. After that we initialize the client used to connect to Google Storage, then we get the object's content, parse the CSV file, and anonymize the content of it.
Last but not least, we connect to the database - defined by the DATABASE_URL
configured for the engine and write all records to the database one by one.
As you see, the entrypoint of the function has been changed as well. In the text box called "Entrypoint" set the entrypoint as a function name to call. The entrypoint is the function that will be called by Cloud Functions when an event is triggered.
Running the full example
We are close to finishing this tutorial, so it's time to test our Cloud Function.
To test the Cloud Function:
- Download the pre-made script and run it to generate random data.
- Navigate to the bucket you created
- Above the list of objects in the bucket (which should be empty) click on "upload files"
- Select and upload the randomly-generated data
- After the file is uploaded, visit the Cloud Functions console
- Click on the actions button and select "view logs"
- Navigate to
http://<EXTERNAL_IP>:9000, where<EXTERNAL_IP>is the external IP of your virtual machine
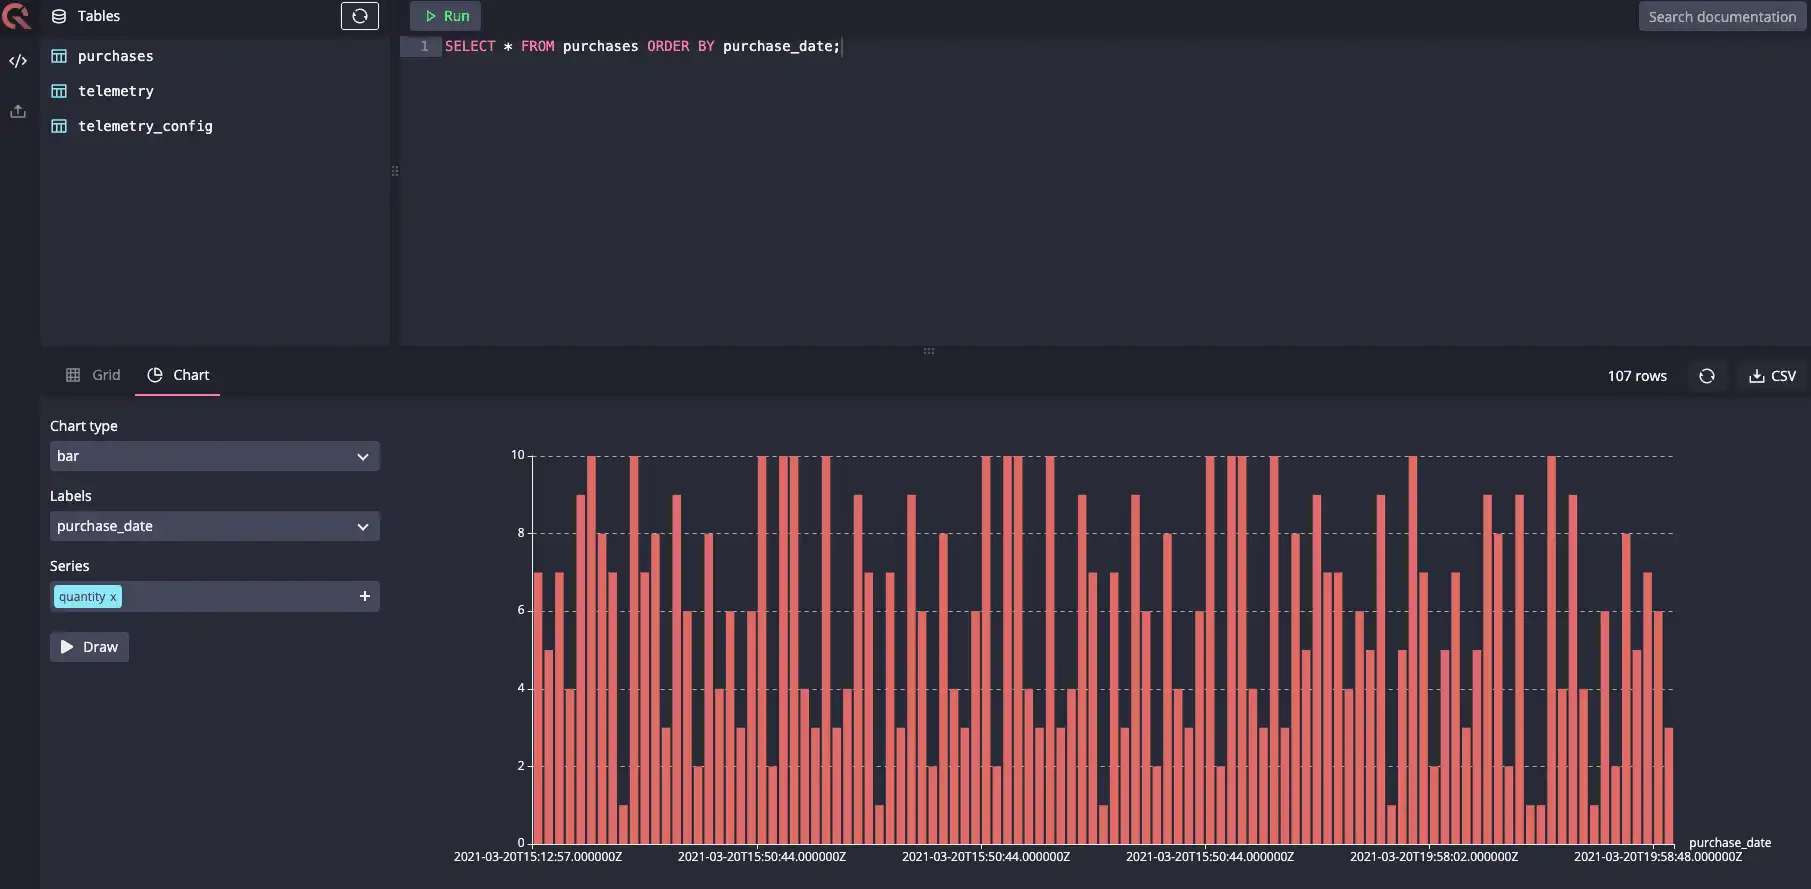
We can now execute the following SQL query:
SELECT * FROM purchases ORDER BY purchase_date;
As you can see, the data is loaded and we have no PII there. By creating a simple chart, we can even observe trends in the generated data, how our imaginary buyers purchased items on the webshop.
Summary
We've installed QuestDB on Google Cloud Platform, set up a Google Storage bucket to store the simulated purchase data exports, built an ETL job that anonymized our buyers' data, and loaded it into a time series database, QuestDB. Data analysts could write more jobs as Cloud Functions in multiple languages and set up multiple sources. It's also possible to set QuestDB's HTTP endpoints to read-only which would allow us to share this dashboard without worrying about destructive commands.
If you like this content, we'd love to know your thoughts! Feel free to share your feedback, browse the GitHub repository for this tutorial, or come and say hello in the community forums.