Create an IoT server with QuestDB and a Raspberry Pi
Networks of IoT devices provide a ton of value to a great many industries. Building and deploying sensors within an IoT network is also a great way to see the generation of time-series data, which can be bursty-if-not-explosive. For this reason, many look for a high-performance time series database as the central source for IoT sensor ingestion.
While this guide is for a modest home temperature sensor configuration, QuestDB can scale up to handle the blasts of sensor data generated via:
- rockets bound for outer-space
- nuclear reactors
- the cranes moving our goods at the worlds busiest ports
- the fastest cars ripping around the track in the Formula 1
Plus more! And it can do so on minimal hardware. On a Raspberry Pi for example, you can easily ingest over 1 million rows per second. In this guide, we'll setup a QuestDB server on a Raspberry Pi. Then we'll send it example sensor data via a skeleton temperature reading device written in Python.
Requirements
For this tutorial, you will need
- A Raspberry Pi, 4 or 5 is best
- An SD card
- An appropriate power supply
- Some peripherals (display, keyboard, mouse, micro-HDMI cable or adapter)
Getting the OS running
Out of the box, a Raspberry Pi does not have an operating system from which it can boot. The OS is usually flashed on an SD card which can then be inserted in the Raspberry Pi's SD card slot.
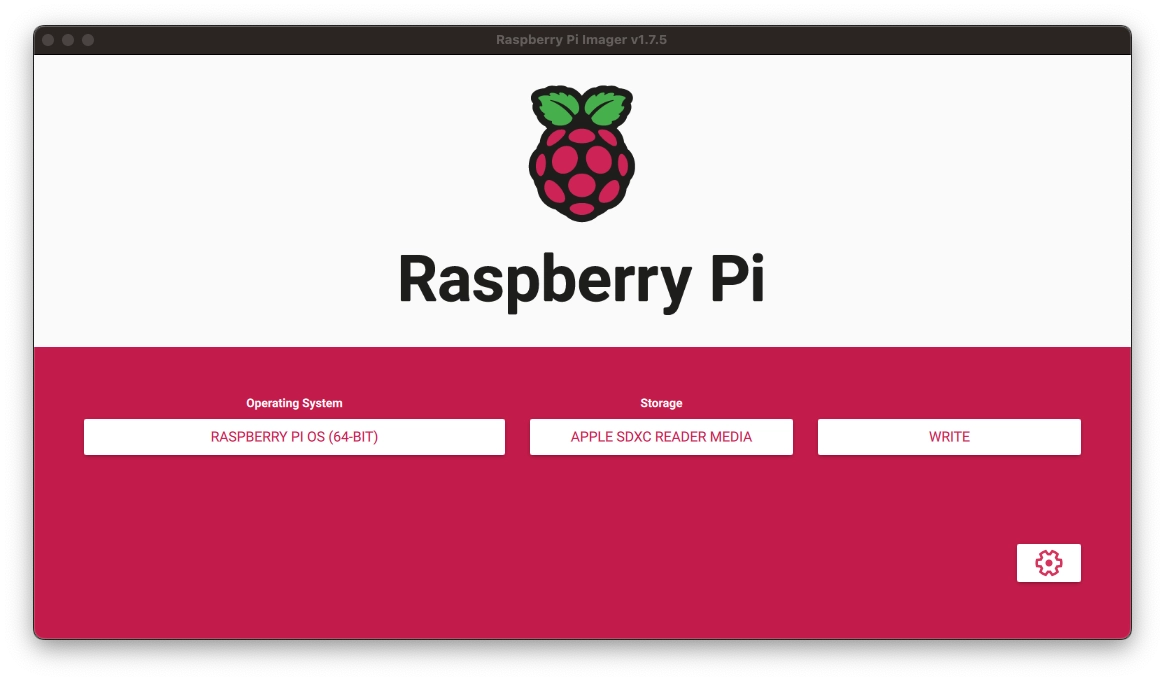
While there are many choices of OS, a popular distribution is the official Raspberry Pi OS. It often comes pre-packaged when you purchase a Raspberry Pi. However, if you need an OS or want to choose your own, the Raspberry Pi official software page allows you to download a convenient flashing tool.
From the tool, the steps are:
- Choose the OS you want
- Choose the SD card you want to flash the image on
- Flash it
- Insert the flashed card into the Raspberry Pi
That's it. You're good to go!
After installing the OS and booting the Raspberry Pi, you will see the first configuration wizzard where you will be asked to setup a login/password, connect to Wifi, choose a browser, and all that stuff. After doing this and restarting the Pi, you will land on your fresh new desktop.
Installing Java
Since we are running Linux on an ARM architecture, we need to use the QuestDB binaries to run the database. The binaries require Java, so our first step is to install it. This can be done with a few commands in a terminal window:
sudo apt install openjdk-17-jdk -y
Once complete, set the JAVA_HOME environment variable. Do so via editing your
.bashrc (or .zshrc) file. First, we open the file in a text editor:
nano ~/.bashrc
Then we edit the file to add the following line:
export JAVA_HOME=/usr/lib/jvm/java-17-openjdk-arm64
This points java based commands at that path.
Hit CTRL+X to exit the text editor and Y to save the file.
Then reload your terminal variables using the following:
source ~/.bashrc
Lastly, we can verify JAVA_HOME is correctly set with:
echo $JAVA_HOME
It'll spit out what we've set.
Installing QuestDB
QuestDB is a such high performance, time-series database. Its bundle small size, core feature set and massive ingestion handling make it an ideal fit for massive IoT mesh networks. It's free, powerful and open source.
To install questDB, we will download a release from Github, extract the files and rename the directory, then delete the archive using the following sequence of commands:
wget https://github.com/questdb/questdb/releases/download/7.4.0/questdb-7.4.0-no-jre-bin.tar.gztar -xvzf questdb-7.4.0-no-jre-bin.tar.gzrm questdb-7.4.0-no-jre-bin.tar.gzmv questdb-7.4.0-no-jre-bin questdb
For the latest version of QuestDB, check out releases in GitHub.
Starting QuestDB
The /questdb directory we just created contains a questdb.sh script. This
script allows us to
start/stop/restart the
instance. We can start a QuestDB instance as follows:
~/questdb/questdb.sh start
Running the above commands should allow you to get started fast on a Raspberry Pi. For other platforms, other installlation methods could more straightforward. Find more information in the QuestDB quickstart guide.
After completing all of the above, you should be greeted by the startup message in your terminal:
me@raspberrypi:~ $ ~/questdb/questdb.sh start

  ___                  _   ____  ____
 / _ \ _   _  ___  ___| |_|  _ \| __ )
| | | | | | |/ _ \/ __| __| | | |  _ \
| |_| | |_| |  __/\__ \ |_| |_| | |_) |
 \__\_\\__,_|\___||___/\__|____/|____/
                        www.questdb.io

JAVA: /usr/lib/jvm/java-17-openjdk-arm64/bin/java
Reading log configuration from /home/me/.questdb/conf/log.conf
In addition, if you navigate to http://localhost:9000, you should be able to see the QuestDB web console.
Nice!
Designate a central server
Whether you're hacking at home or beginning a corporate undertaking, the principles are the same. You will have one or more devices generating useful data. To make sense and to organize all of this incoming data, you'll need a central server.
Assuming that both your Raspberry Pi and your potential other data-generating devices are on the same WiFi network, we can start ingesting data into our home server. To do so, we must know the IP address of our Raspberry Pi.
Obtain it by typing the following into a shell within your Pi:
hostname -I> 192.168.0.86
As a sample mesh, let's consider an array of temperature sensors. A mesh is when many devices work together to cover a wide area. You could have one centralized sensor, but a wide array of nodes, or a mesh of nodes, allows you to cover a much wider area. In aggregate, data tend to be more accurate, too.
For our purposes, let's assume a network of temperature sensors across a house. We're trying to optimise our energy consumption for heating. Where are the hot spots? Where are the cold spots? Should we add or remove heaters, or air conditioners?
One such device that can do this is a Raspberry Pi Pico. We have a separate guide to teach you how to create a fully-featured temperature sensor. Once you're done with this guide, check it out!
We will configure each sensor to periodically send their readings to the base server. Later, we will consider whether to analyse the readings with visual tools such as Grafana or launch queries into the Web Console.
Create a sensor for our mesh
To create our sensor, we'll use the QuestDB Python client to send the readings over the WiFi network. A skeleton version of this could look like the following. Though, do note that we don't need to worry about creating the table. QuestDB - thanks to the underlying InfluxDB Line Protocol - will do so automatically for us.
There is no upstream "DDL work" required; we only need to send data:
from questdb.ingress import Sender, TimestampNanosip = '192.168.0.86'conf = f'http::addr={ip}:9000;'with Sender.from_conf(conf) as sender:sender.row('sensors',symbols={'id': 'kitchen'},columns={'temperature': 20.0, 'humidity': 0.5},at=TimestampNanos.now())sender.flush()
In practice, the contraptions you use to read temperatures may not always be able to run the above library, or may not even be able to execute (micro)python. We're use hard-coded values, but we'd assume that whatever controller software your device uses would permit "extraction and forwarding" of these readings.
If your device cannot apply a library as above, there are many other ways to send data to QuestDB. You can use the REST API.
So, for completedness, here is the Rest API, again in Python:
import requestsip, port = '192.168.0.86', '9000'url = f"HTTP://{ip}:{port}/exec"location,temp,humidity = 'kitchen',20.0, 0.5params = {'query': f"INSERT INTO sensors(id,temperature,humidity,timestamp) VALUES('{location}',{temp},{humidity},systimestamp())"}requests.get(url=url, params=params)
These skeleton examples show how a single node in your mesh may look. Maybe you have 1, 5, 15 or 200. So long as they are encoded as you'd like and ingesting data to the right IP, you can expect them to land in QuestDB.
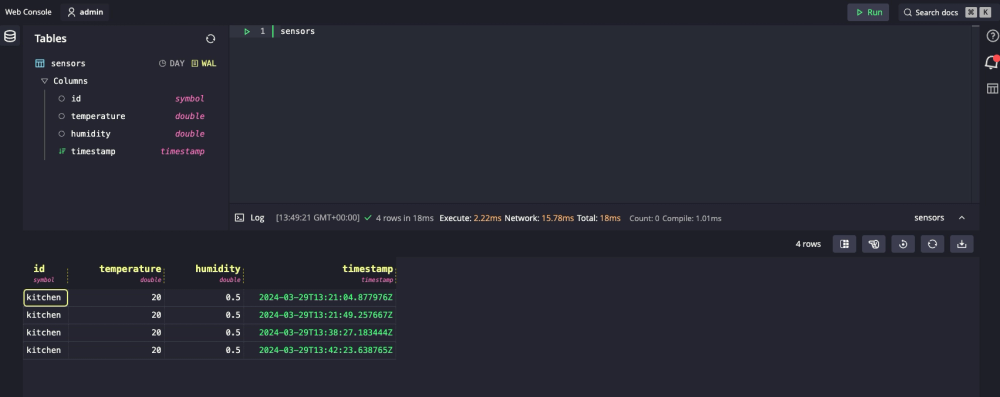
Checking the server
We can log into the QuestDB Web Console to see that our data sent through a variety of protocols is indeed present. We can also see that the table has been created for us when we sent data, and we can observe its structure in the left-hand menu.
This server is accessible both from the Raspberry Pi itself by navigating to
http://localhost:9000, or to any computer on the
network by navigating to the IP we identified above, in our case
192.168.0.86:9000:
Having done all this setup work, we can start hooking up more devices in the same way, and then proceed to analysing the data with further tools such as the SQL console or Grafana.
Related blogs that may interest you:
- Time-series IoT tracker using QuestDB, Node.js, and Grafana: Setup Grafana + QuestDB, and see another approach to a "sensor"
- Build a temperature sensor with Raspberry Pi Pico & QuestDB: Create robust temperature sensor nodes with a Raspberry Pi Pico!
What else is cool about QuestDB?
Getting data in at high speeds is half the battle. It needs to be organized, too! QuestDB also handles "out-of-order" indexing, ensuring that data is indexed in-time. Deduplication also functions on in-bound data, ushering clean data into the database even at very high scale.
Once inside, the analysis, visualization and querying of that data is paramount. QuestDB - as a time-series native database - has very useful SQL extensions to manipulate time-based data:
SAMPLE BYsummarizes data into chunks based on a specified time interval, from a year to a microsecondWHERE INto compress time ranges into concise intervalsLATEST ONfor latest values within multiple series within a tableASOF JOINto associate timestamps between a series based on proximity; no extra indices required
SQL is known to many, and our documentation can get you comfortable quickly, if you're unfamiliar.
For these reasons and more, QuestDB is an excellent fit for your IoT cases.
We hope you like it!