In a previous post, we looked at how to setup a lightweight QuestDB server on a Raspberry Pi to collect data from a potential mesh of IoT devices. We used a very bare bones, a minimal Python app for our example sensor.
In this post, we'll explore how to setup a much more robust Raspberry Pi Pico as a temperature sensor. While its sensor is not the most accurate, it has the advantage of being onboard the chip. No soldering required!
At the end, we'll have a baseline for a potential sensor mesh that features more accurate temperature sensors or a variety of different sensor types. And with QuestDB, the confidence that we can scale it as far as we need.
Pi Pico vs Raspberry Pi
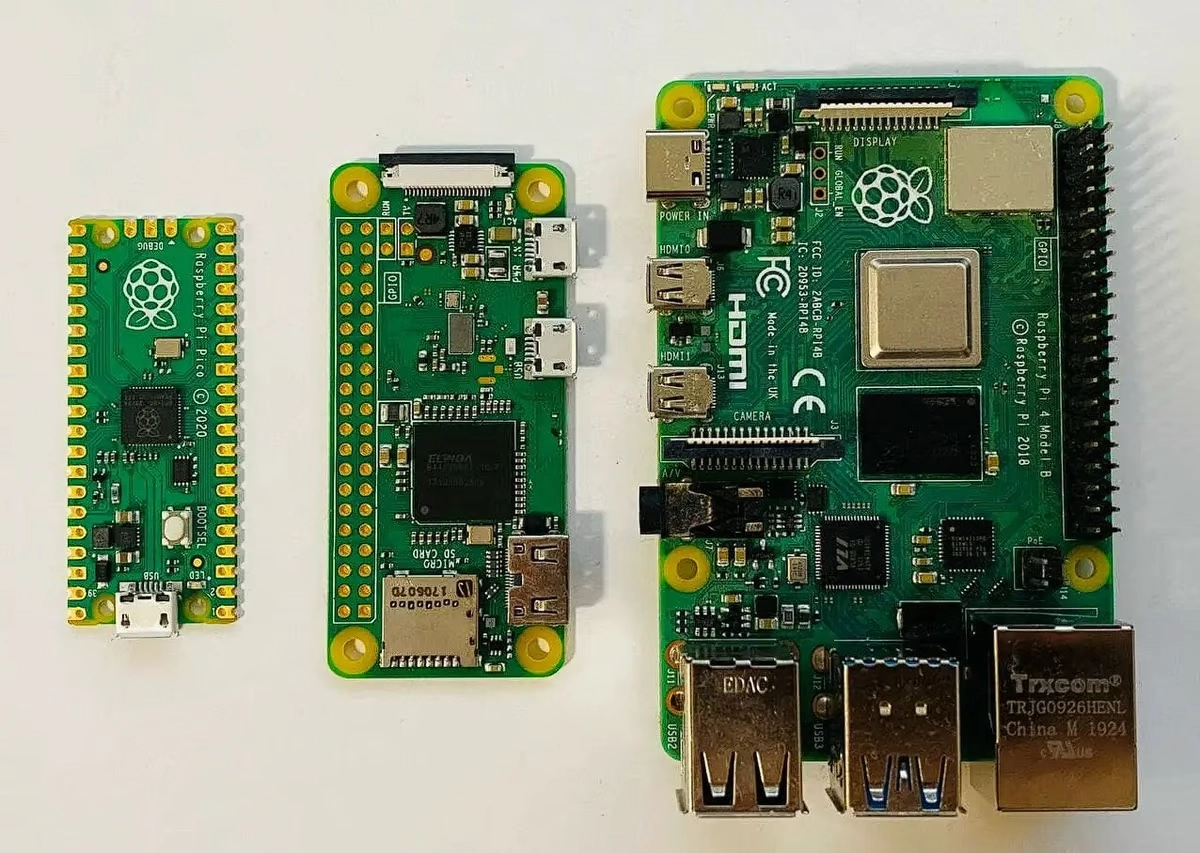
All forms of Pi are delicious (and functional). Yet they have their pros and cons, different ingredients if you will. Enter the Raspberry Pi Pico.
Unlike its bigger brother, the Raspberry Pi, the Raspberry Pi Pico is not a computer. Rather it's a microcontroller with a bunch of General Purpose Input/Output (GPIO) pins that connect various devices and circuits such as sensors, LEDs, small displays, buttons and so on. There are many, many possibilities.
The original Pi comes with gigabytes of RAM. The Pico only offers… 256kb. While it is far less powerful, the Pico is also significantly cheaper, at about 8$ per unit. However, it requires much less power and can even run on batteries for extended periods of time.
As a tradeoff, the Pico is not able to run an operating system and needs to be programmed externally. This program is then saved to the onboard memory where it will start executing as soon as power is supplied to the Pico.
Pico as a temperature sensor
The Pi Pico offers three interesting features for building a mesh of remote temperature sensors:
-
First, it has an onboard temperature sensor. This means there is no need to purchase a sensor and connect/solder it to the pins. It's quick to get started.
-
Second, if it's a Pi Pico W then it has onboard Wifi which allows us to remotely send the observed values in realtime. This is in contrast to having to, for example, connect the device to USB from time-to-time to dump the data.
-
Third, it supports micropython, which is a flavour of Python for microcontrollers. I personally find it much easier to use than the alternatives, such as C++.
For accuracy, there is a key caveat. It's not that accurate. This is because the sensor is built atop the die of the microcontroller. The sensor is somewhat shielded from the air by the plastic covering, and as a result its readings can be influenced by the temperature of the die itself.
But for a first setup with minimal assembly, it does the trick!
Setup the Pico
Before you can use a fresh Pi Pico board, you will need to complete a few steps:
Download the firmware
First, download the firmware. The firmeware comes in an .uf2 file.
-
If you are using the wifi-enabled Pi Pico, get the
_Wfirmware. -
For Pico boards without wireless, use this firmware.
Not sure which you have?
Check if the wireless chip is present on the board. The wireless chip is present if you can see the large metal shield covering it on the top side of the board towards the bottom.
Flash the firmware onto the Pico
Next, flash the firmware onto the Pico.
To do this, press and maintain the BOOTSEL button and connect the Pico to your
computer using a micro-USB cable.
Your Pico will show up as an external drive. Drag and drop the freshly-downloaded firmware file to your Pico, and the flash process will begin.
After a few seconds the Pi Pico will restart, and you won't be able to see it as an USB drive anymore, which is normal.
Going forward, we will connect to the Pi Pico using Thonny via USB.
Bring an IDE
Download and install an IDE.
We recommend Thonny!
Connecting to your Pico
Now, let's connect to your board. To do this, open Thonny, connect your Pico via USB, and select it in the bottom right corner of your Thonny editor:
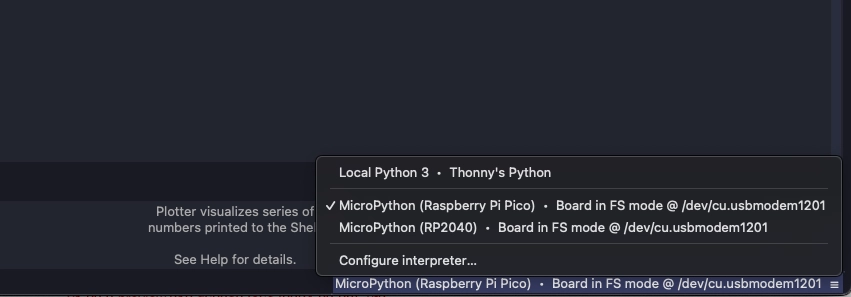
This connection will allow you to write code on your computer, then run it and save it onto the Pi Pico board.
Hello world
The Pi Pico offers an onboard LED which we can interact with to provide visual cues. As an introductory programme, we'll write a simple Hello World and blink the onboard LED.
Create a new python file called hello.py and type the following:
from time import sleep
from machine import Pin
led = Pin('LED', Pin.OUT)

print('Hello world')
while True:
    led.toggle()
    sleep(0.5)
Let's break down what happens:
- We import the sleep module to introduce a delay between actions
- We import the
Pinclass to interact with the onboard LED. From the Pico's perspective, the LED is connected to one of the GPIO pins. However, this Pin does not have a 'hole' into which we connect devices. This is also the case for the temperature sensor, which we'll use in a moment. - We use
printwhich will output text in our Thonny console - We use a
whileloop to toggle the LED state (ONorOFF) with asleepof 0.5 seconds to introduce a delay.
Run your programme using the play button or by hitting F5.
You should see Hello world on your Thonny console:
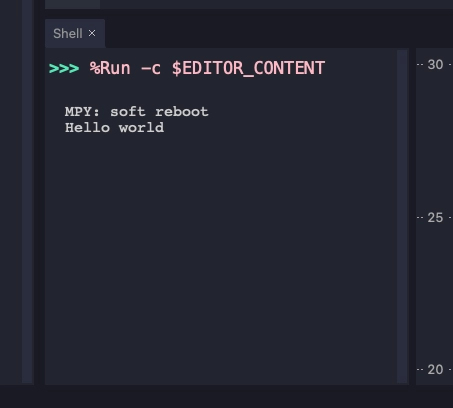
And the Pico should be blinking its green LED!
Using the onboard temperature sensor
Our goal is to capture temperatures. One Pico, one sensor. 400 Picos? 400 sensors, and that's a bonafide sensor mesh. We start small.
The Pico features an onboard analog temperature sensor directly on the RP2040 chip. This sensor is connected to an ADC pin 4. It produces an analog voltage which is proportional to the observed temperature.
To use this temperature, we first need to convert it to a digital value, and then convert the voltage into the corresponding temperature.
The conversion takes the value read from ADC Pin 4, and converts it into volts. The value read at this Pin is between 0 and 65535, for a reference of 3.3V. A value of 0 would get translated to 0 volts, and a value of 65,535 to 3.3V:
sensor_temp = machine.ADC(4)
conversion_factor = 3.3 / (65535)
reading_in_volts = sensor_temp.read_u16() * conversion_factor
Using this reading, we can use the Pico datasheet to obtain a conversion formula to temperature. The datasheet indicates an output of 0.706V corresponds to 27 degrees Celcius, with each degree reducing the voltage by 0.001721V.
Therefore, we can convert the voltage into temperature using the following formula:
temperature = 27 - (reading_in_volts - 0.706)/0.001721
Using this, we can build our temperature sensor code:
import machine, utime

sensor_temp = machine.ADC(4)
conversion_factor = 3.3 / (65535)

while True:
  utime.sleep(50)
  reading_in_volts = sensor_temp.read_u16() * conversion_factor
  temperature = 27 - (reading_in_volts - 0.706)/0.001721
  print(temperature)
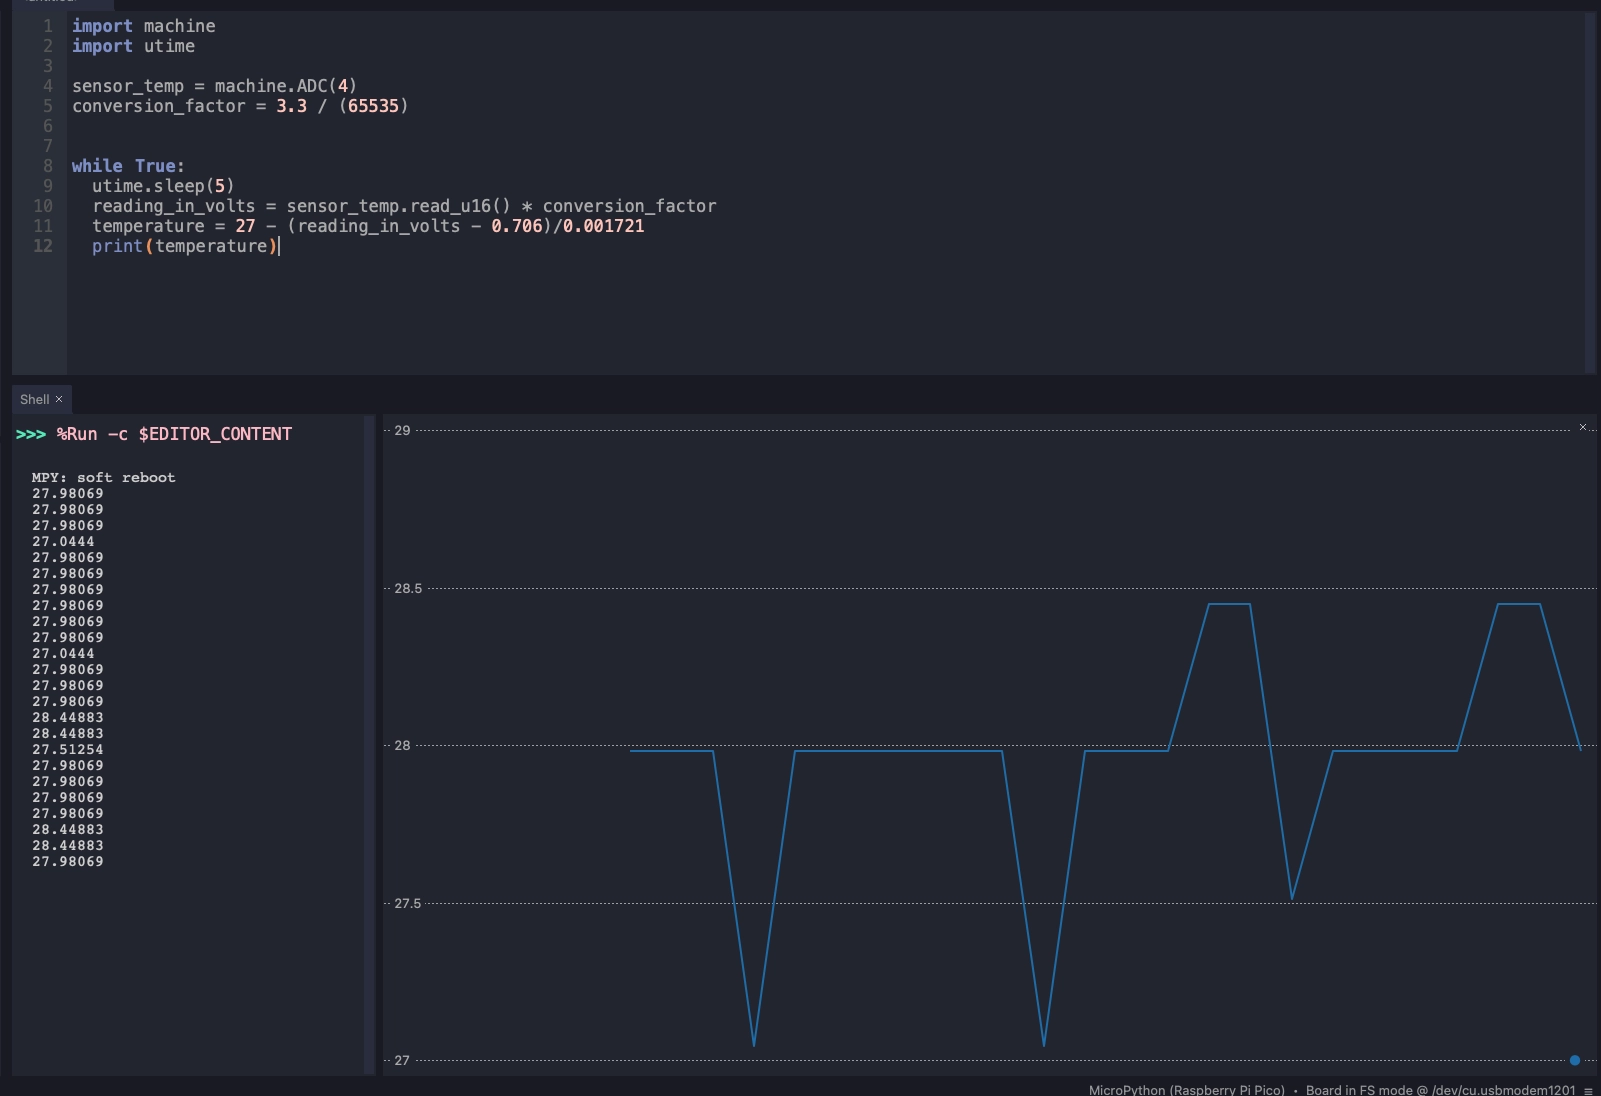
Running this within Thonny IDE, we see that the temperature is indeed relatively jumpy, and also not the most accurate. But it's a strong baseline setup to try things out before buying and soldering external temperature sensors to the Pico board, which we could then apply in a similar way.
Tip: Use rolling average queries to smooth the measurements over time.
Sending values to QuestDB server
In a previous post, we setup a lightweight QuestDB server on a Raspberry Pi to receive our temperature readings over the WiFi network. If you're using that server, great!
If not, you can use any QuestDB instance, whether hosted on your own laptop, in AWS or Azure, or anywhere else. Ensure QuestB is running before you continue. Check the QuestDB quick start for help. Open source!
With ingress centralized into QuestDB, we can finish our sensor node.
First, connect our Pi Pico to the Wifi network:
import network
wlan = network.WLAN(network.STA_IF)
wlan.active(True)
wlan.connect('YOUR_WIFI_NAME', 'YOUR_WIFI_PASSWORD')
We'll send data via the QuestDB REST HTTP.
Unlike the native QuestDB Python library, this protocol does not create tables automatically.
Therefore, we create an appropriate table in QuestDB using the following statement:
CREATE TABLE sensors(timestamp timestamp, id symbol, temperature double)
timestamp(timestamp)
PARTITION BY MONTH
This creates a table with columns for a timestamp, an id and the temperature. It's partitioned by month.
Next, we'll import a library for HTTP requests onto our Pico.
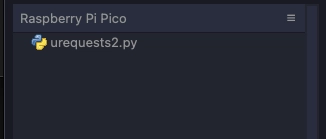
To do so, create a new file on the Pico called urequests2.py, and
copy the contents of the library
into it. Save the file. This will save the library into the Raspberry Pi Pico:
We will use a URL as a means to pass our query, and this requires the URL to be encoded. We can do so by adding this code to our main logic:
def url_encode(string):
    encoded_string = ''
    for char in string:
        if char.isalpha() or char.isdigit() or char in '-._~':
            encoded_string += char
        else:
            encoded_string += '%' + '{:02X}'.format(ord(char))
    return encoded_string
Lastly, we can put it all together and send the values across as follows
query = f"INSERT INTO sensors(id,temperature,timestamp) VALUES('{location}',{str(temperature)},systimestamp())"
f = url+"?query="+url_encode(query)
try:
    requests.get(url=f)
except:
    pass
For reference, the full code:
import machine, utime, network, urequests2 as requests

#Define some constants
location = 'kitchen'
ssid = 'YOUR_SSID'
password = 'YOUR_PASSWORD'
ip, port = 'YOUR_RPI_QUESTDB_SERVER_IP', '9000'
url = f"http://{ip}:{port}/exec"
sensor_temp = machine.ADC(4)
conversion_factor = 3.3 / (65535)
led = machine.Pin('LED', machine.Pin.OUT)

def connect_to_wifi(ssid,password):
  wlan = network.WLAN(network.STA_IF)
  wlan.active(True)
  wlan.connect(ssid, password)
  utime.sleep(2)

def get_temperature():
    reading_in_volts = sensor_temp.read_u16() * conversion_factor
    return 27 - (reading_in_volts - 0.706)/0.001721

def url_encode(string):
    encoded_string = ''
    for char in string:
        if char.isalpha() or char.isdigit() or char in '-._~':
            encoded_string += char
        else:
            encoded_string += '%' + '{:02X}'.format(ord(char))
    return encoded_string

def send_results(location,temperature):
  query = f"INSERT INTO sensors(id,temperature,timestamp) VALUES('{location}',{str(temperature)},systimestamp())"
  full_url = url+"?query="+url_encode(query)
  try:
    requests.get(url=full_url)
  except:
    pass

def main():
  connect_to_wifi(ssid,password)
  while True:
    led.toggle()
    temperature = get_temperature()
    send_results(location,temperature)
    utime.sleep(0.5)

main()
Checking in with Mothership
Let's confirm that data is indeed flowing into our server.
Assuming you're using a centralized Raspberry Pi with QuestDB from the prior guide as your main ingress point, the server is accessible both from the Raspberry Pi itself at http://localhost:9000, or via any computer on the network. To get there, navigate to the IP of the server, in our case http://192.168.0.86:9000.
Check the Web Console:
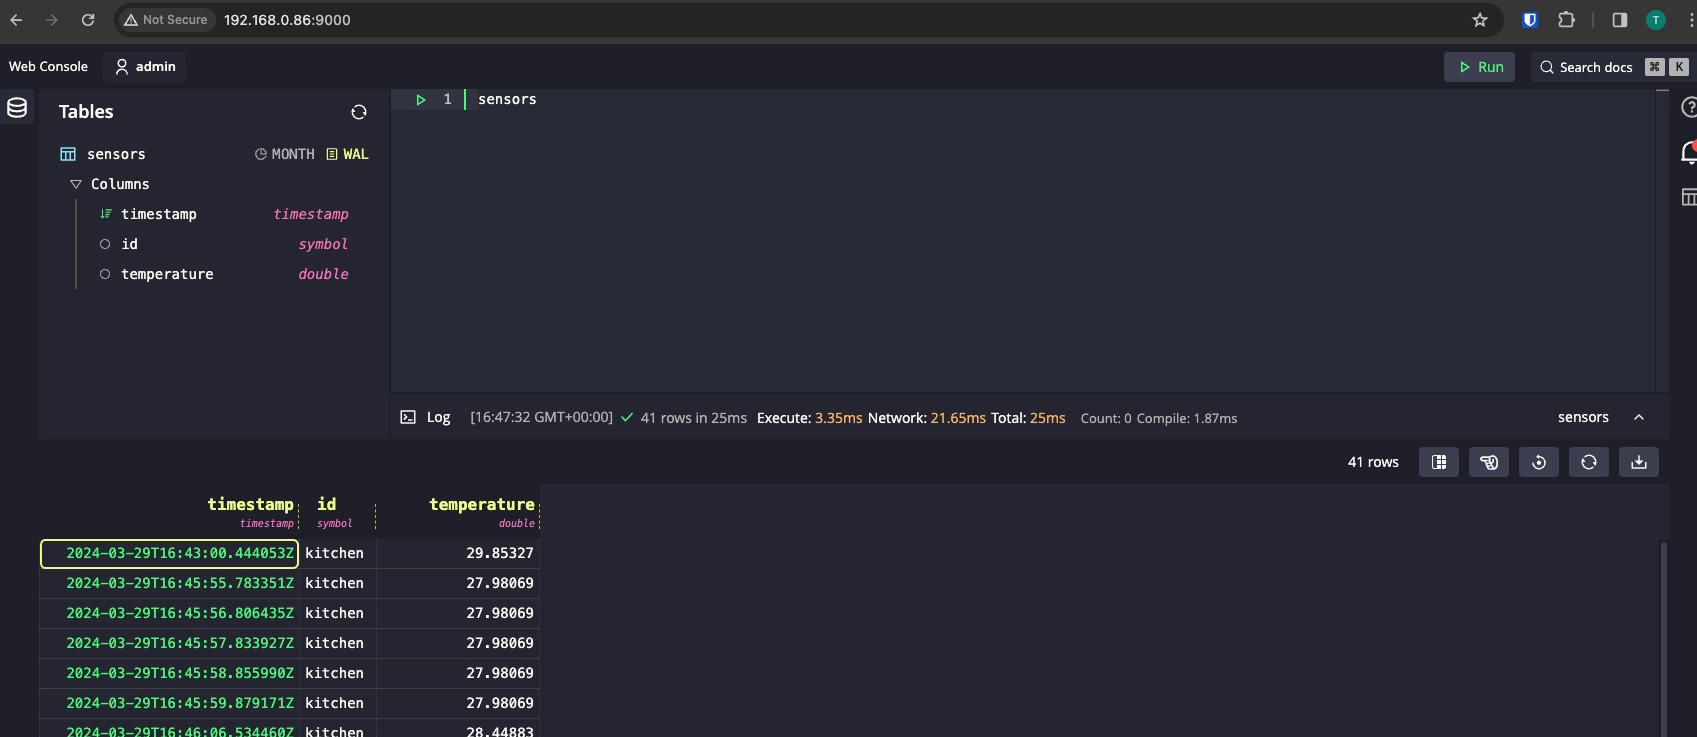
Let the readings flow!
Once at the Web Console, you can apply many interesting queries.
Or you could even setup a Grafana dashboard.
But before that, we still need to get our Pico sensor ready.
Deploy code to the Pico
Now that we have running code and are happy with it, we can deploy our 'device'. To do so, we need to find a way to supply it with power. This could be from a USB charger or via batteries.
We also want to setup the code so that it will autostart whenever power is
supplied. Save the above code in full to a module on the board named main.py.
Micropython will use this module name as a trigger to automatically start
executing code.
And that's it! The node will start, record the temperature, and send the data forward to QuestDB. QuestDB - even on modest hardware like that in a Raspberry Pi - can easily handle millions of rows per second of ingest. The sky is the limit for where we take our sensor mesh.
Repeat!
This framework is repeatable. The method can be used to deploy a fleet of sensors setup in the same way to monitor your home, office, factory, or anything else. You could even extend the temperature sensor to others such as motion, humidity, light, proximity, tilt and so on, and create your own metrics.
While this was a simple small-scale getting started example, the scope of possibilities is wide enough to satisfy your wild imagination for only a few bucks worth of components!
To that tune, related blogs or things that may interest you:
- Time-series IoT tracker using QuestDB, Node.js, and Grafana: Setup Grafana + QuestDB, and see another approach to a "sensor"
- Create IoT server with QuestDB and a Raspberry Pi: Create robust temperature sensor nodes with a Raspberry Pi Pico!
- NYC Taxi Grafana dashboards: Realtime tracking of NYC taxis! Now that's a mesh network, indeed.
What else is cool about QuestDB?
QuestDB is a high-performance time-series database. It's a great fit for time-series data, such as that generated by IoT usecases of vast sophistication. It's useful for both hobby projects, and for the hyper-streams of data generated in massive usecases:
- rockets bound for outer-space
- nuclear reactors
- the cranes moving our goods at the worlds busiest ports
- the fastest cars ripping around the track in the Formula 1
But getting data in at high speeds is half the battle. It needs to be organized, too! QuestDB also handles "out-of-order" indexing, ensuring that data is indexed in-time. Deduplication also functions on in-bound data, ushering clean data into the database even at very high scale.
Once inside, the analysis, visualization and querying of that data is paramount. QuestDB - as a time-series native database - has very useful SQL extensions to manipulate time-based data:
SAMPLE BYsummarizes data into chunks based on a specified time interval, from a year to a microsecondWHERE INto compress time ranges into concise intervalsLATEST ONfor latest values within multiple series within a tableASOF JOINto associate timestamps between a series based on proximity; no extra indices required
SQL is known to many, and our documentation can get you comfortable quickly, if you're unfamiliar.
For these reasons and more, QuestDB is an excellent fit for your IoT cases.
We hope you like it!