We're happy to announce that QuestDB is available with an official listing on the DigitalOcean marketplace. Deploying QuestDB via 1-click app means it's quick and easy to get started with a high-performance SQL database for time series. In this announcement, we'll show you how to get started and show how you can make use of some free DigitalOcean credit for new users.
The DigitalOcean marketplace
DigitalOcean is a platform with software listings from independent vendors that run on cloud resources. You can launch virtual private servers (VPS) called "Droplets", which use KVM as the hypervisor and can be created in various sizes, in 13 different data center regions and with various options out of the box, including 6 Linux distributions and over 100 1-Click applications.
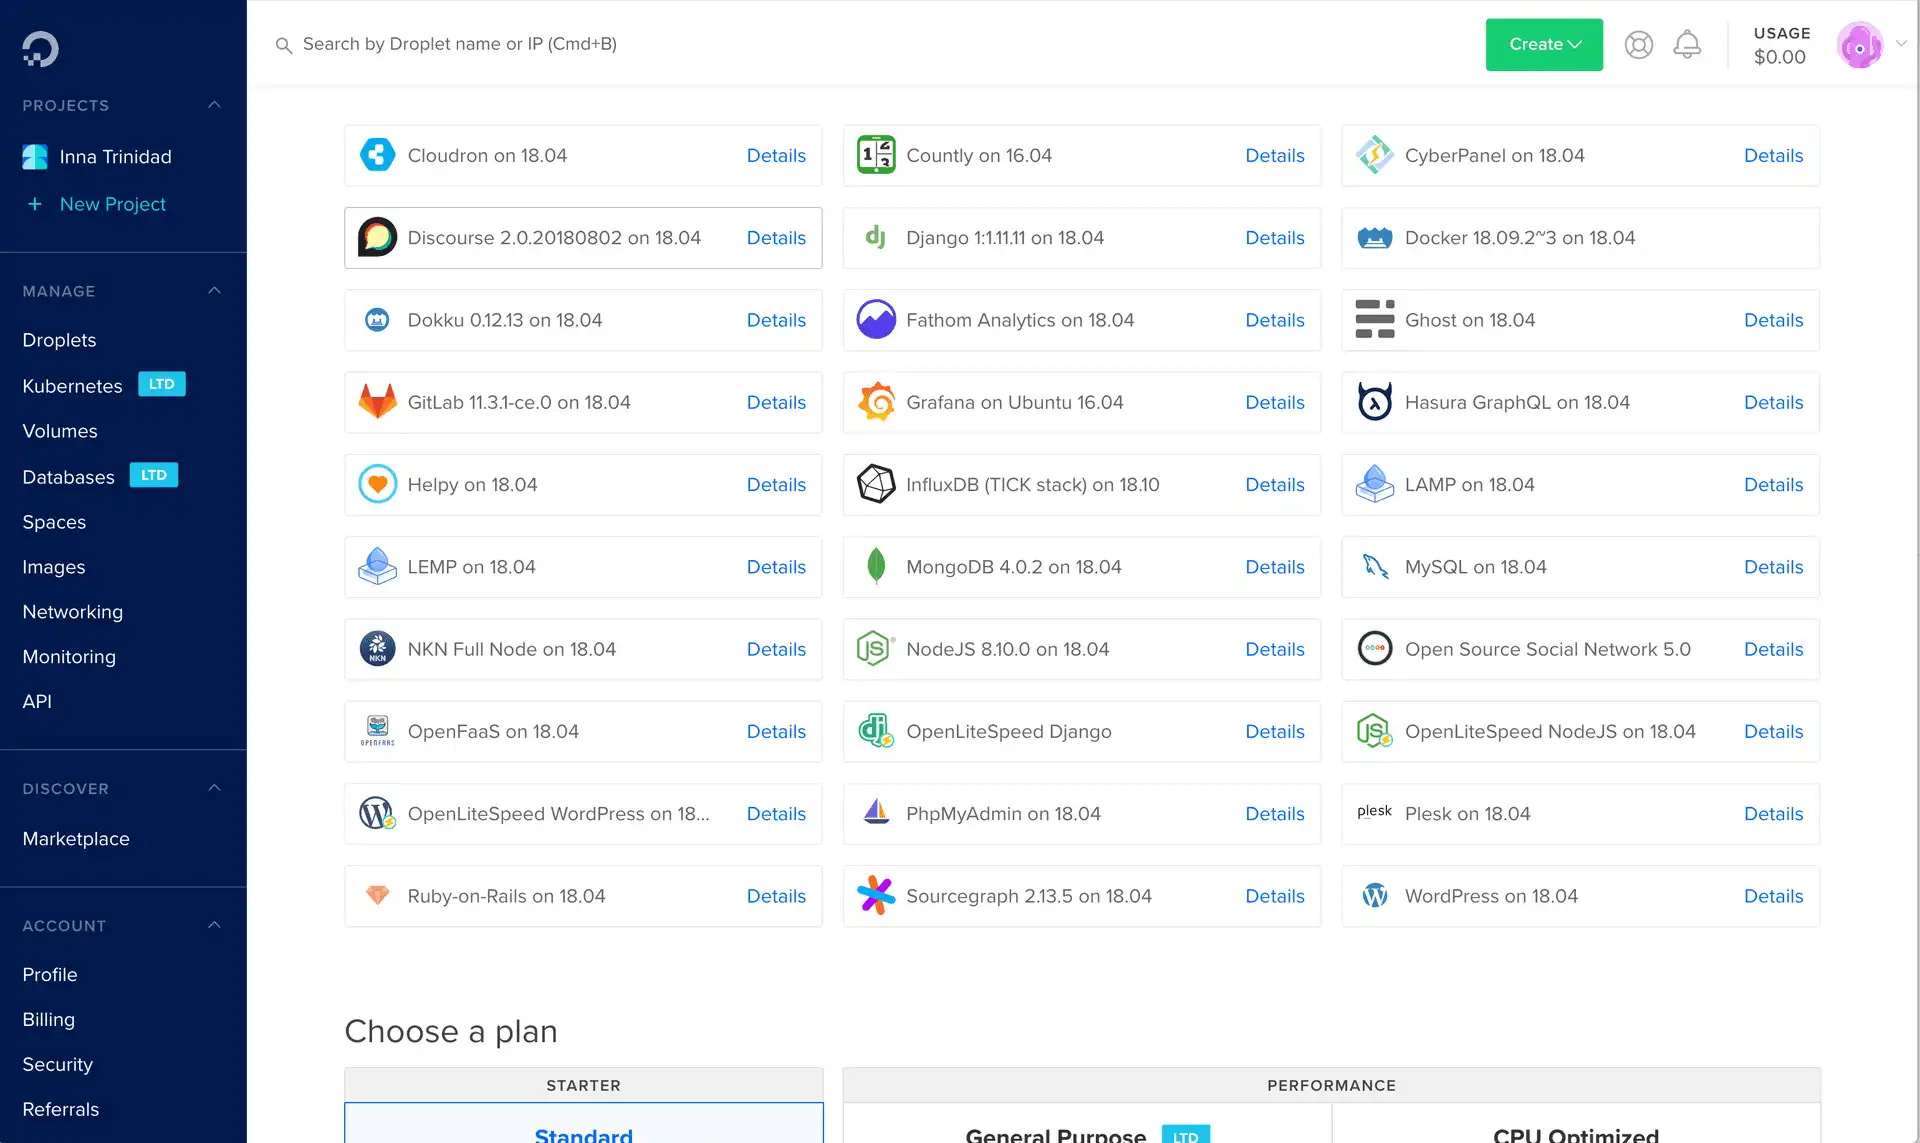
Launching QuestDB via the DigitalOcean marketplace allows you to configure the latest QuestDB version as a Droplet with the configuration of your choosing such as:
- The geographic region of your choice
- Persistent block storage
- Monitoring
- Credentials management for remote access (SSH)
- Backups
- Networking and VPC configuration
How to create a QuestDB droplet
QuestDB is available on DigitalOcean through 1-Click Apps reviewed by their staff. Setup using this method is quite easy and can be performed in a few short steps:
- Navigate to the QuestDB listing on DigitalOcean
- Click Create QuestDB Droplet
- Select the basic plan for your Droplet (4GB RAM is recommended)
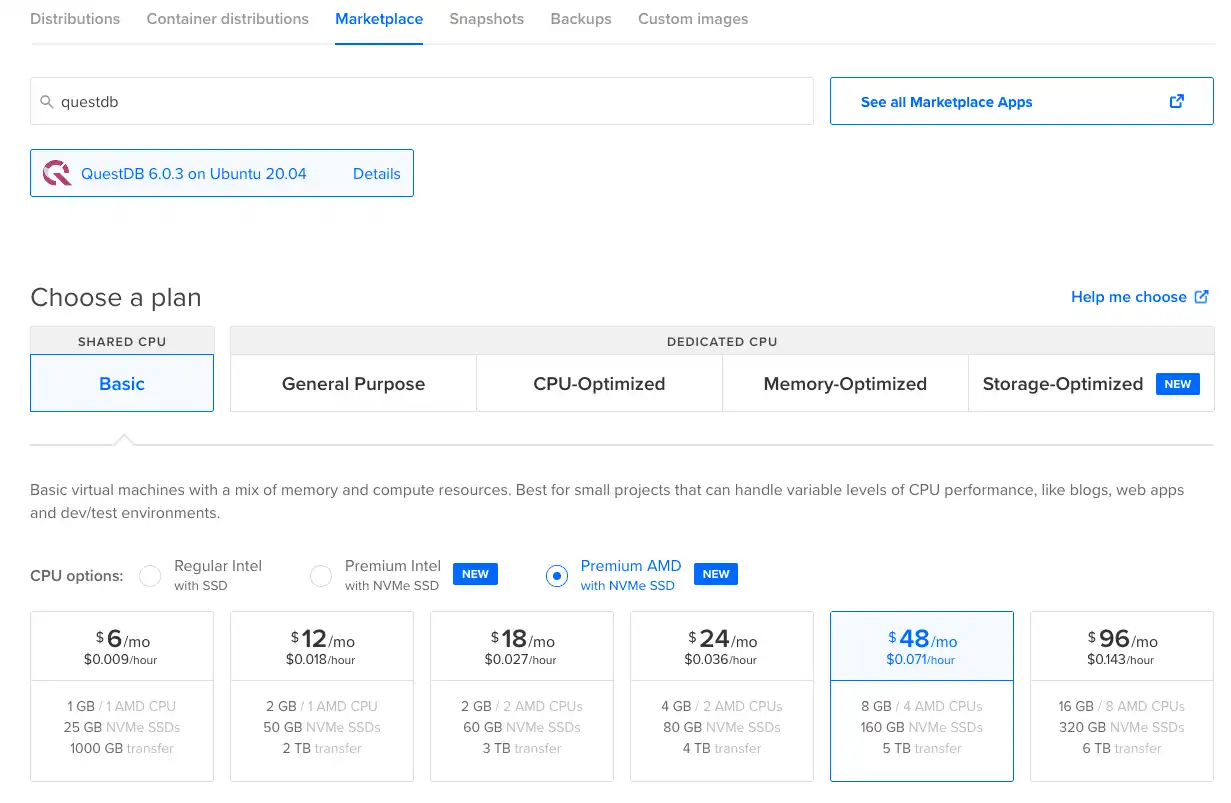
- Choose a region closest to you
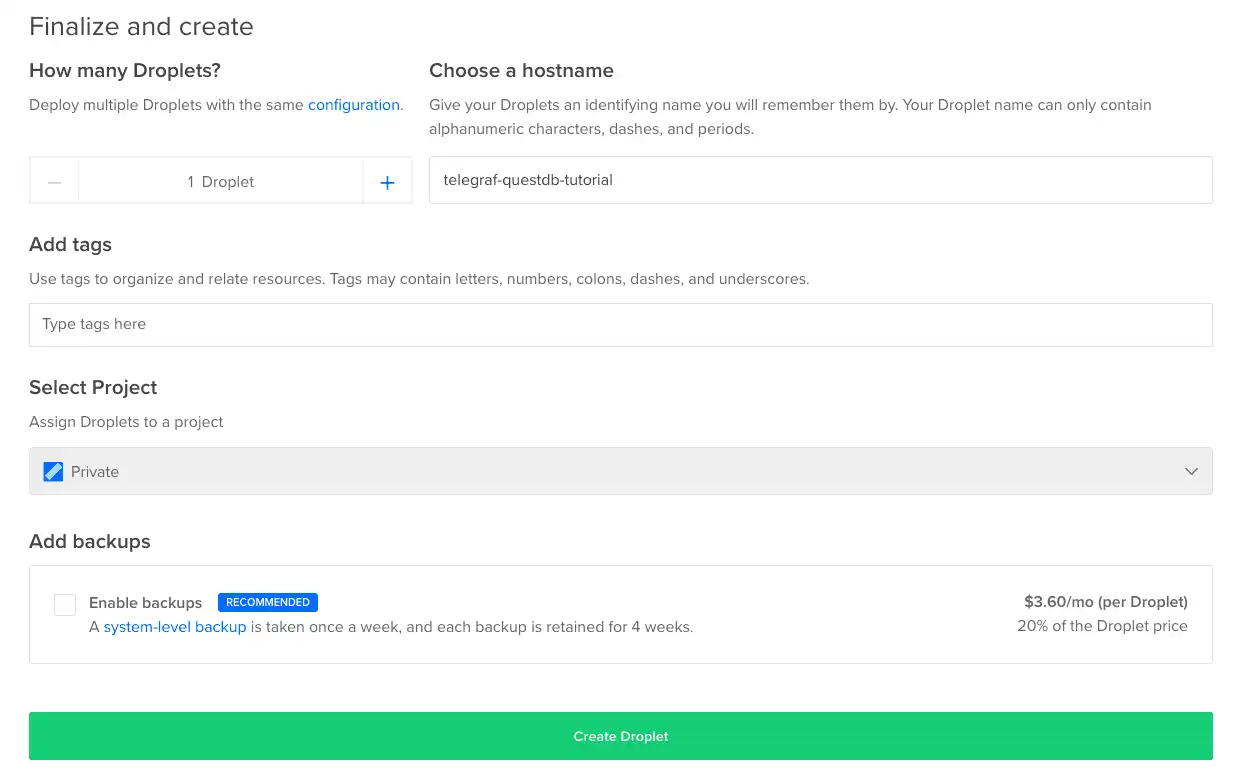
- At the Authentication section, enter your SSH public key, or set a password
- Set a hostname for the droplet such as
questdb-demo - Leave all other settings with their defaults, and click Create Droplet at the bottom of the page
After 30 seconds, QuestDB should be ready to use. To validate that we set
everything up successfully, copy the Droplet's IP address by clicking on it and
navigate to http://<IP ADDRESS>:9000/ where <IP ADDRESS> is the IP address
you just copied. The interactive console should load and we can start querying
the database and inserting data.
More details on deploying the droplet, along with information on securing the instance and the interfaces that are exposed can be found on the DigitalOcean deploy guide.
Get started with QuestDB on DigitalOcean
If you are new to DigitalOcean and don't have an account yet, we are happy to be able to offer 100 USD of free credit to users who sign up using the the QuestDB referral link. With this offer, anyone can try out QuestDB on DigitalOcean for free and evaluate using droplets for storing and analyzing time series data.
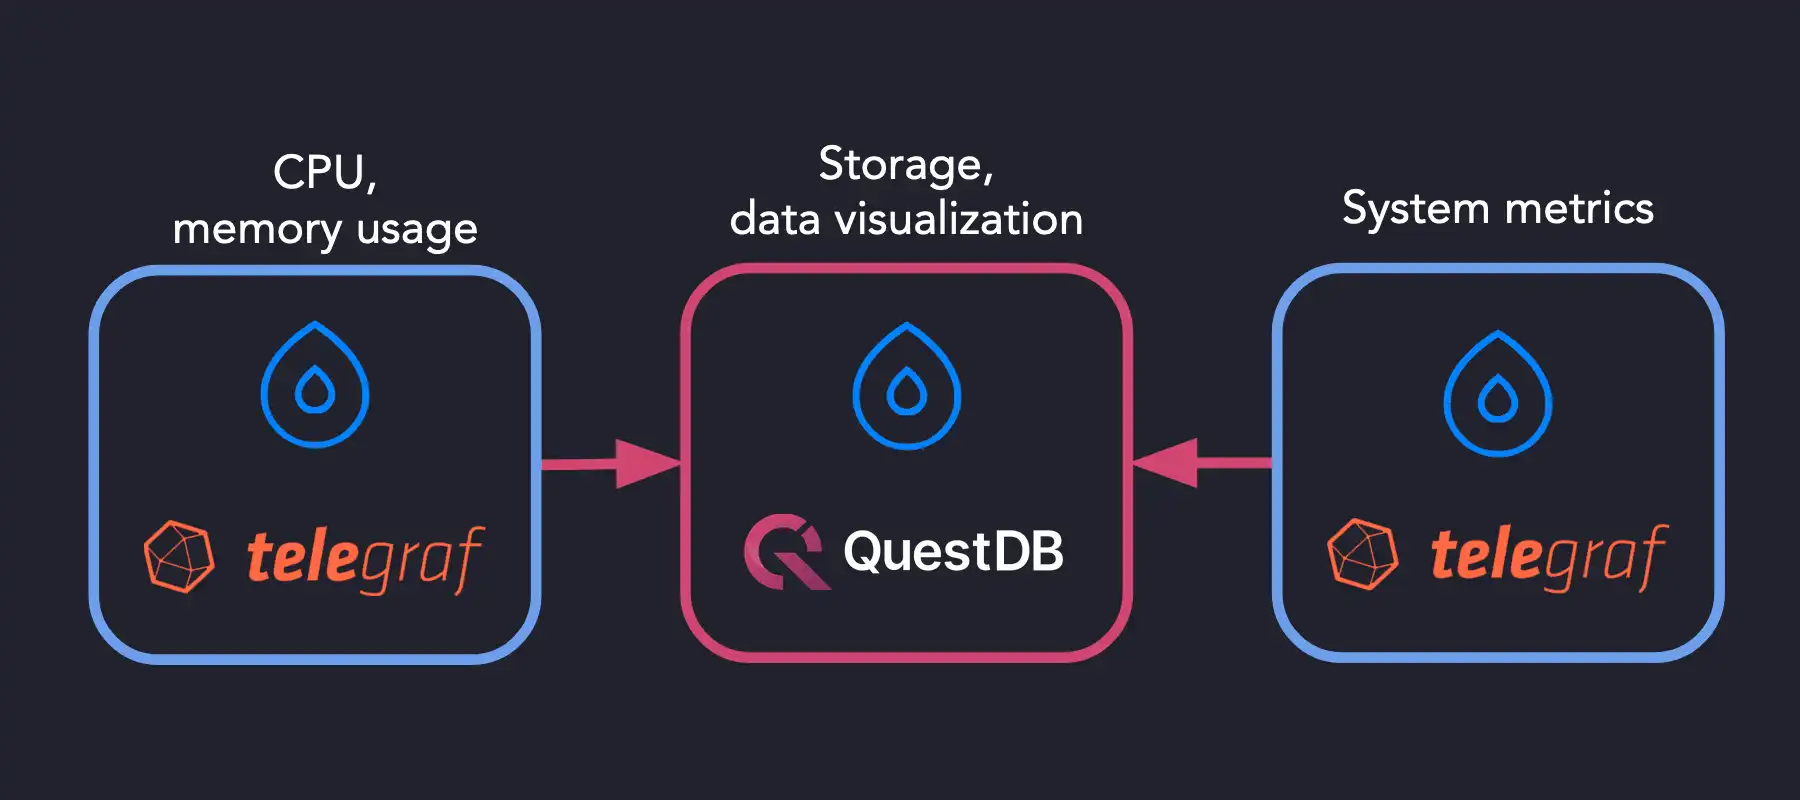
And if you're looking for inspiration on how to make use of the new QuestDB droplet, our community contributor Gábor Boros has written an excellent tutorial showing how to deploy QuestDB as a 1-Click application. The example stack uses Telegraf clients that collect system metrics from multiple DigitalOcean droplets and streams this monitoring information to a QuestDB instance for analysis and visualization. Check out the QuestDB on DigitalOcean tutorial to get started.
Feel free to reach out and tell us how the QuestDB Droplet is running. Let us know how we're doing or just come by and say hello in our community forums or browse the repository on GitHub.