Active Directory (PingFederate) guide
This document helps set up SSO authentication for the Web Console in PingFederate.
It is assumed that the Azure Active Directory serves as the Identity Provider (IdP).
For a general introduction to OpenID Connect and QuestDB, see the OIDC Operations page.
Set up PingFederate client
First thing first, let's pick a name for the client!
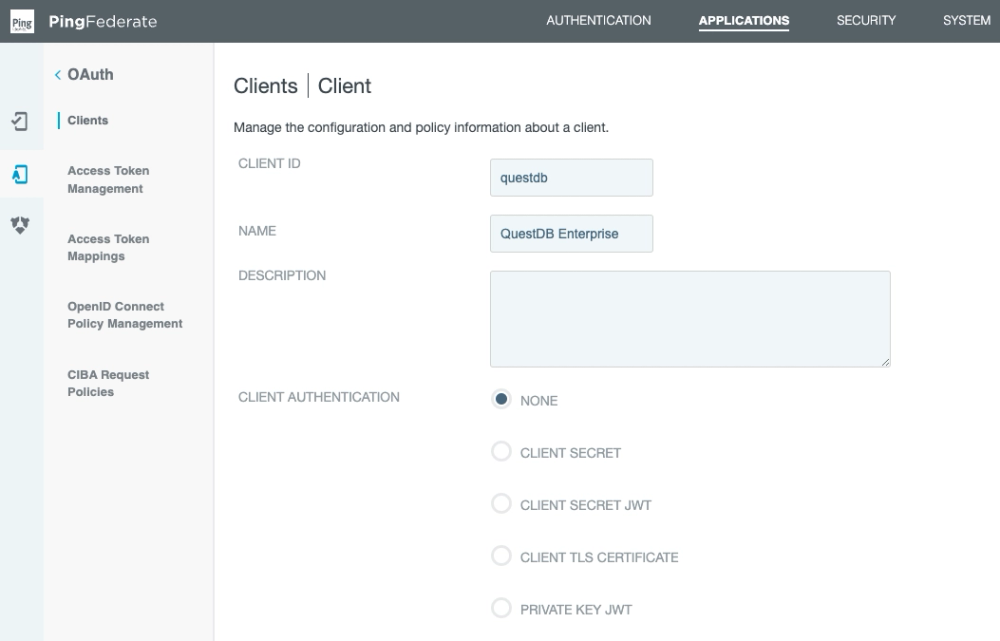
The QuestDB Web Console is a SPA (Single Page App).
As a result, it cannot store safely a client secret.
Instead it can use PKCE (Proof Key for Code Exchange) to secure the flow.
As shown above, leave the client authentication disabled.
We also have to white list the URL of the Web Console as a redirection URL:

We can instruct PingFederate to automatically authorize the scopes requested by the Web Console.
The user will not be presented the extra window asking for consent after authentication:

The Web Console uses the Authorization Code Flow, and refreshes tokens automatically.
Next, enable the grant types required for this flow:
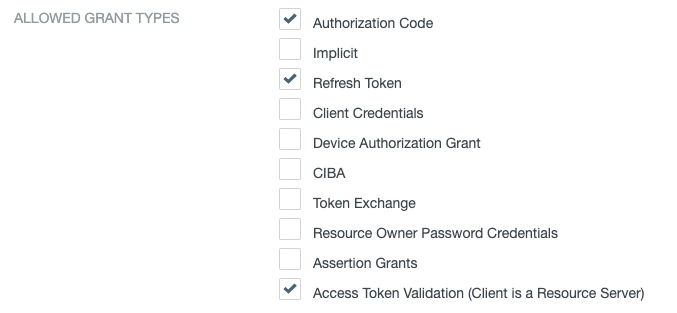
We've selected:
- Authorization Code
- Refresh Token
- Access Token Validation (Client is a Resource Server)
After that, select the token manager for the client.
The token manager is responsible for issuing access tokens.
All token related settings should be configured in the token manager.
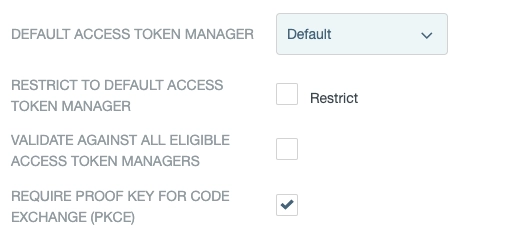
Finally, enable PKCE - as shown above - and save the settings.
Access Token Manager settings
QuestDB does not require any special setup regarding the access token.
We recommend that you do not to use shorter tokens than the default 28 characters.
As the QuestDB Web Console refreshes the token automatically, there is no need for long-lived tokens:
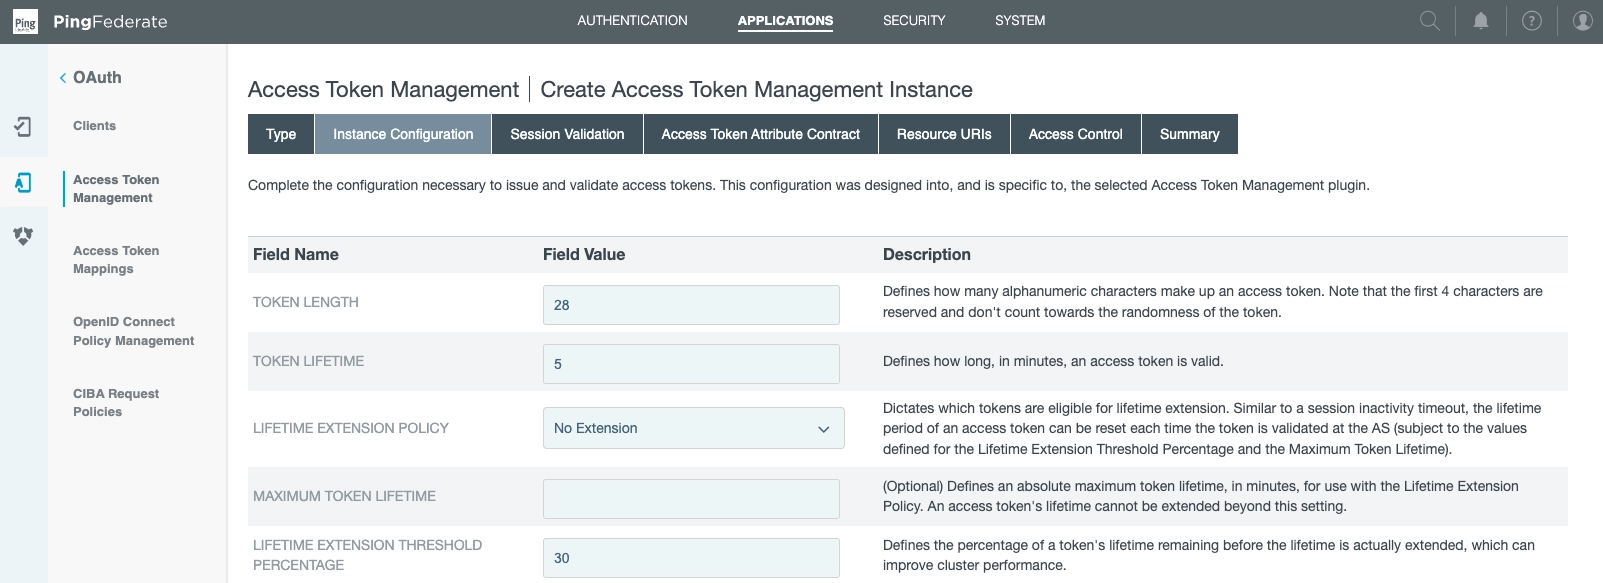
We've selected:
- Token length: 28
- Token lifetime: 5
- Lifetime extension policy: None
- Maximum token lifetime: Null
- Lifetime extension threshold percentage: 30
For the next step, we tune the Authorization Server.
Authorization Server settings
These settings relate to the authorization code, refresh token and CORS.
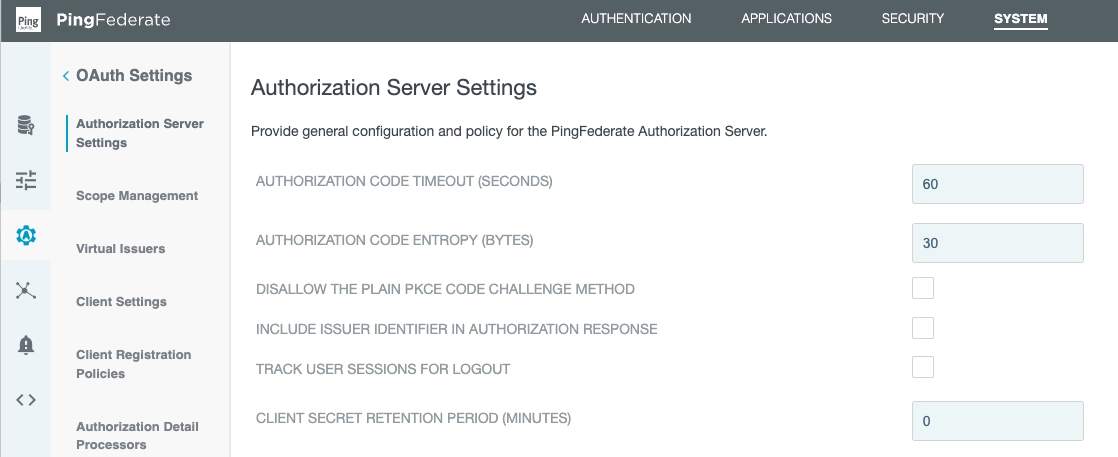
In this section, we've entered:
- Authorization code timeout: 60
- Authorization code entropy: 30
- Client secret retention period: 0
Next, ensure the ROLL REFRESH TOKEN VALUES option is selected:

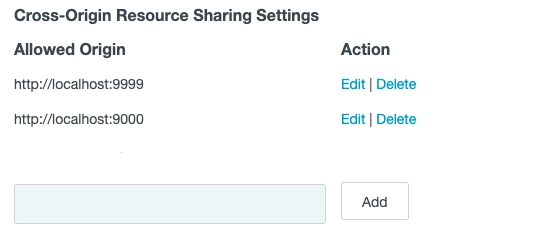
It is also important to whitelist the Web Console's URL on the CORS list:
Set up a Microsoft Entra ID Data Source
PingFederate needs a Data Source setup.
This is a secure LDAP connection to Microsoft Entra ID, formerly known as Azure Active Directory.
The data source needs a:
- name
- hostname
- port
- username and password for the LDAP connection
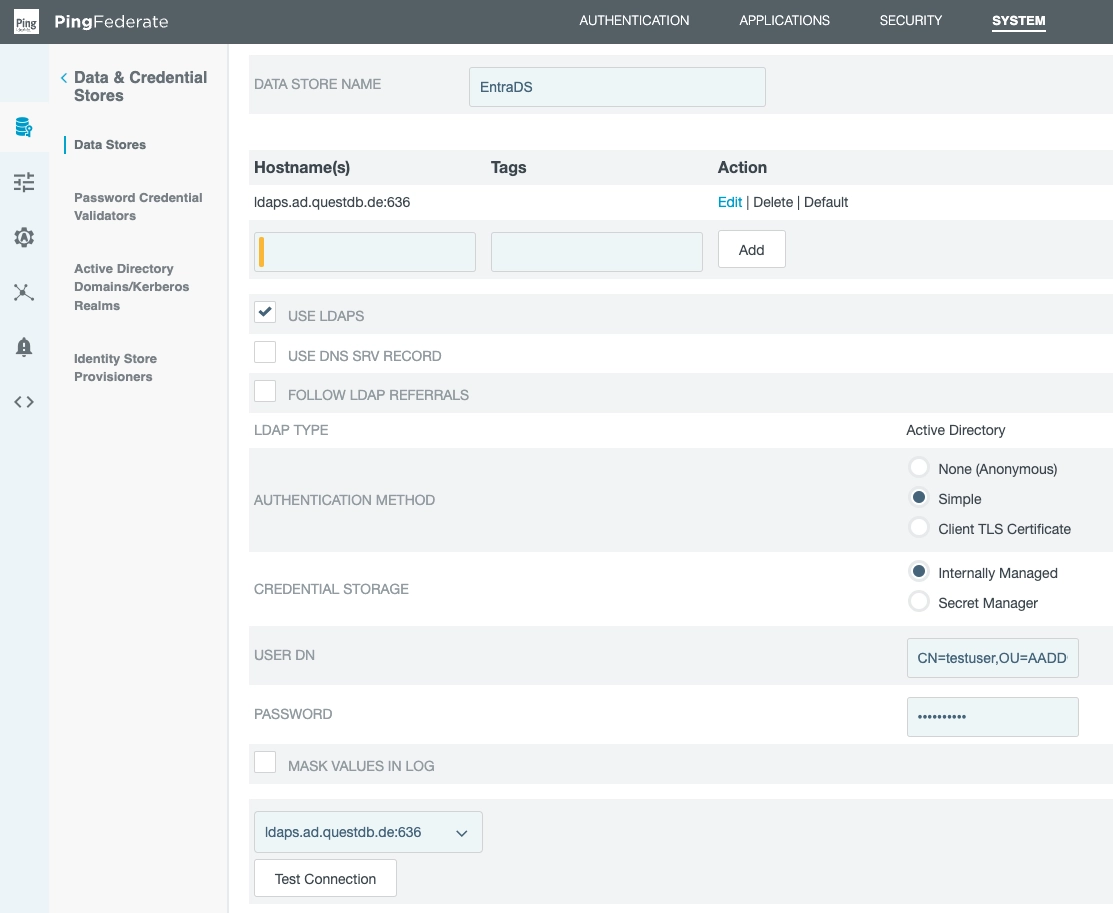
We have given it the name EntraDS and it will be applied later.
Set up a Password Credential Validator
Now that PingFederate has an LDAP connection, we can use it for authentication.
First, create a Password Credential Validator:
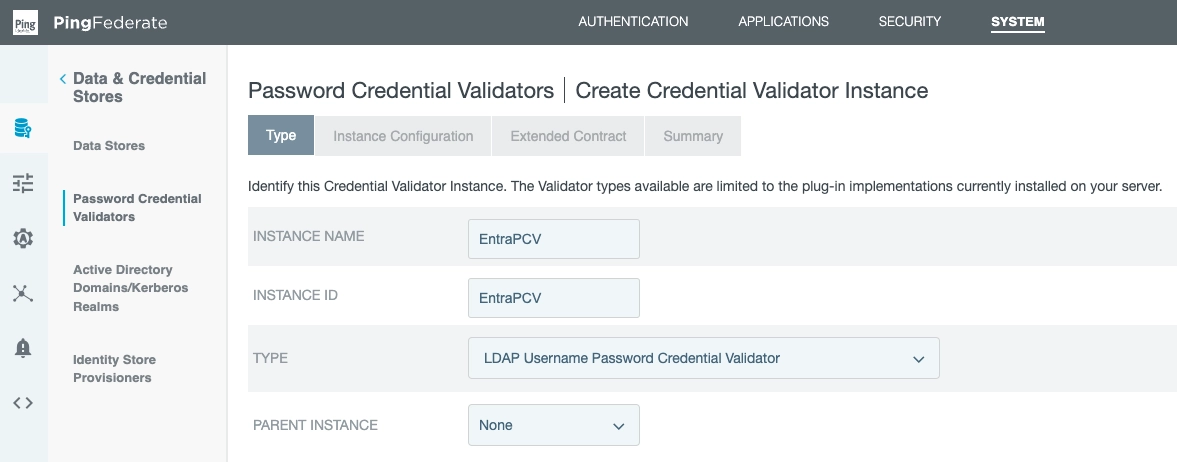
We've entered:
- Instance name: EntraPCV
- Instance ID: EntraPCV
- Selected: LDAP Username Password Credential Validator
- Parent instance: None
Furthermore, we now declare our previously created data source (EntraDS):
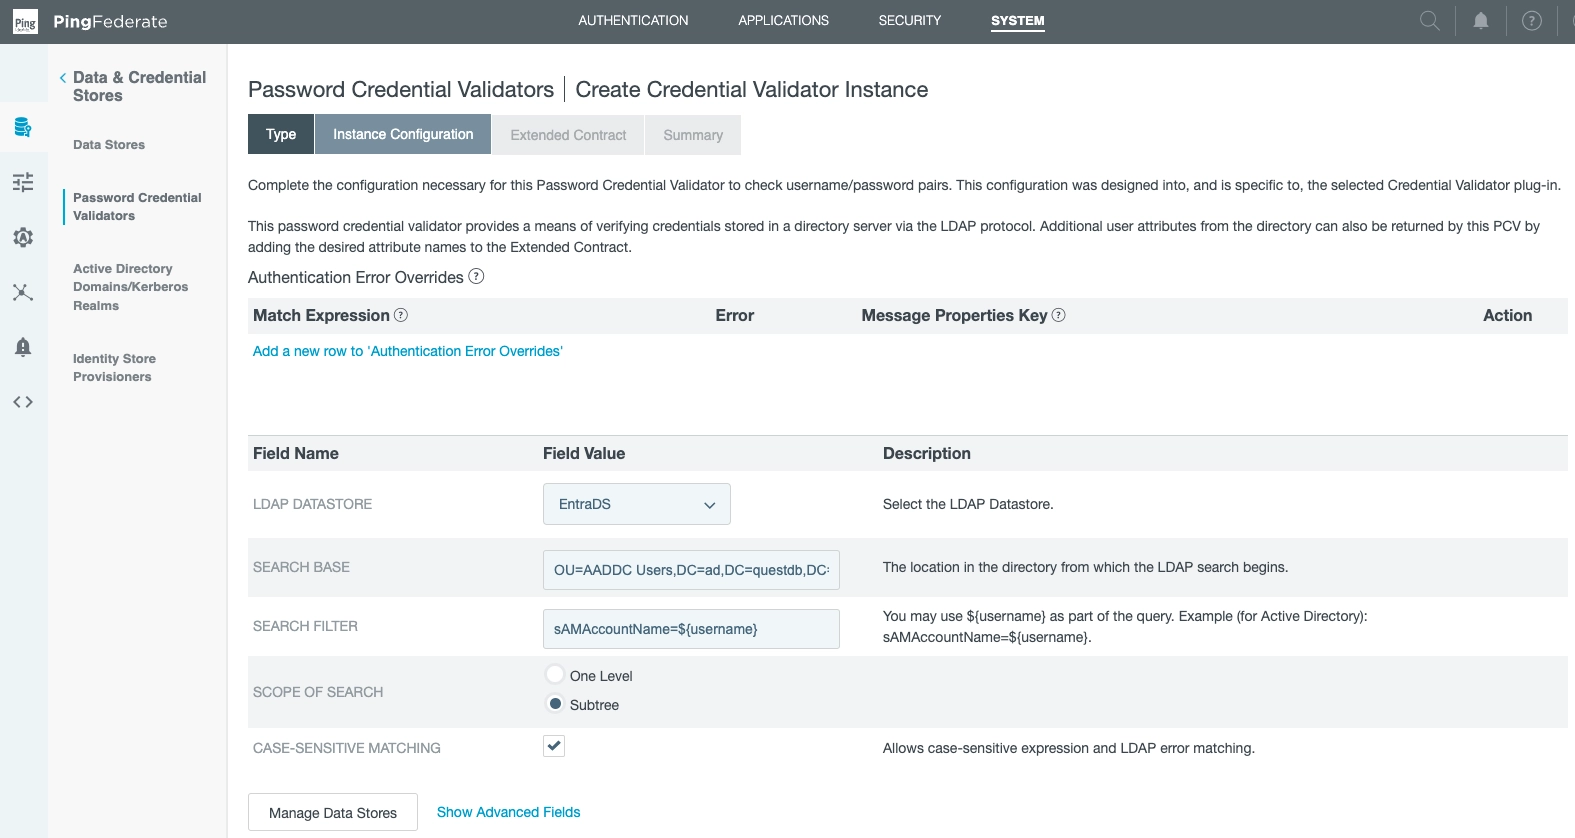
This links our data store (EntraDS) to our PCV (EntraPCV).
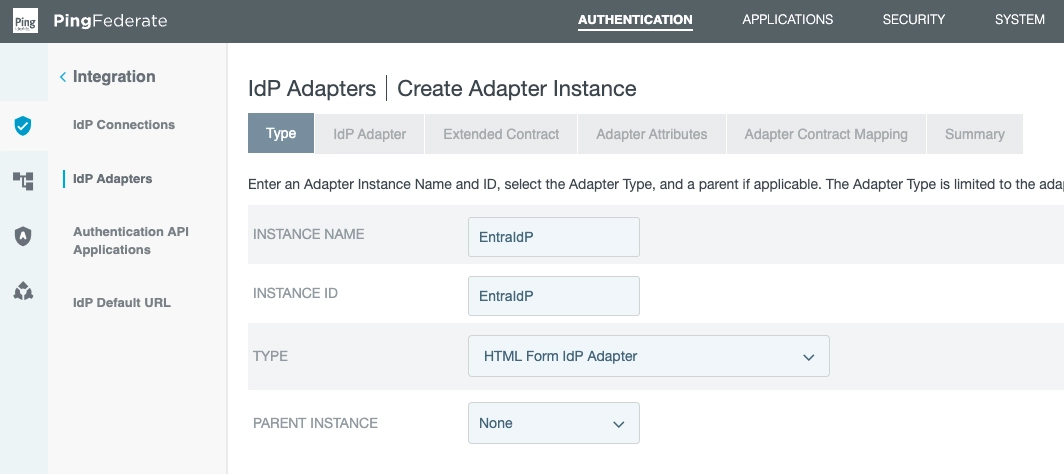
Set up an Identity Provider
We can use our PCV once we set up an Identity Provider.
The IdP will be used to authenticate users against Active Directory using the LDAP connection.
We do this in the Type subsection:
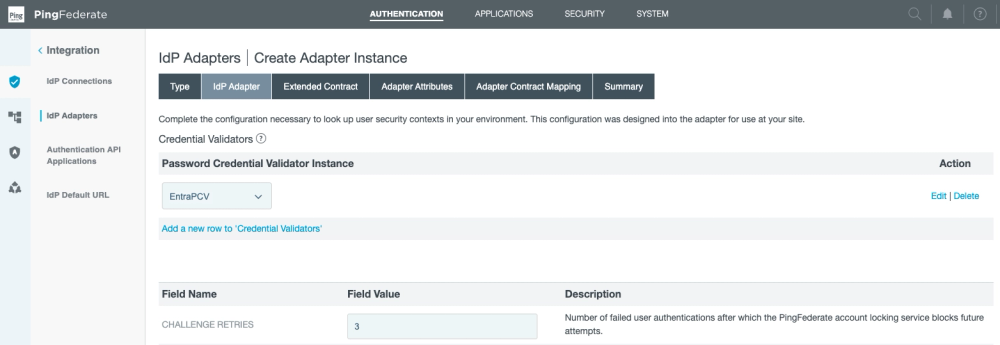
Next, in the IdP Adapter section...
Click: Add a new row to Credential Validators.
Select the PCV (EntraPCV) we created.
Optionally alter number of retries:
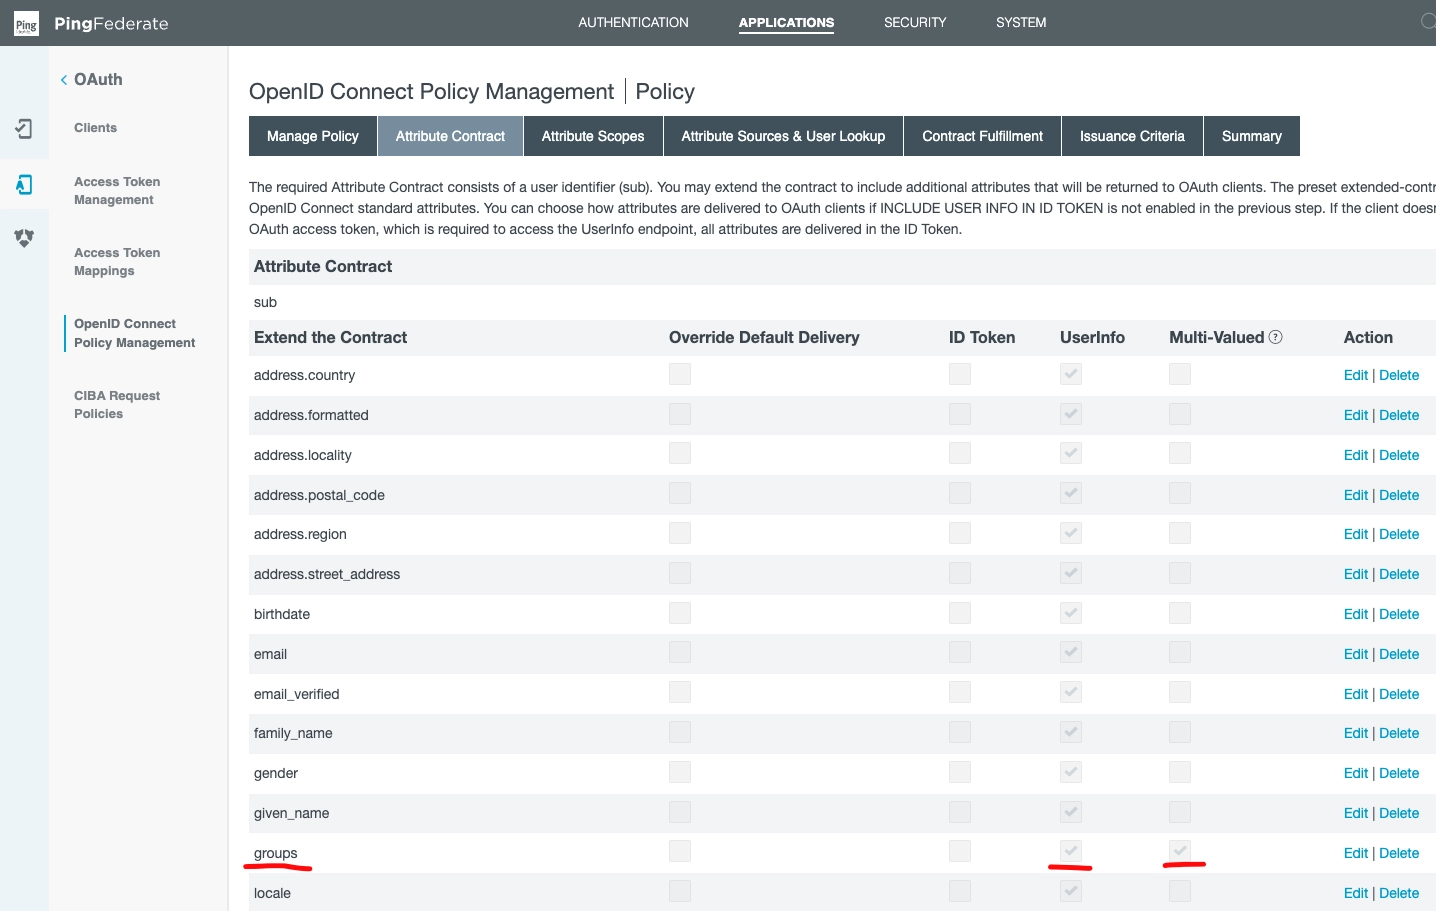
Add groups to OIDC policy management
QuestDB now needs to know about the user's AD group memberships to find their permissions.
Groups are passed to QuestDB inside the User Info object in a custom claim.
This has to be added in the OpenID Connect Policy Management.
The field is Multi-Valued, because it is a list of group names.
Under the Attribute Contract subsection, see:
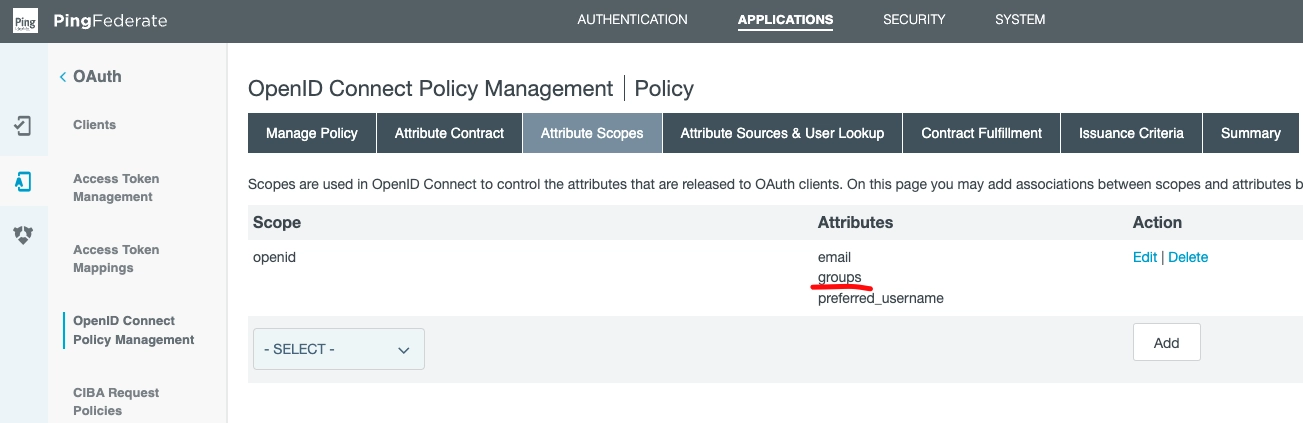
Next, click to the Attribute Scopes subsection.
Ensure groups is among the openid attributes:
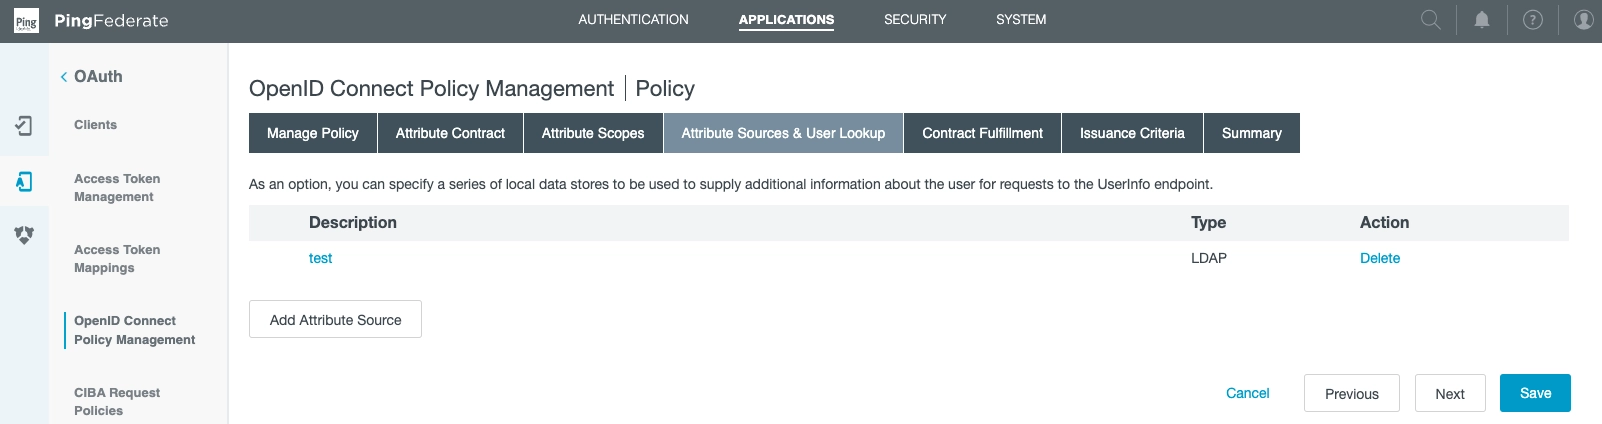
Onwards to the Attribute Sources & User Lookup Section.
From this view, you can add local data stores.
Note item test of type of LDAP:
We created it via the following choices in Add Attribute Source:
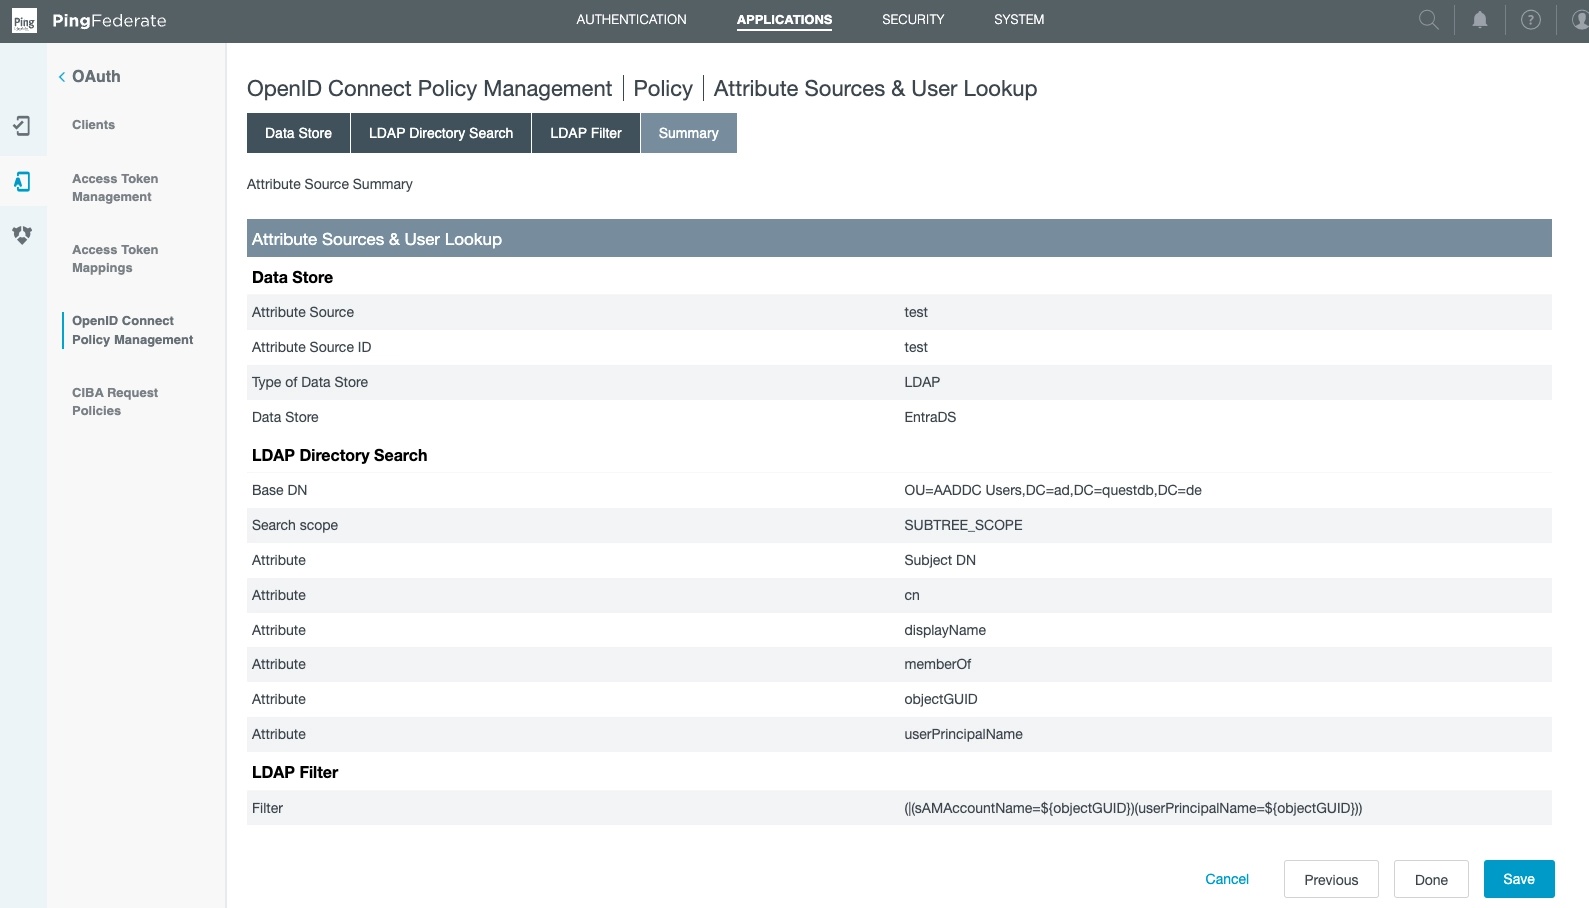
Note where we specified the Data Store (EntraDS).
This is also where the directory search parameters are defined.
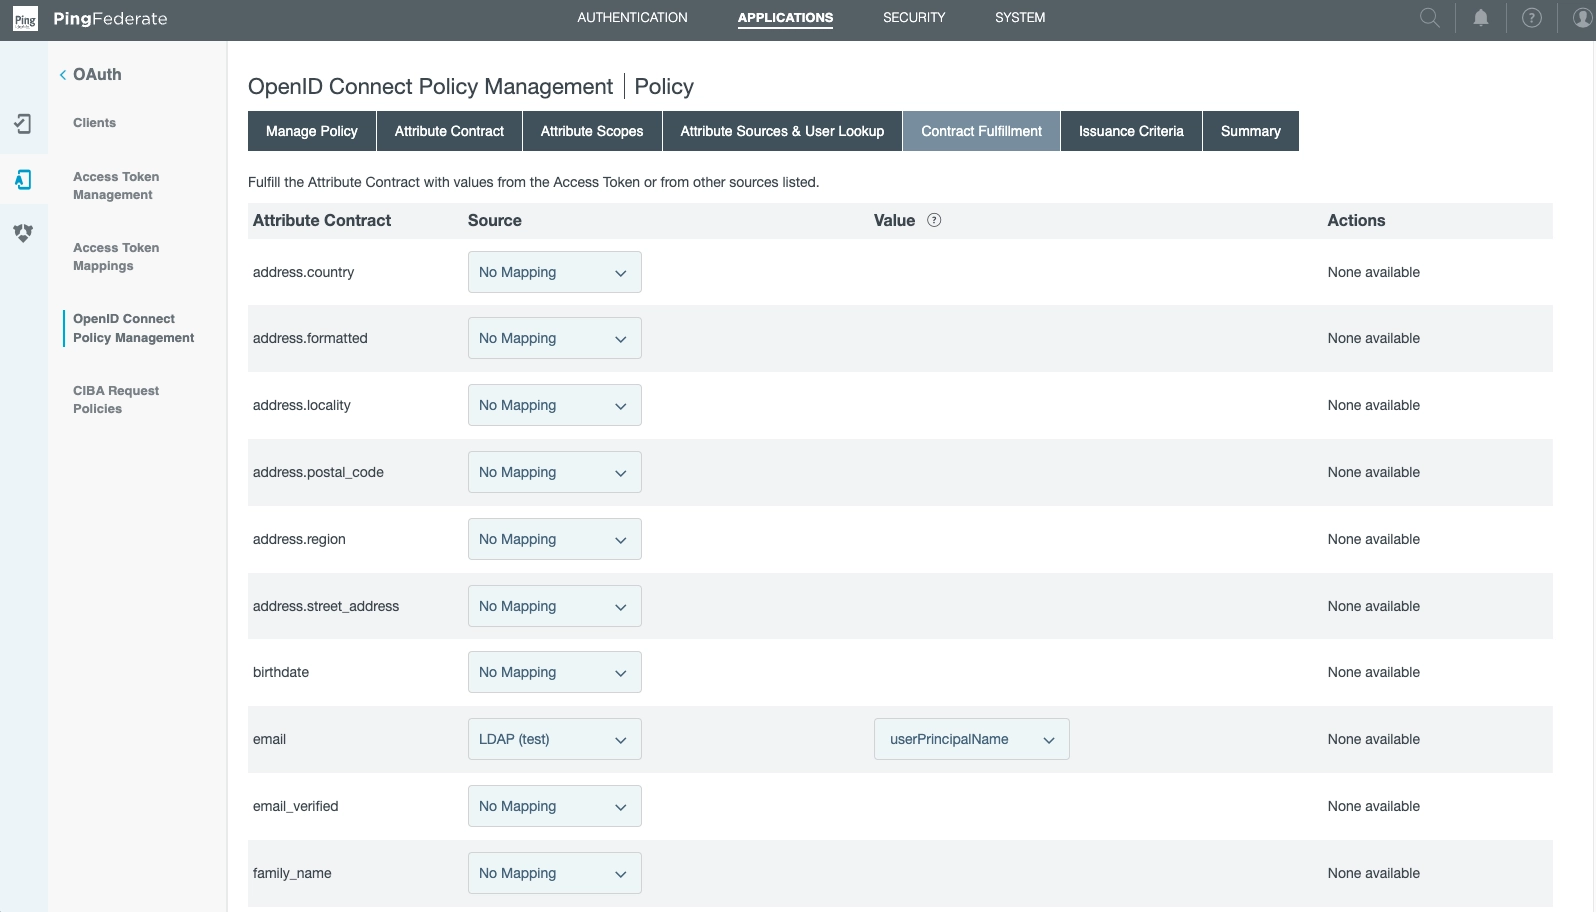
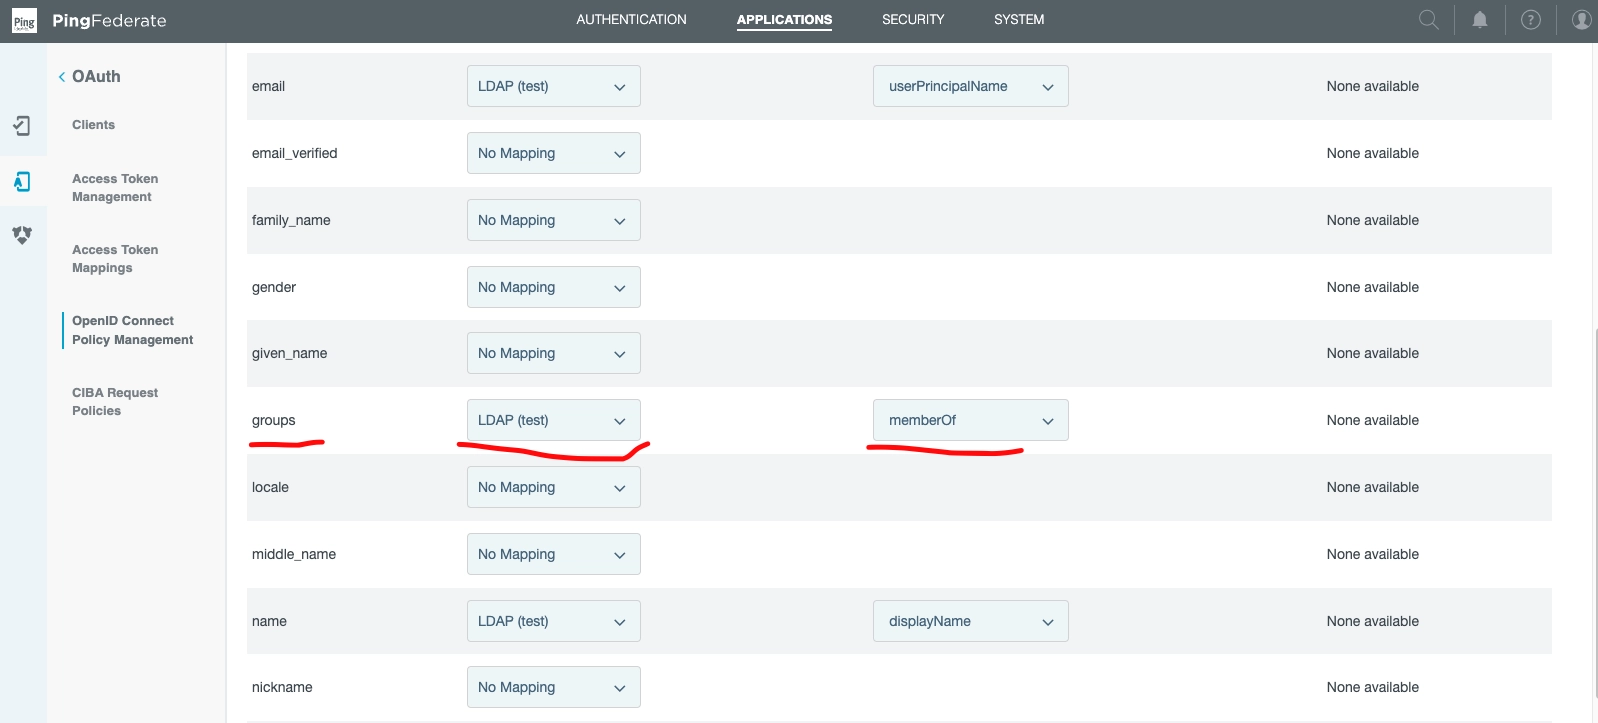
Back at the Attribute Sources & User Lookup Section section, note we have set
email.
The source is LDAP (test), while the value is usePrincipalName:
And finally!
In the same Attribute Sources & User Lookup Section...
Find groups.
Note the definition of Source (LDAP (test)) that bridges our various parts.
The value is memberOf.
Confirm QuestDB Mappings, login
QuestDB requires a mapping, as laid out in the OIDC operations document.
If a given user has the HTTP permission, they will be able to now login via the Web Console.
Head to http://localhost:9000 and login, to test.
If all has been wired up well, then login will succeed.