Microsoft Azure
This guide demonstrates how to spin up a Microsoft Azure Virtual Machine that is running QuestDB on Ubuntu. This will help get you comfortable with Azure VM basics.
Prerequisites
- A Microsoft Azure account with billing enabled. Adding a credit card is required to create an account, but this demo will only use resources in the free tier.
Create an Azure VM
-
In the Azure console, navigate to the Virtual Machines page. Once you are on this page, click the Create dropdown in the top left-hand corner of the screen and select the Azure virtual machine option.
-
From here, fill out the required options. If you don't already have a Resource group, you can create one on this page. We made a "default" group for this example, but you are free to choose any name you like. Enter the name of your new virtual machine, as well as its desired Region and Availability Zone. Your dialog should look something like this:
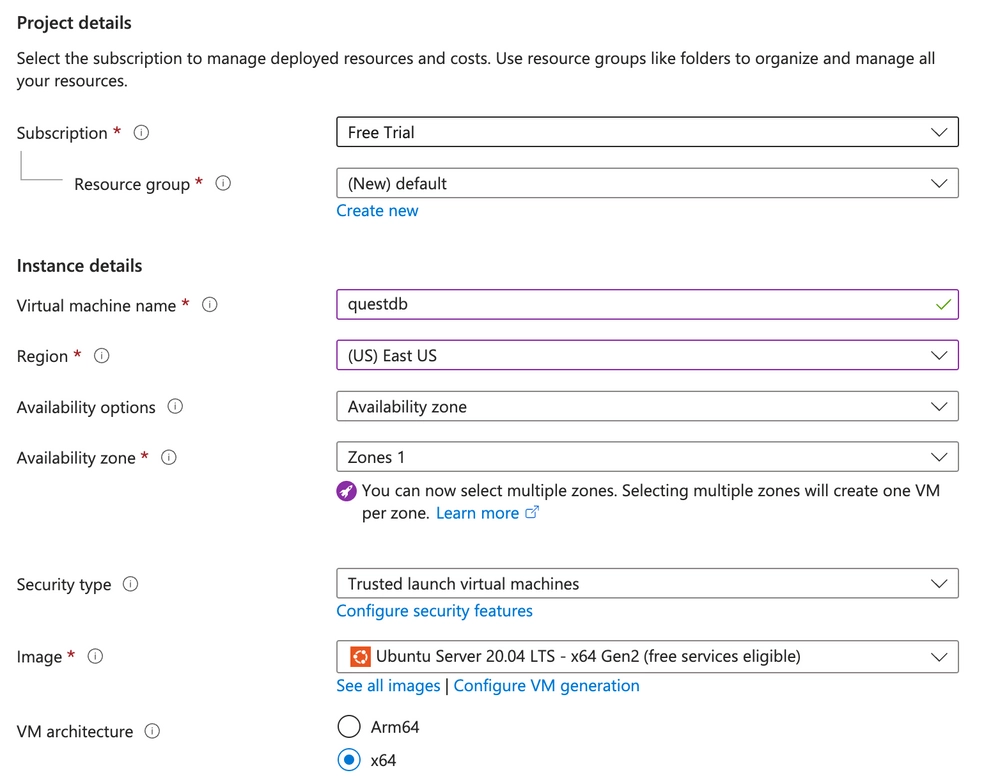
- Scroll down and select your desired instance type. In this case, we used a
Standard_B1sto take advantage of Azure's free tier. - If you don't already have one, create a new SSH key pair to securely connect to the instance once it has been created.
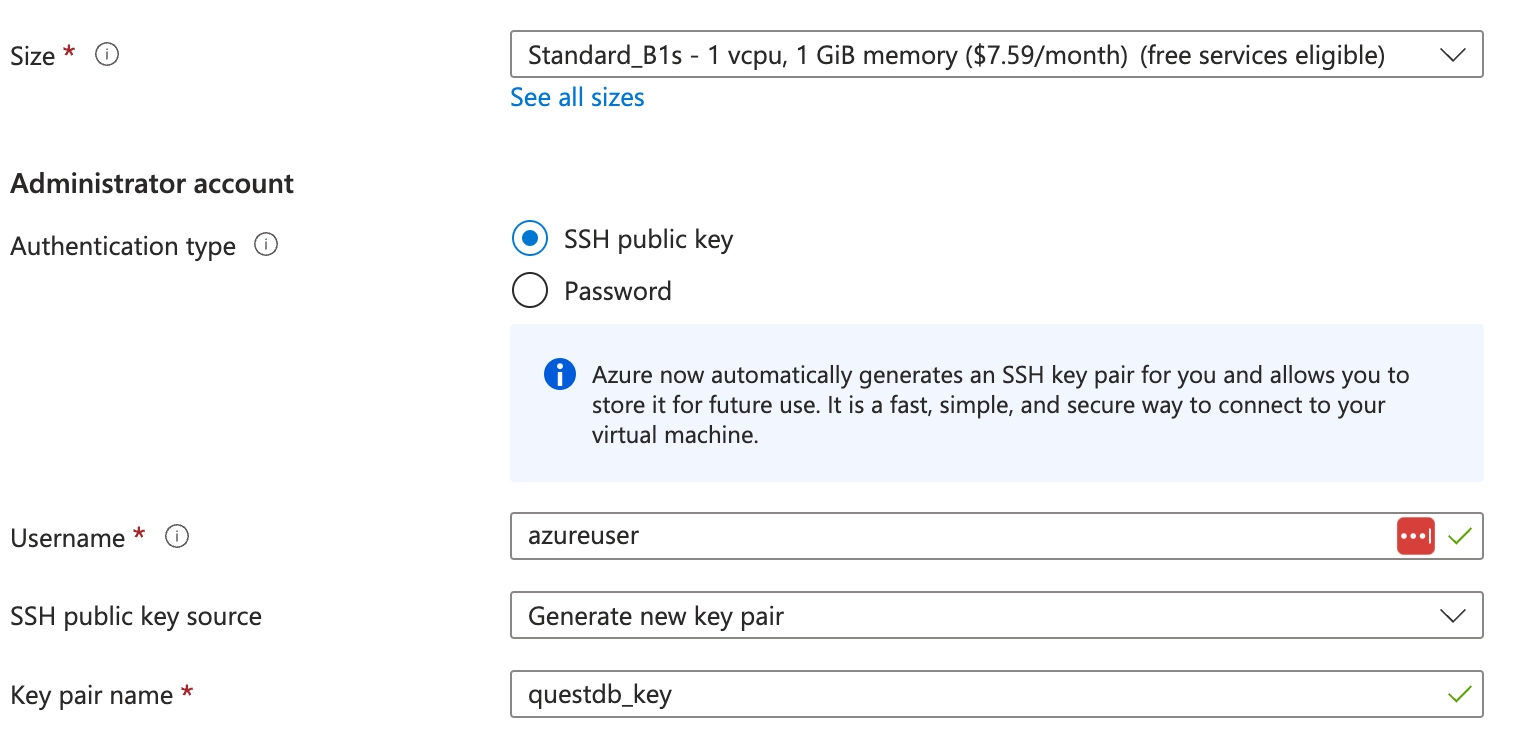
- We will use Azure defaults for the rest of the VM's settings. Click Review + create to confirm your settings, then Create to download your new key pair and launch the instance.
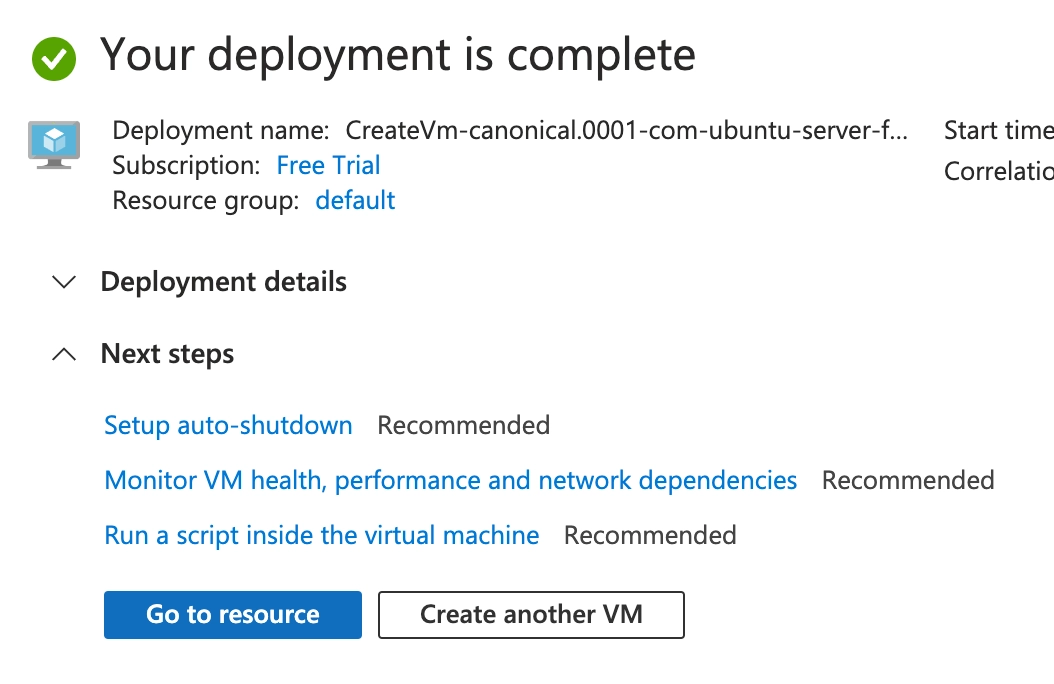
Once you see this screen, click the Go to resource button and move on to the next section
Set up networking
We now need to set up the appropriate firewall rules which will allow you to connect to your new QuestDB instance over the several protocols that we support.
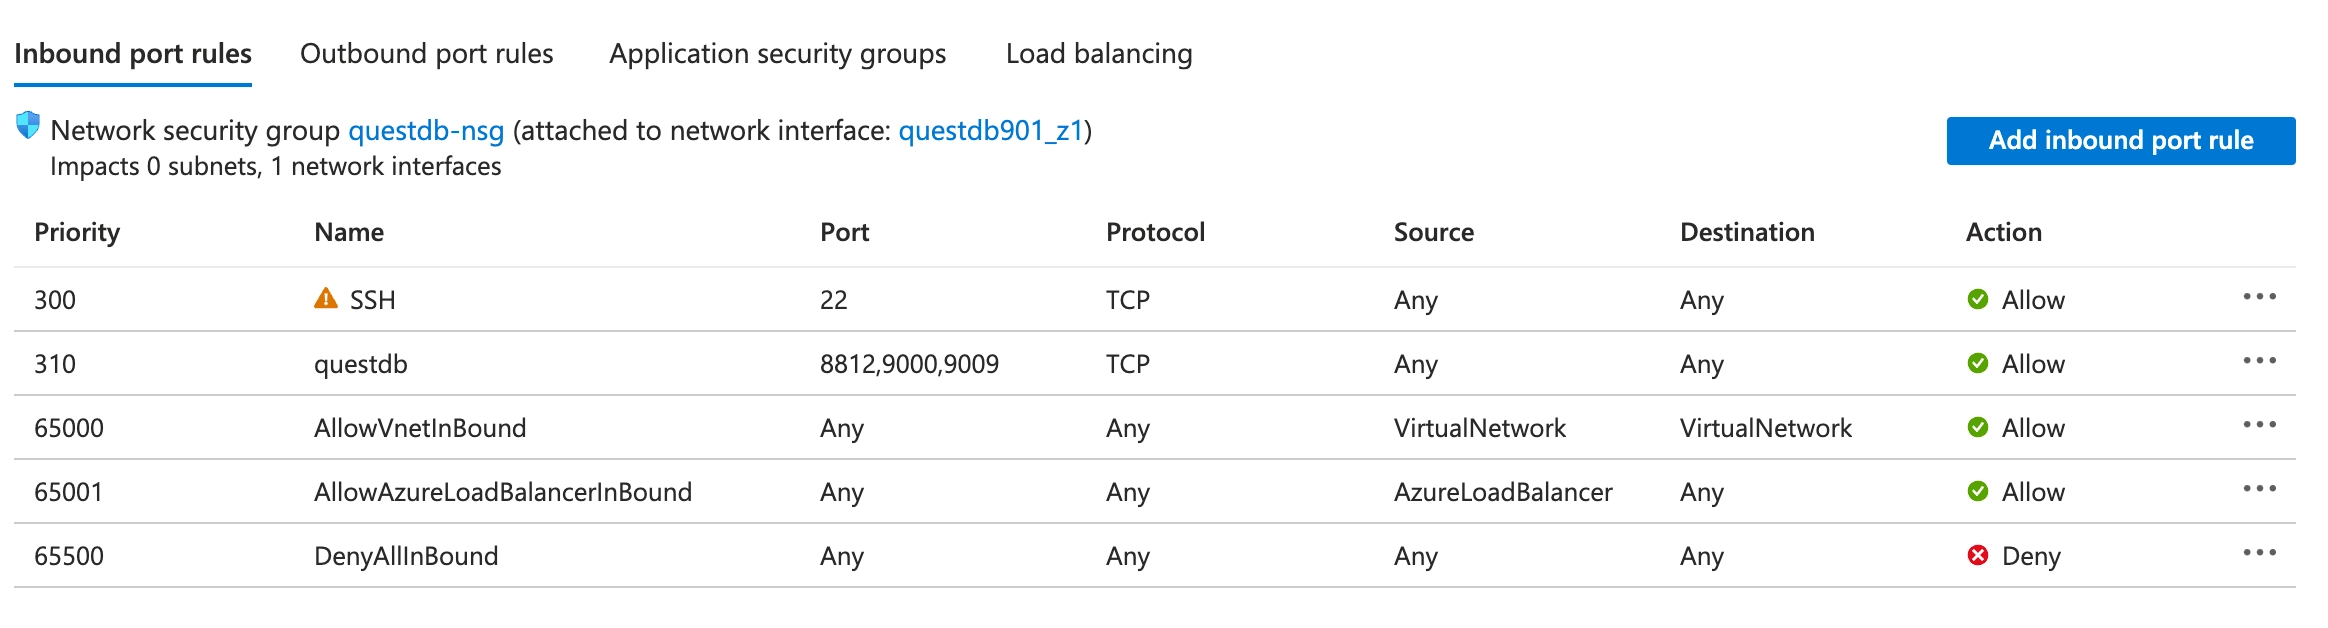
- In the Settings sidebar, click the Networking button. This will lead you to a page with all firewall rules for your instance. To open up the required ports, click the Add inbound port rule on the right-hand side.
- Change the Destination port ranges to the
8812,9000,9009, set the Protocol toTCP, change the name toquestdb, and click the Add button. This will add the appropriate ingress rules to your instance's firewall. It may take a few seconds, and possibly a page refresh, but you should see your new firewall rule in the list.
Connect to your instance and install QuestDB
Now that you've opened up the required ports, it's time to install and run
QuestDB. To do this, you first need to connect to your instance over SSH. Since
we named our SSH key questdb_key, this is the filename that the commands below
use. You should substitute this with your own key name that you downloaded in
the previous step. You also need to use your VM's external IP address instead of
the placeholder that we have provided.
We first need to adjust the permissions on the downloaded file, and then use it to ssh into your instance.
export YOUR_INSTANCE_IP=172.xxx.xxx.xxx
chmod 400 ~/download/questdb_key.pem
ssh -i ~/download/questdb_key.pem azureuser@$YOUR_INSTANCE_IP
Once we've connected to the instance, we will be following the
binary installation method. Here, we use wget
to download the latest QuestDB binary, extract it, and run the start script.
wget https://github.com/questdb/questdb/releases/download/7.3.3/questdb-7.3.3-rt-linux-amd64.tar.gz
tar -xvf questdb-7.3.3-rt-linux-amd64.tar.gz
cd questdb-7.3.3-rt-linux-amd64/bin
./questdb.sh start
Once you've run these commands, you should be able to navigate to your instance
at its IP on port 9000: https://$YOUR_INSTANCE_IP:9000
Azure Managed Disks
Azure offers a number of managed disk types. For QuestDB deployments, we recommend Premium SSD or Premium SSD v2. Which should you choose?
In general, Premium SSD v2 provides better price to performance, and is similar to AWS EBS gp3 volumes. It is easy to scale up and allocate more IOPS without increasing the overall storage size.
However, only LRS resilience is supported for this volume, so judicious use of snapshots and backups are recomended.
To support high-availibility with this volume, QuestDB Enterprise provides replication over Azure Blob Storage.
Premium SSD supports ZRS resiliency. However, it will usually be more expensive to provision, and require upping total storage size in step with IOPS. We would not recommend provisioning a disk with less than 500 MB/s of throughput for general production workloads, which would require overprovisioning storage to 8 TB or higher. Therefore, Premium SSD v2 is a superior choice for most use cases.
For development workloads, Standard SSD may be used, but will not provide representative performance.
Filesystems
Not all filesystems have first-class support in QuestDB. This means we do not routinely run tests against them. This includes blobfuse2, which is not currently supported by QuestDB.
For fresh deployments, we recommend ZFS, since its built-in compression will reduce spending on storage space.
Please refer to the main documentation on supported filesystems for more information.