Web Console
Web Console
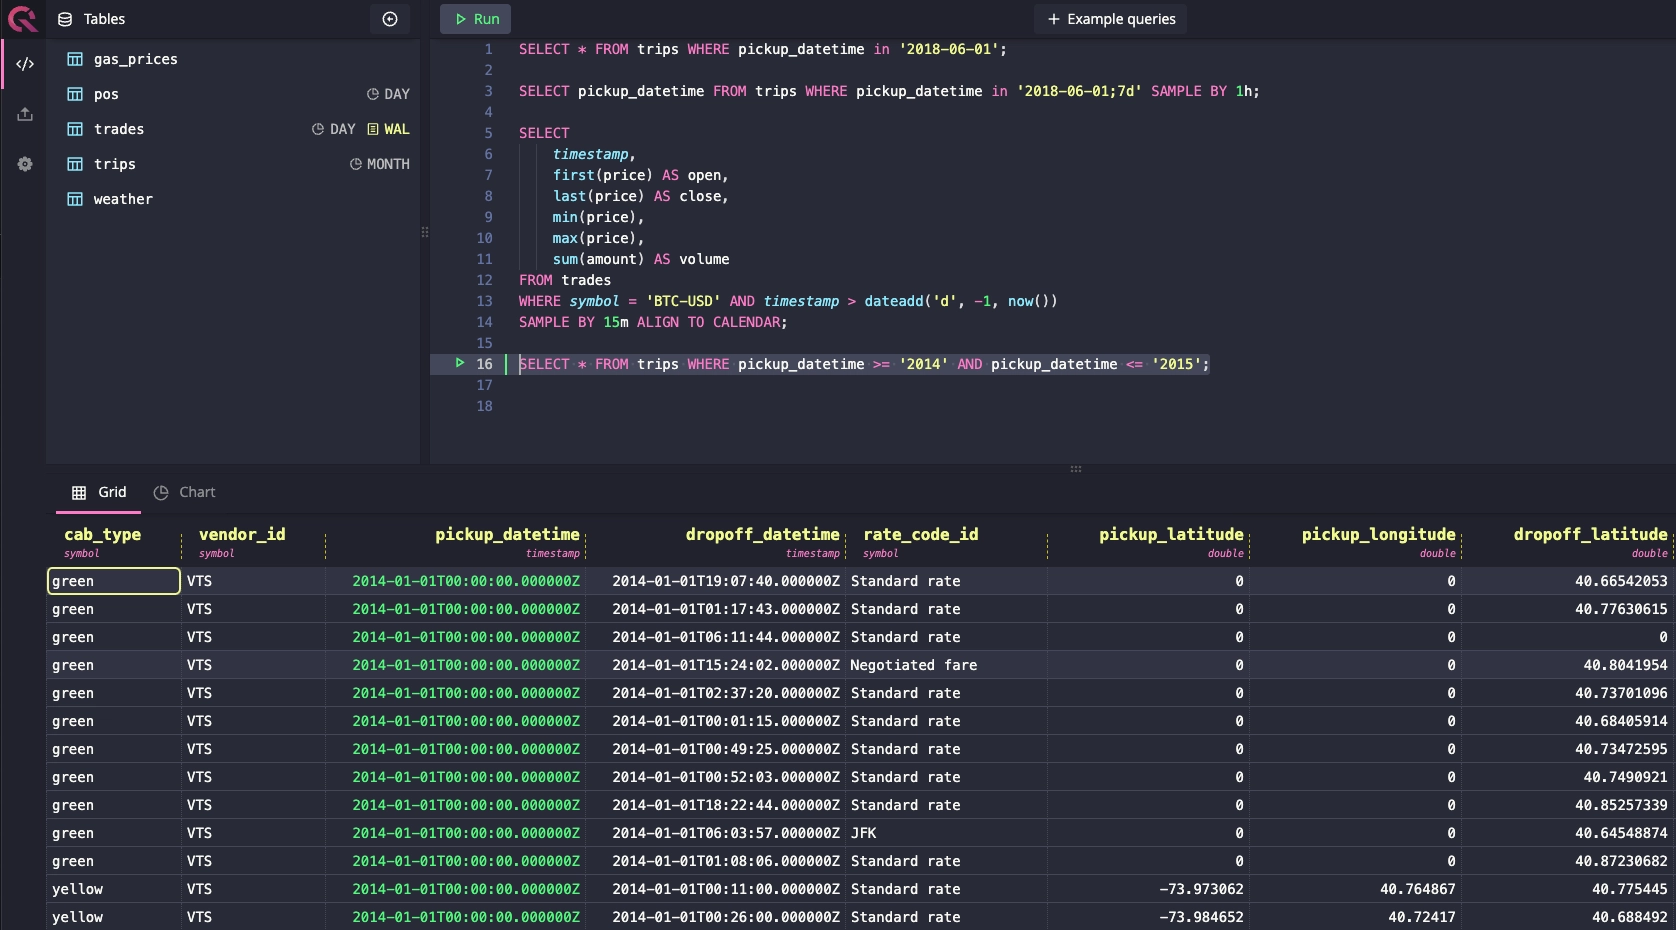
The Web Console is a client that allows you to interact with QuestDB. It provides UI tools to query data and visualize the results in a table or plot.
Accessing the Web Console
The Web Console will be available at http://[server-address]:9000. When
running locally, this will be http://localhost:9000.
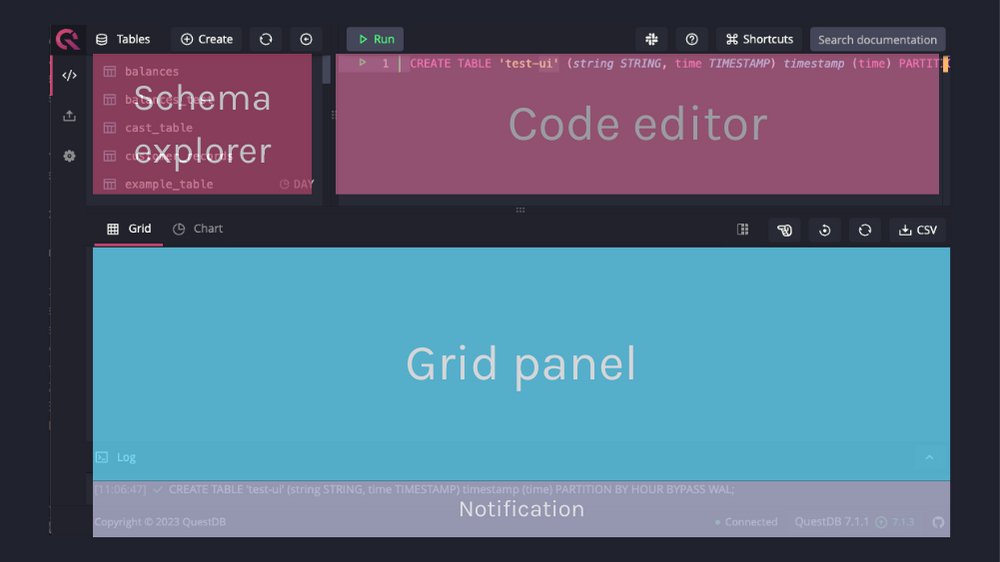
Layout
System tables in Schema explorer
It is possible to hide QuestDB system tables (telemetry and
telemetry_config) in Schema explorer by setting up the following configuration
option in a server.conf
file:
telemetry.hide.tables=true
Code editor
The default panel shown in the web console is the code editor which allows you to write and run SQL queries.
Shortcuts
| Command | Action |
|---|---|
| Run query | f9 or ctrl/cmd + enter |
| Locate cursor | f2, use this to focus the SQL editor on your cursor in order to locate it |
Behavior
As you can write multiple SQL commands separated by a semicolon, the Web Console uses the following logic to decide which queries to execute:
- Check if a query or part of a query is highlighted. If yes, it will be executed, otherwise:
- Check if the cursor is within a SQL statement. If yes, the statement will be executed, otherwise:
- Check if the cursor is on the same line as a SQL statement and after the semicolon. If yes, this statement will be executed, finally:
- If the cursor is on a line that does not contain a SQL statement, the next encountered statement will be executed. If there is no statement after the cursor, the previous statement will be used.
Visualizing results
You can run a query and click on the Chart button. This will display the chart
editor. You can then choose chart type, for example, line and then press
Draw.
Toggle the grid table
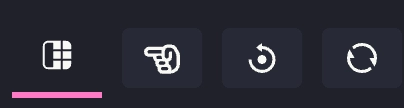
The following options are available to toggle the grid layout:
-
Freeze left column:
To freeze more columns, drag the vertical solid line to the desired column

-
Move the selected column to the front
-
Reset grid layout
-
Refresh
Downloading results
You can download the query result by clicking the CSV button. This file will
be useful to test the import functionality below.
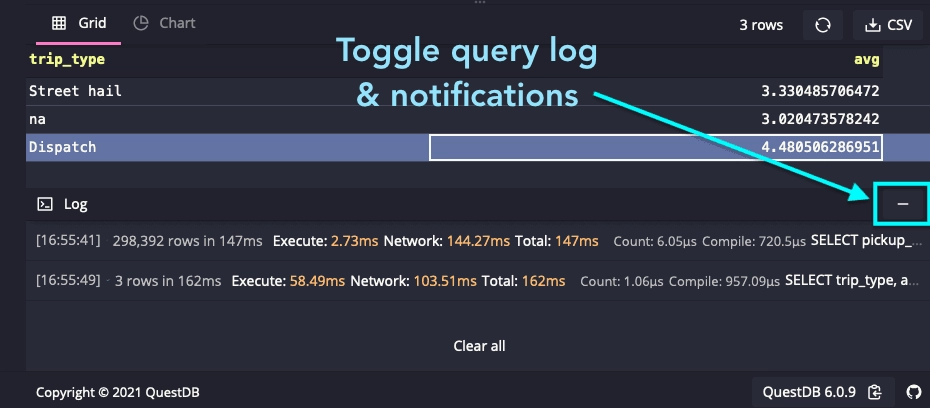
Notification panel
The panel at the bottom of the web console shows the status of the most-recent query. This panel can be toggled by clicking the up-arrow icon on the right of the panel and shows the last 20 messages and notifications after query execution.
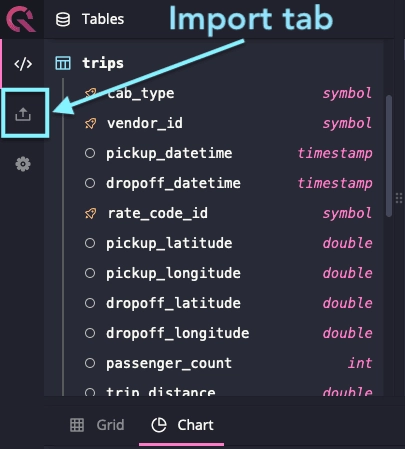
Import
The Web Console offers an interface to import small batches of CSV files as new tables or to existing tables.
The import tab can be accessed by clicking this icon on the left-side navigation menu:
The import UI:
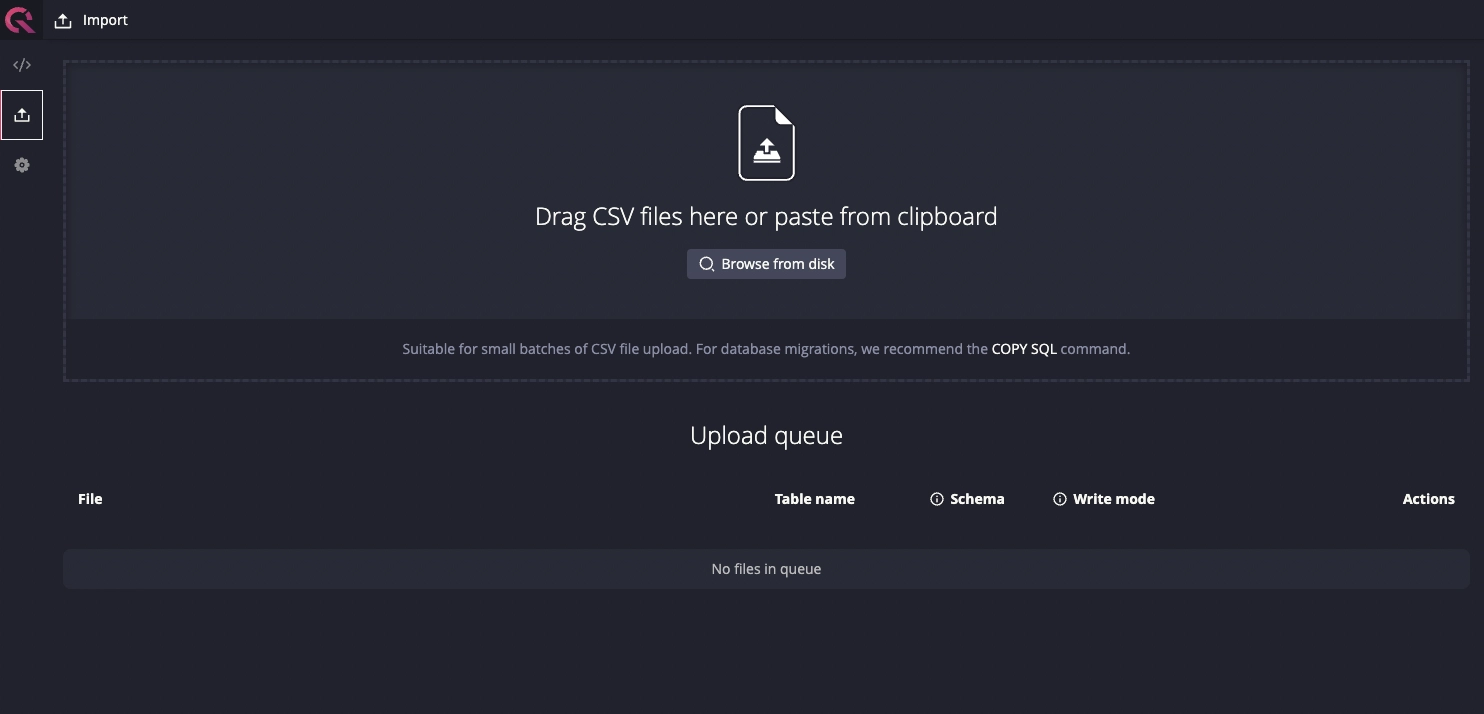
Import configurations
Once a file is added to the Upload queue, the following configurations will be displayed:

File: The file name, size, and the import statusTable name: The name for the table to be imported. By default, this is the name of the imported file.Schema: The Colum data name and data type. The schema is automatically detected but it is possible to set it manually. See Table schema for more information.Write mode:Append: Uploaded data will be appended to the end of the table.Overwrite: Uploaded data will override existing data in the table
Actions:Settings: Additional configuration for the import. See Import settings for more information.Upload: Start the uploadX: Delete the file from the Upload queue
Table schema
To update the schema of an existing table, select Overwrite write mode to
replace the rows and the partition unit with the CSV file.
For an existing table, changing the table name allows importing it as a new separate table.
The following setting is available for configuration for both existing and new table import:
| Setting | Description |
|---|---|
| Partition | Change the partition setting of the table. |
| Designated timestamp | Electing a Designated timestamp. This is mandatory if the partition unit is not NONE. |
| Data type | Define the data type. For timestamp, the timestamp format is mandatory and there is the option to elect the column as the designated timestamp. |
To update the schema of a new table, in addition to the above, the following settings are also available for configuration:
| Setting | Description |
|---|---|
| Delete column | Click x to delete the column from the table. |
| Add column | At the end of the column list, select “Add column” to insert a new column into the table. |
The following table schema details are imported based on the csv file:
- The column order
- The column name
Import settings
The Settings panel displays the following configurations:
| Setting | Description | Default value |
|---|---|---|
| Maximum number of uncommitted row | The size of the commit batch. A commit will be issued when this number is reached in the buffer. This setting is the same as cairo.max.uncommitted.rows. To avoid running out of memory during an import, set this value based on the RAM size of the machine. | 500000 |
| Delimiter | The delimiter character to parse the CSV file. | Automatic |
| Atomicity | Error behavior. Rejected rows or columns will be reported in the Details panel after the import is completed. | Skip column |
| Force header | Whether to interpret the first line as the header. The result will be reported in the Details panel after the import is completed. | FALSE |
| Skip line extra values | Whether the parser should ignore extra values by ignoring the entire line. An extra value is something in addition to what is defined by the header. | FALSE |
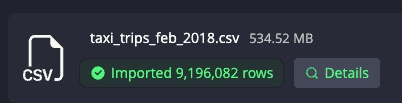
Import details
The import status is displayed in the file column. Once the action is completed,
the number of rows inserted is displayed alongside the Details tab:
The Details panel lists rejected rows and errors in importing each column:

The details such as header forced, table name, and rejected rows are related to the defined import settings. For example, setting Atomicity in Settings to Skip row will result in skipped rows being reported in Rejected rows after the import.
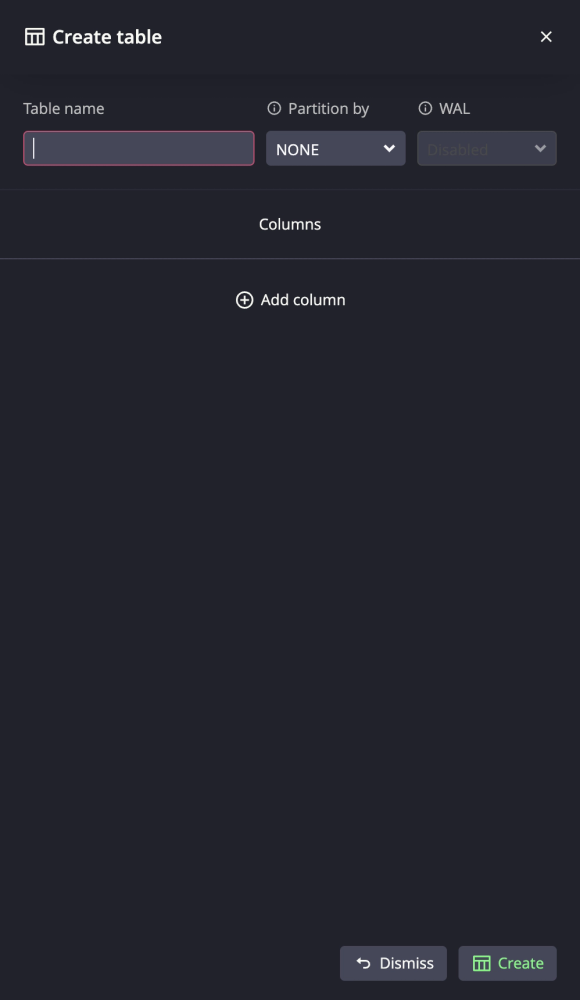
Create table
The "Create" tab on the top of the page allows table creation using interactive UI:
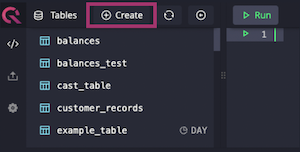
Use the create table panel to define table partition, WAL setting, and add column to a new table:
Providing an asset path
It's possible to provide an asset path if QuestDB is being run from somewhere
that is not the server root. In this case, create a .env file in the UI
directory of QuestDB and provide the path to web console assets as follows:
ASSET_PATH=/path/to/questdb/ui
An
example dotenv
file is provided which can be renamed to .env and placed in QuestDB's UI
directory.