Redpanda
Redpanda is an open-source, Kafka-compatible streaming platform that uses C++ and Raft to replace Java and Zookeeper. Since it is Kafka compatible, it can be used with the QuestDB Kafka connector, providing an alternative data streaming option.
Prerequisites
- Docker
- A local JDK installation
- A running QuestDB instance
Configure and start Redpanda
The Redpanda
Quick start guide
provides a docker-compose.yaml file that can be used. Copy and paste the
content into into a file named docker-compose.yml on your local filesystem:
---
version: "3.7"
name: redpanda-quickstart
networks:
  redpanda_network:
    driver: bridge
volumes:
  redpanda-0: null
services:
  redpanda-0:
    command:
      - redpanda
      - start
      - --kafka-addr
      - internal://0.0.0.0:9092,external://0.0.0.0:19092
      # use the internal addresses to connect to the Redpanda brokers'
      # from inside the same Docker network.
      #
      # use the external addresses to connect to the Redpanda brokers'
      # from outside the Docker network.
      #
      # address the broker advertises to clients that connect to the Kafka API.
      - --advertise-kafka-addr
      - internal://redpanda-0:9092,external://localhost:19092
      - --pandaproxy-addr
      - internal://0.0.0.0:8082,external://0.0.0.0:18082
      # address the broker advertises to clients that connect to PandaProxy.
      - --advertise-pandaproxy-addr
      - internal://redpanda-0:8082,external://localhost:18082
      - --schema-registry-addr
      - internal://0.0.0.0:8081,external://0.0.0.0:18081
      # Redpanda brokers use the RPC API to communicate with eachother internally.
      - --rpc-addr
      - redpanda-0:33145
      - --advertise-rpc-addr
      - redpanda-0:33145
      # tells Seastar (the framework Redpanda uses under the hood) to use 1 core on the system.
      - --smp 1
      # the amount of memory to make available to Redpanda.
      - --memory 1G
      # the amount of memory that's left for the Seastar subsystem.
      # For development purposes this is set to 0.
      - --reserve-memory 0M
      # Redpanda won't assume it has all of the provisioned CPU
      # (to accommodate Docker resource limitations).
      - --overprovisioned
      # enable logs for debugging.
      - --default-log-level=debug
    image: docker.redpanda.com/vectorized/redpanda:v22.3.11
    container_name: redpanda-0
    volumes:
      - redpanda-0:/var/lib/redpanda/data
    networks:
      - redpanda_network
    ports:
      - 18081:18081
      - 18082:18082
      - 19092:19092
      - 19644:9644
  console:
    container_name: redpanda-console
    image: docker.redpanda.com/vectorized/console:v2.1.1
    networks:
      - redpanda_network
    entrypoint: /bin/sh
    command: -c 'echo "$$CONSOLE_CONFIG_FILE" > /tmp/config.yml; /app/console'
    environment:
      CONFIG_FILEPATH: /tmp/config.yml
      CONSOLE_CONFIG_FILE: |
        kafka:
          brokers: ["redpanda-0:9092"]
          schemaRegistry:
            enabled: true
            urls: ["http://redpanda-0:8081"]
        redpanda:
          adminApi:
            enabled: true
            urls: ["http://redpanda-0:9644"]
    ports:
      - 8080:8080
    depends_on:
      - redpanda-0
Once the file is saved, run the following command to start a single Redpanda broker inside Docker and expose Redpanda to your host machine:
docker compose up
It also start the Redpanda web UI.
Download Apache Kafka
Download Apache Kafka and unzip the file.
This step is required as Redpanda does not have its own Kafka Connect equivalent.
Download the QuestDB Kafka connector
Download
the QuestDB Kafka connector,
under the zip archive named kafka-questdb-connector-<version>-bin.zip.
You can automate downloading the latest connector package by running this command:
curl -s https://api.github.com/repos/questdb/kafka-questdb-connector/releases/latest |
jq -r '.assets[]|select(.content_type == "application/zip")|.browser_download_url'|
wget -qi -
Unzip the connector - it has a directory with 2 JARs: Copy these JARs into /path/to/kafka/lib:
unzip kafka-questdb-connector-*-bin.zip
cd kafka-questdb-connector
cp ./*.jar /path/to/kafka/libs
There should be already a lot of other JAR files. That's how you can tell you are in the right directory.
Configure properties
Go to /path/to/kafka/config - there should be already quite a few *.property
files. Create a new file: questdb-connector.properties with the following
lines:
name=questdb-sink
connector.class=io.questdb.kafka.QuestDBSinkConnector
client.conf.string=http::addr=localhost:9000;
timestamp.kafka.native=true
topics=example-topic
table=example_table
include.key=false
value.converter=org.apache.kafka.connect.json.JsonConverter
value.converter.schemas.enable=false
key.converter=org.apache.kafka.connect.storage.StringConverter
In addition, pointing the open connect-standalone.properties and replace:
bootstrap.servers=localhost:9092
with the Redpanda broker URL:
bootstrap.servers=127.0.0.1:19092
Start Kafka Connect
Navigate to the Kafka Connect folder and then run:
./bin/connect-standalone.sh config/connect-standalone.properties config/questdb-connector.properties
Now the Kafka Connect is initiated.
Send a message
Open the Redpanda UI topic page. It should
display example-topic:
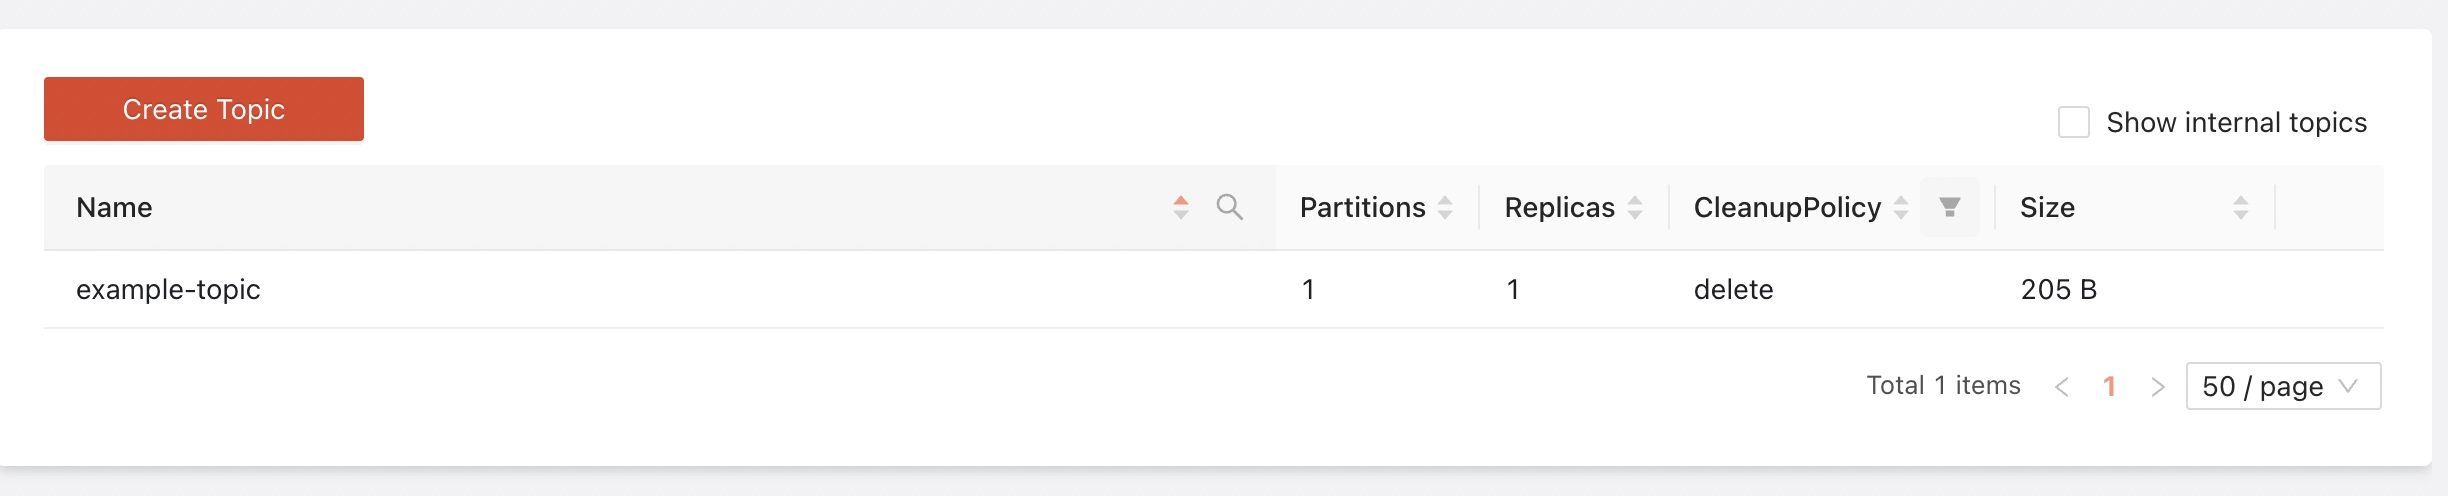
If the topic is not there then refresh a few times.
Select example-topic to expand more details and click Actions -->
Publish Message:

Paste the following message into the message box:
{ "firstname": "Arthur", "lastname": "Dent", "age": 42 }
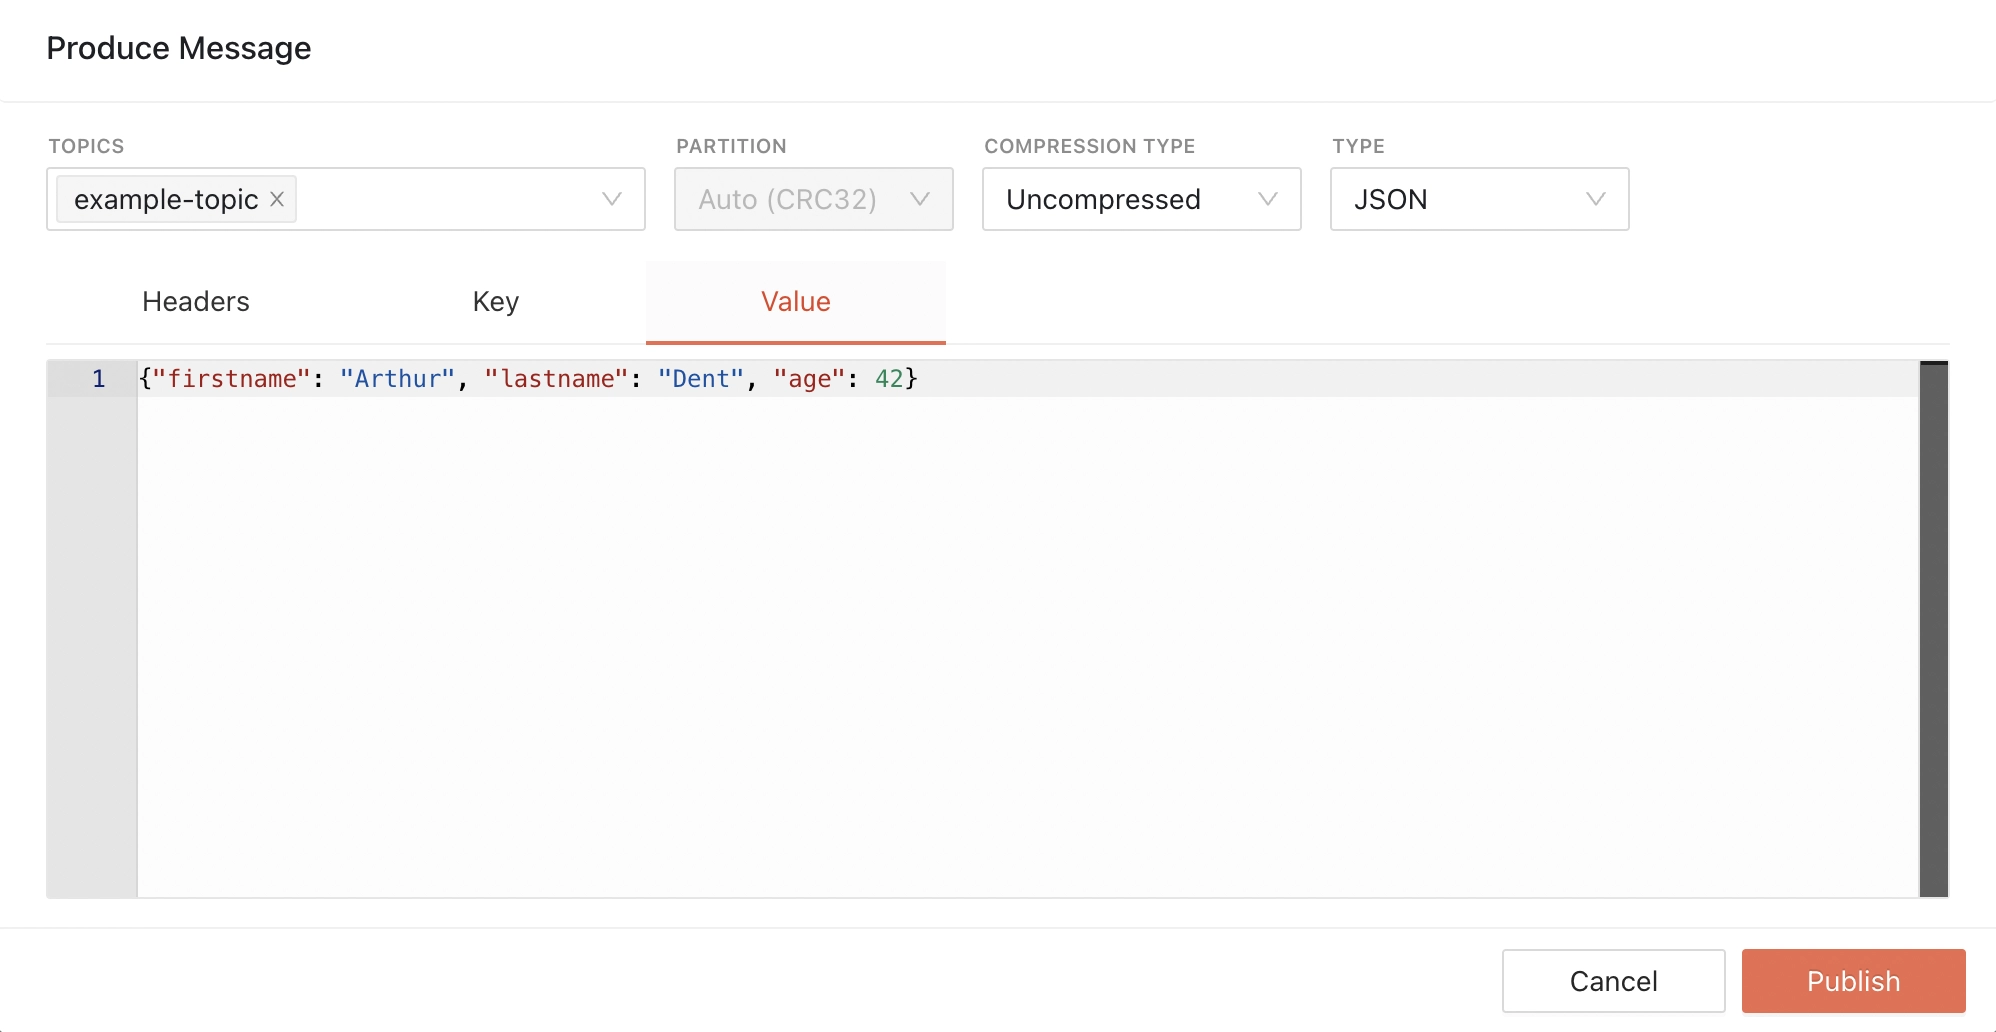
Then, click 'Publish'.
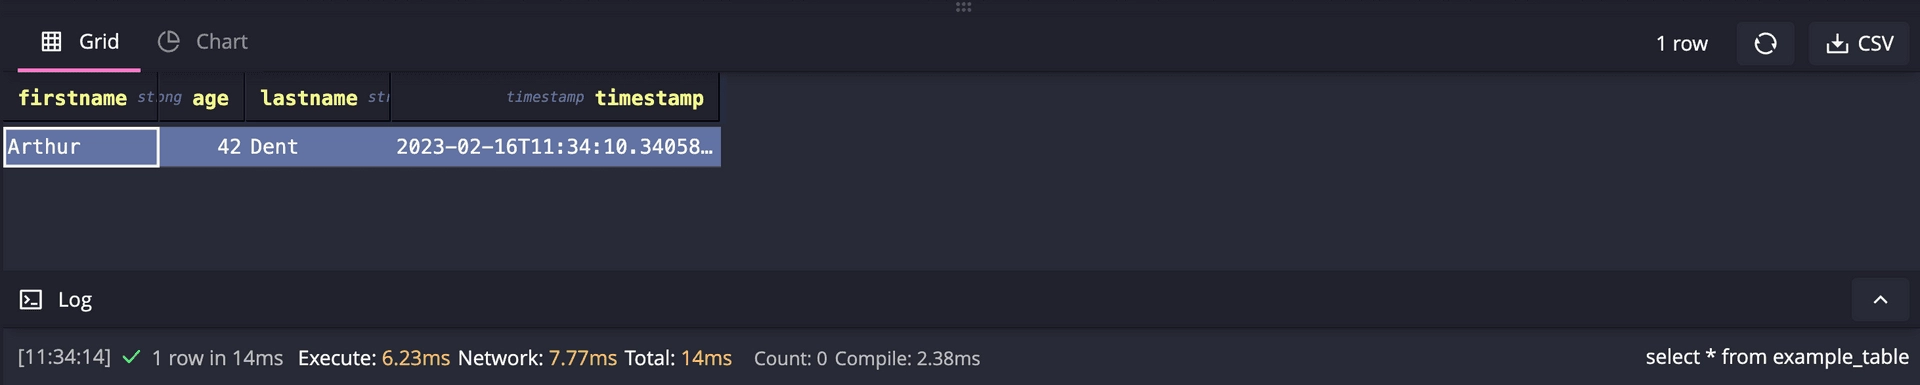
See result from QuestDB
Go to QuestDB web console at http://localhost:9000. Run
a SELECT query:
SELECT * FROM example_table;
The message is delivered to QuestDB:
Summary and next steps
The guide demonstrates how to use Redpanda with the QuestDB Kafka connector. The connector implicitly creates a table in QuestDB with inferred schema from the Kafka message.
Our connector configuration properties includes a key
timestamp.kafka.native=true which tells the connector to use the timestamp
from the Kafka message metadata.
The connector can be also configured to use a custom timestamp field from the Kafka message. See the QuestDB Kafka Connector reference manual for details.
A possible improvement could be to explicitly create the target table in QuestDB instead of relying on the connector to create it implicitly. This way, you can control the schema, partitioning and data types of the table. It also enables QuestDB's native deduplication feature. Deduplication is required for Exactly-Once processing semantics.