Ingestion overview
QuestDB makes top performance "data-in" easy.
This guide will prepare you to get the most out of (and into!) QuestDB.
Choose from first-party clients, apply message brokers, event streaming platforms, queues, and more.
First-party clients
Recommended!
Our first party clients are the fastest way to insert data, and they excel with high volume, high cardinality data streaming.
To start quickly, select your language:
Our clients utitilize the InfluxDB Line Protocol (ILP) which is an insert-only
protocol that bypasses SQL INSERT statements, thus achieving significantly
higher throughput. It also provides some key benefits:
- Automatic table creation: No need to define your schema upfront.
- Concurrent schema changes: Seamlessly handle multiple data streams with on-the-fly schema modifications
- Optimized batching: Use strong defaults or curate the size of your batches
- Health checks and feedback: Ensure your system's integrity with built-in health monitoring
- Automatic write retries: Reuse connections and retry after interruptions
An example of "data-in" - via the line - appears as:
# temperature sensor example
readings,city=London temperature=23.2 1465839830100400000\n
readings,city=London temperature=23.6 1465839830100700000\n
readings,make=Honeywell temperature=23.2,humidity=0.443 1465839830100800000\n
Once inside of QuestDB, it's yours to manipulate and query via extended SQL.
Message brokers and queues
Recommended!
QuestDB supports several excellent message brokers, event streaming platforms and/or queues.
Checkout our quick start guides for the following:
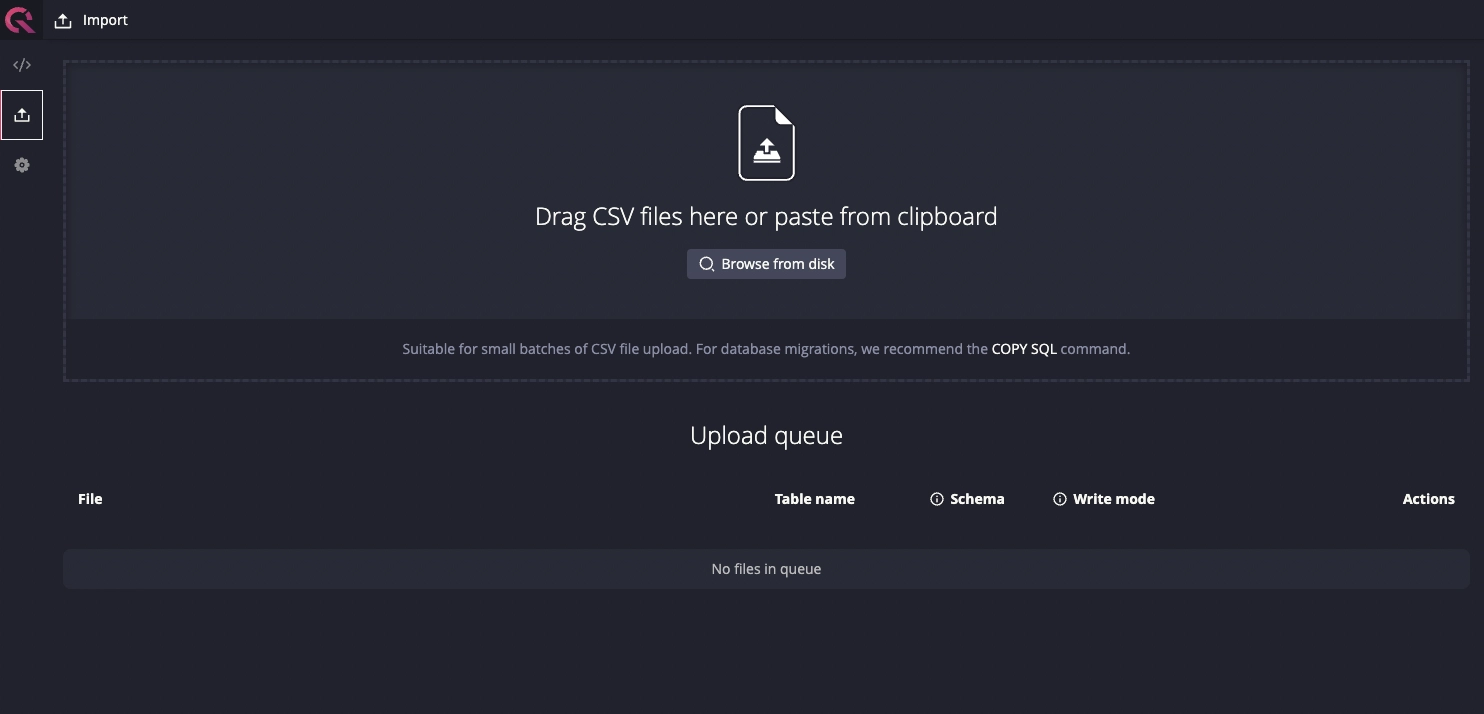
Easy CSV upload
Recommended!
For GUI-driven CSV upload which leverages the built-in REST HTTP API, use the Import tab in the Web Console:
For all CSV import methods, including using the APIs directly, see the CSV Import Guide.
PostgreSQL Wire Protocol
QuestDB also supports the PostgreSQL Wire Protocol (PGWire).
It offers most PostgreSQL keywords and functions, including parameterized
queries and psql on the command line.
While PGWire is supported, we recommend applying the first-party clients or other tools if possible.
This is to take advantage of maximum performance and overcome limitations in the protocol.
Create new data
No data yet? Just starting? No worries. We've got you covered.
There are several quick scaffolding options:
- QuestDB demo instance: Hosted, fully loaded and ready to go. Quickly explore the Web Console and SQL syntax.
- Create my first data set guide: Create
tables, use
rnd_functions and make your own data. - Sample dataset repos: IoT, e-commerce, finance or git logs? Check them out!
- Quick start repos: Code-based quick starts that cover ingestion, querying and data visualization using common programming languages and use cases. Also, a cat in a tracksuit.
- Time series streaming analytics template: A handy template for near real-time analytics using open source technologies.
There are also one-click sample data sets available in QuestDB Cloud.
Next step - queries
Depending on your infrastructure, it should now be apparent which ingestion method is worth pursuing.
Of course, ingestion (data-in) is only half the battle.
Your next best step? Learn how to query and explore data-out from the Query & SQL Overview.
It might also be a solid bet to review timestamp basics.